


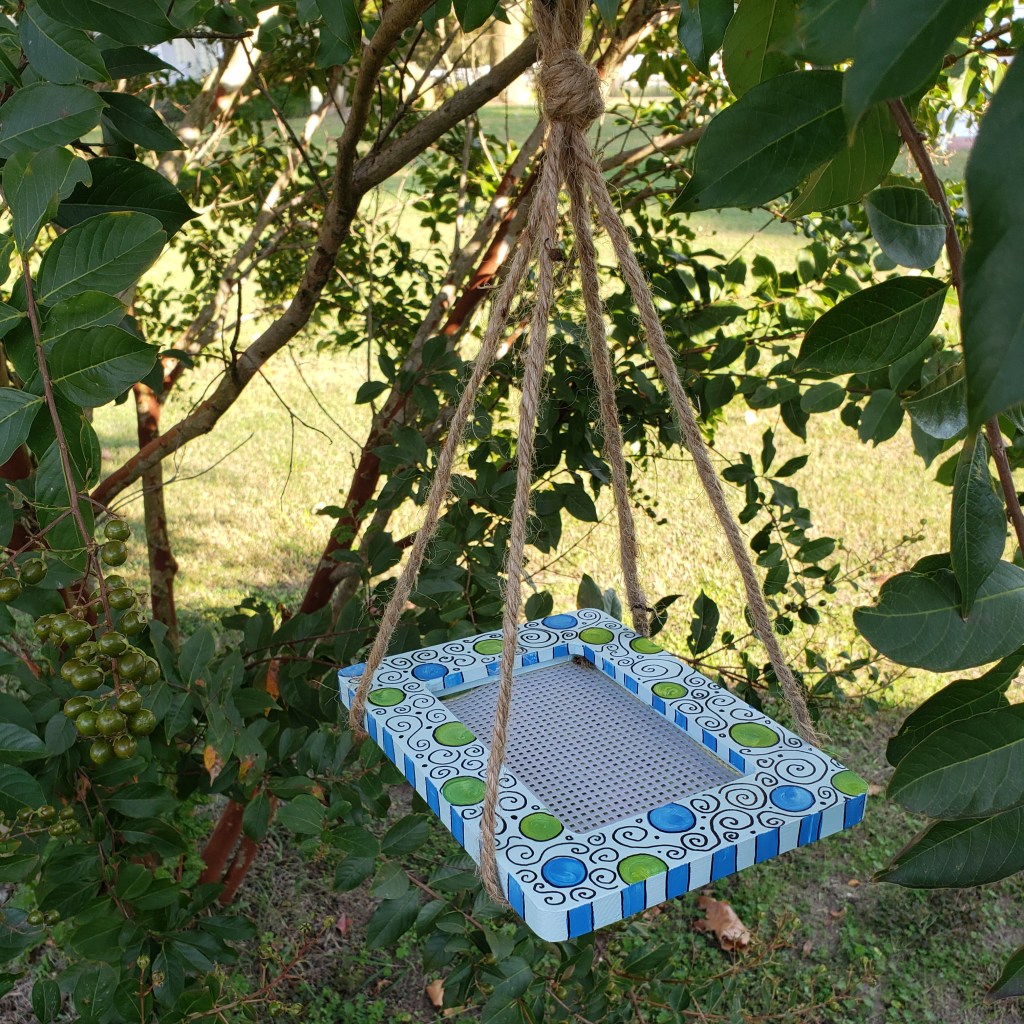
Make a little bird feeder for your yard! Paint, decorate, and design your own to give as a gift or keep for yourself! This cute little platform feeder is a simple and fun project!
What you need:
- Wooden craft picture frame – mine is approx. 8″x6″ with a 4″x6″ opening
- Acrylic craft paints in desired colors
- Paint brushes
- Sharpie
- Krylon clear gloss outdoor spray sealer
- Flat thumb tacks – Use stainless steel ones for longer lasting outdoor results
- Plastic mesh cut to the opening size of your frame (I used needle point plastic but you could also use aluminum gutter shield, or plastic food mesh – if you have some with small enough gaps to hold birdseed!
- Twine, rope, chain, leather, or any similar material suitable to use outdoors – I used approx. 6′ of jute, cut into two, 3′ pieces
- Hammer
PAINTING YOUR FRAME:

Step one: Paint both sides and all edges of your frame one color.

Step two: Let your first layer of paint dry (use a hairdryer to speed up the dry time) and apply a second layer of paint if needed!

Step three: Add some designs and patterns with your other colors – I did dots and stripes! Let your paint dry completely before moving on!

Step four: Apply the outdoor sealer – do this outside on a protected work surface. Apply the sealer to both sides and edges of your frame – letting it dry completely before flipping your frame.

Step five: Once your sealer is completely dry use a sharpie to outline and add details to your painted design. I decided to cover most of my painted area with additional doodles!

ASSEMBLING YOUR FEEDER:


Step one: If using jute, twine, or rope, line up your two 3′ pieces and fold in half, creating a loop as shown in the first photo. Make sure the ends of your rope are even. Gathering all four strands of rope, tie a knot towards the top – leaving a loop, shown in the second picture.


Step two: Attach your rope and mesh to the frame with a thumb tack. Sandwich the ends of your rope between the mesh and the frame. Use a hammer to make sure your tack is firmly pressed into your wooden frame.

Step three: Continue to add all 4 pieces of your rope to the frame in the same manor! Make sure the knot and strands of rope are not twisted or tangled before attaching!

Step four: Add extra thumb tacks to your mesh to keep it securely in place!

Step five: Hang and fill your platform bird feeder!
Where to hang your feeder: Depending on where you place your feeder will determine what types of birds you attract (along with feeder type & seed). Attract the most birds by offering a range of feeders & food placed in various locations! Most feeders do best in a quiet, semi-sheltered area, or near shrubs & trees so birds can rest and hide from predators. Make sure you also have a good viewing point of your feeder from inside! Placing your platform feeder closer to the ground will attract ground-feeding birds such as, Juncos, doves, sparrows, & blackbirds. Placing your feeder up higher will attract birds such as, sparrows, finches, & titmice!
What to put in your feeder: Different foods can attract different birds to your feeder – some types of birds are picky and only eat certain things while others will eat most anything you put out! I like to use black oil sunflower seeds or a seed mix. You can also try foods such as, peanuts (raw kernels only) and other nuts as well as coconuts (fresh, cut open), stale breads, cakes, & cookies (no chocolate). Fruits such as apples, oranges, grapes, & bananas. With foods that you put out, make sure to keep your feeder clean- and pick-up uneaten foods that could attract rodents, insects and other pests as well as create mold & bacteria growth.
Feeder care: Feeders can become messy quick! Platform feeders can hold trampled food and droppings, and should be regularly cleaned out. A little soapy water and rinse should be sufficient. Re-coat your feeder with a clear coat each season to help keep it in shape (clean and dry your frame before re-coating).
Making more feeders: If you had fun with this project, and want to make more, here are some various ideas for supplies!
- The frame in this kit is a small wooden craft frame, you could also re-purpose old picture frames in the same manor! Outdoor spray paint is a quick and easy way to cover old frames!
- I used needle point plastic in this kit for the mesh to hold seed, you could also use aluminum gutter shield, plastic food mesh, or window screen material. Just be sure your mesh material has small enough gaps to hold seed!
- The included hanging material is jute – eventually this will get weathered down, as an alternative, you could use twine, rope, chain, leather, or any similar material suitable to use outdoors.
- The included thumb tacks are stainless steel – this helps with the longevity of them being out in the weather! Depending on the frame being used, nails, screws, & staples could be utilized instead of tacks!
BONUS PROJECT: Make a winter treat for your birds! What you’ll need: Pinecones, String or Wire, Peanutbutter (or Crisco), & Birdseed. Gather your pinecones and tie a string or piece of wire tightly to the top of your pinecone! Next completely cover your pinecone with peanutbutter or crisco – pushing it into all the gaps & spaces on your pinecone. (Note* if your pinecones are not open, let them set inside for a day or so or place them in your oven on 200*F for 20 min or so to speed up the process). Roll your covered pinecone in birdseed and hang up!
Like this project? It was from one of our Creative Science lessons – a partner program between Brad Hartle, 4-H STEM educator with UMES and myself! We work together to create fun & engaging lessons that involve art and science for youth! Check out other projects to do at home and upcoming creative science lessons here!

