

Contact me to join us at Baywater Trading Co. in Hebron to create your own mini donut keychain out of polymer clay, while getting to enjoy a Baywater donut!


Contact me to join us at Baywater Trading Co. in Hebron to create your own mini donut keychain out of polymer clay, while getting to enjoy a Baywater donut!

Check out some of our current projects happening in the art room and how they’re made!


Check out some of what we’ve been up to below!
This month started with a new session, new projects and new endeavors! Students began the year off by working on collaborative painted panels that will be displayed at a local park over the winter! Both private lessons and groups will have the chance to add their own touches to the panels!
Over the summer was packed with lessons and projects held at local libraries, the Art League in OC, Roaring Point Campground, here in the Art Room, & some other places too!


The fun continued through the month! Holding classes at other locations with projects likes paint nights, Zentangles, painted wine glasses, Hanging Mason Jar vases, and kids crafts!


I have also been working on various commission pieces – some I can’t share until after Christmas! Custom wine glass order for Williams Market, and a couple works in progress!


Check out these projects you can do at home & upcoming classes here!

Check out some of our current projects happening in the art room and how they’re made!


Check out some of what we’ve been up to below!
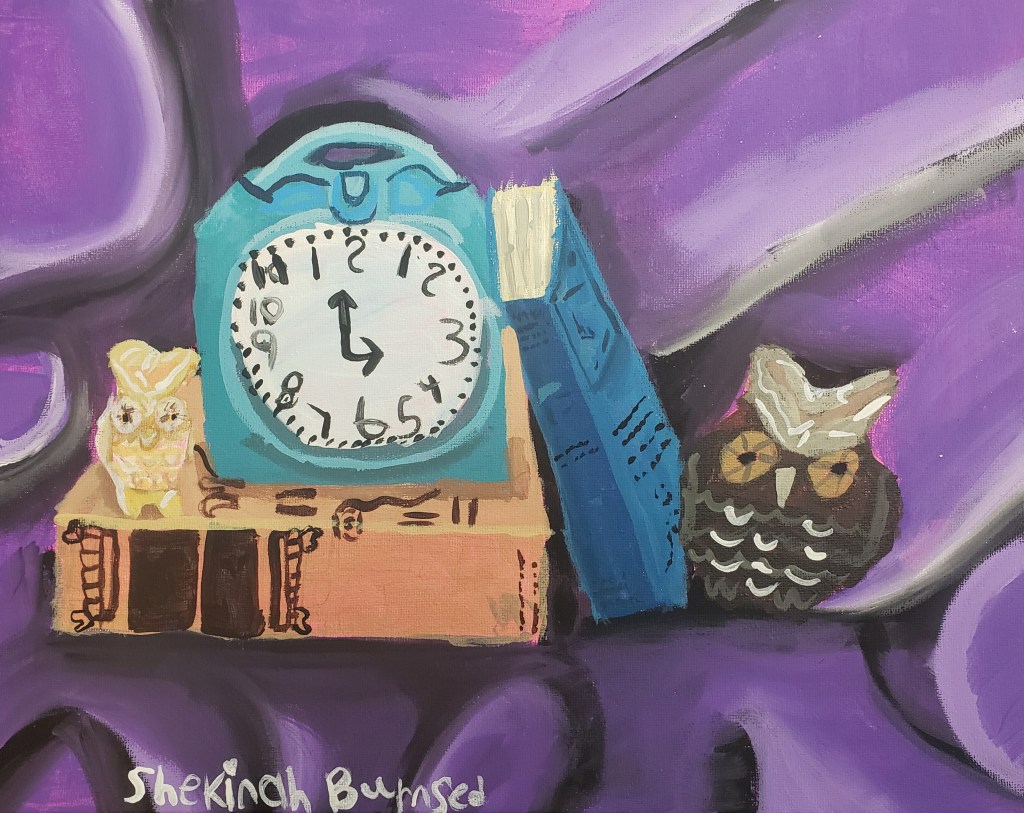
This month students finished up their still life acrylic paintings! They have all been taking a lot of time and doing their best work on these still life paintings! They did an awesome job! We first learned about composition and arranging a still life, completing several thumbnail sketches of inanimate objects arranged in different ways. Students had the chance to arrange objects and form their own set-ups. The decided arrangement was then sketched out onto a canvas. Before painting we talked about the color wheel and making our own colors as well as exploring tints, tones, & shades & undertones! Students completed these paintings with a limited palette – only using primaries and black and white, mixing all of their colors!


We also have a new art room friend -“Winnie”, our new Standard Poodle puppy! Evidently she likes belly rubs!


This month was also full of classes at other locations! Some fun projects at the Seaford Library, the Art League in OC, Roaring Point Campground, Greenwood Library & face painting! Check out more upcoming classes here!


I was also lucky enough to be able to complete these two pet portraits in May! “Waffles”, 8″x10″, in pastel. And “Buddy”, 8″x10″, in watercolor and pen!


Students also completed these fun pieces of art! Mixed media collage butterflies, pencil drawings, & Watercolor with pen!


Check out these projects you can do at home & upcoming classes here!

Check out some of our current projects happening in the art room and how they’re made!

Check out some of what we’ve been up to below!
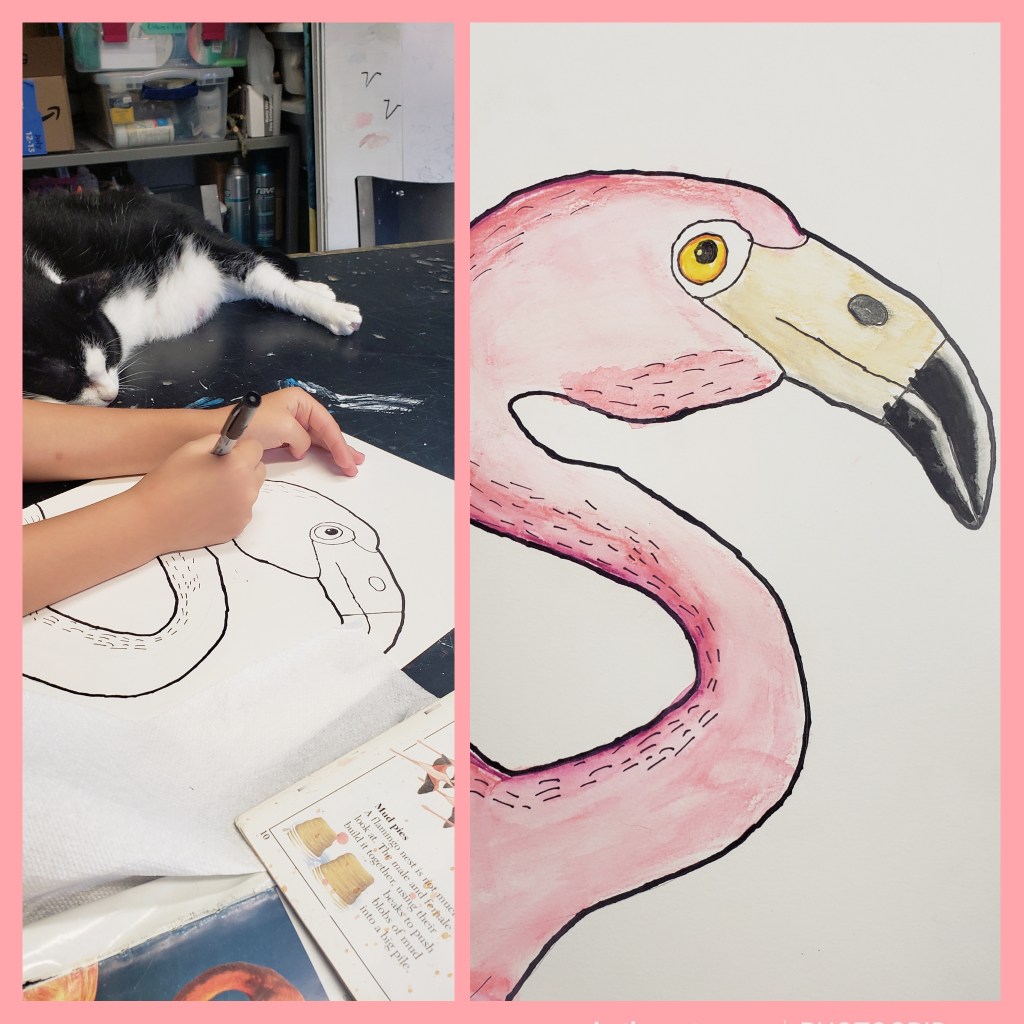
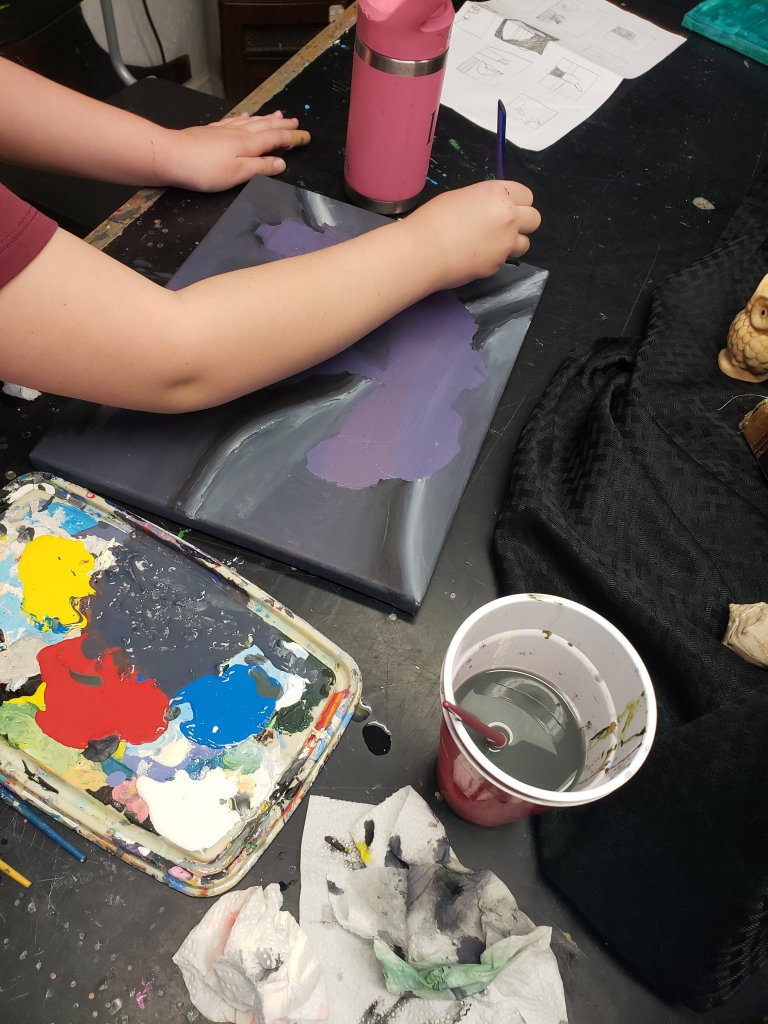
This month students are still working on their still life acrylic paintings! They have all been taking a lot of time and doing their best work on these still life paintings and I’m excited to see how they come out! We first learned about composition and arranging a still life, completing several thumbnail sketches of inanimate objects arranged in different ways. Students had the chance to arrange objects and form their own set-ups. The decided arrangement was then sketched out onto a canvas. Before painting we talked about the color wheel and making our own colors as well as exploring tints, tones, & shades & undertones!


This month was also full of classes! Some fun projects at the Seaford Library, the Art League in OC, Roaring Point Campground, & a special paint party at Westside Community Center!


One of my favorite Easter traditions is forcing loved ones to make Ukranian Easter Eggs (I think they really like it) – the cat was at least happy to join in. It’s a time-consuming method, using wax resist – the results are always cool!
Also preparing for some upcoming art events with painted wine glasses and polymer clay bookmarks! Check out Music & Arts @ Pemberton Park! Fridays in May to purchase!


We also took a little break from painting still life in classes to create an Easter project – Decoupaged Eggs!


Check out these projects you can do at home!


Create fun and colorful eggs this Easter with decoupage! Gather decorative tissue papers, glitter and some ribbon! These easy and fun eggs are a fun way to create a gift or decoration this Easter!
What you need:

Step one: Gather all your supplies!

Step two: Cut out pieces from your tissue paper – cut more than what you’ll think you will need and try to cut off as much of the background as possible. *If the tissue paper background is white, an your egg is white, then you don’t need to worry as much about getting rid of the background!


Step three: Brush the Modpodge on the egg in a thin layer (I did half the egg at a time), then add one of your tissue paper cut outs, brush another layer of Modpodge on top of the tissue paper. Carefully use your brush to flatten out the tissue paper and press down any wrinkles. The larger pieces of tissue paper you have, the more wrinkles you will end up with as it will have to curve around the egg shell!


Step four: Continue to add your tissue paper to your egg & layering Modpodge under and over each piece! Don’t be afraid to overlap pieces. Once your egg is complete, brush a layer of Modpodge on top of the whole thing, making sure all pieces are pressed down and sealed – I did half my egg at a time drying each half before Modpodging the second half! Let your egg dry completely – use the hair dryer to speed up the processs.


Step five: Apply glitter! The picture on the left is glitter glue in the center of the flowers and the photo on the right was brushed with Modpodge and covered with clear glitter! You could also add details with paint pens or Sharpies at this stage too!


Step six: You can leave your egg as it is or create a hanger with a piece of ribbon and a pony bead. Cut your length of ribbon, fold it in half, slide both cut ends of the ribbon in the bead (photo one), add some hot glue to the ribbon just below the bead, and slide the bead onto the hot glue. Let dry and then cut off any glue or ribbon below the bead. Add a drop of hot glue to the top of your egg and press the bead to it! While the hot glue is still wet you can sprinkle on some glitter!


Check out these fun eggs by students!
Looking for another Easter egg idea? Check out resist dyed Easter eggs and Marbled Easter eggs!

Check out some of our current projects happening in the art room and how they’re made!

Check out some of what we’ve been up to below!
This month students started working on a new project – still life acrylic paintings! We first learned about composition and arranging a still life, completing several thumbnail sketches of inanimate objects arranged in different ways. Students had the chance to arrange objects and form their own set-ups. The decided arrangement was then sketched out onto a canvas. Before painting we we talked about the color wheel and making our own colors as well as exploring tints, tones, & shades & undertones! I can’t wait to see all these completed still life paintings!


I was also able to hold a mini polymer clay succulent class at Westside Community Center, Felt flower plaques at Seaford library & painted pet portraits at Greenwood Library! And a partner program, Creative Science, Shrinking Turtles, at Westside Community Center too!


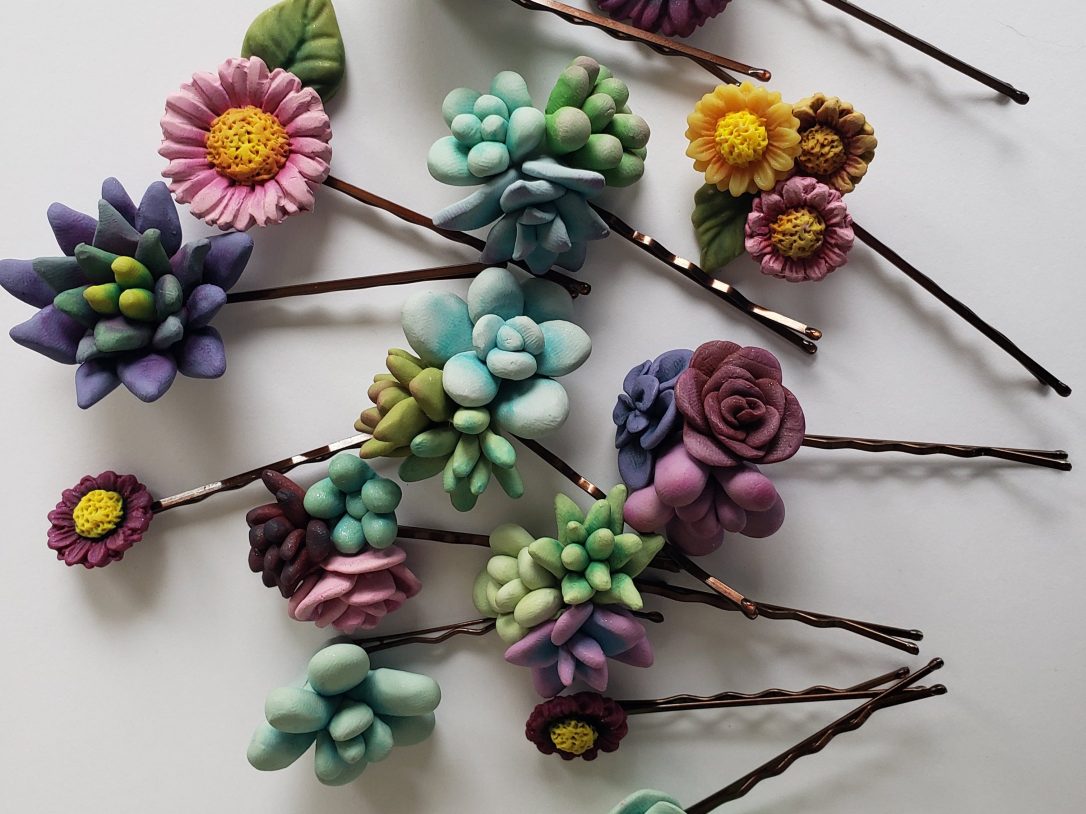
Also preparing for some upcoming art events with painted wine glasses and polymer clay hair pins! Check out Music & Arts @ Pemberton Park! Fridays in May to purchase!
This month I also worked on a commission – painting the top of table and chairs!


Students also finished up on color wheels and creating artwork using warm & cool colors to help create or evoke certain feelings, moods, or ideas into their art! Many focused on hands and how we can also use them to communicate with too! While others completed a painted gourd birdhouse and pet portrait!


Check out these projects you can do at home!


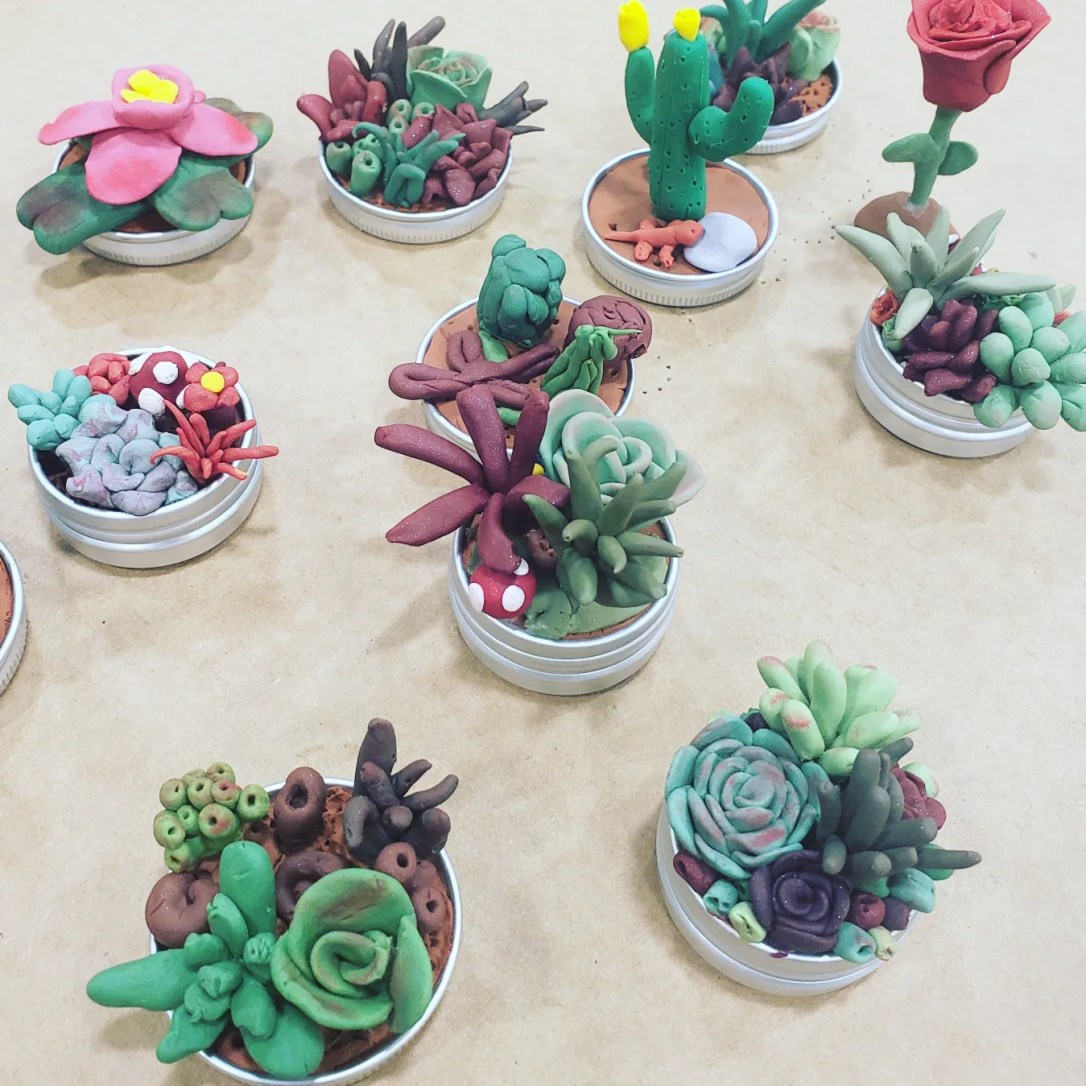
Create cute & fun polymer clay succulents that you can turn into magnets, gift toppers, desktop decor, and more! The instructions show several different types of plants inspired by real succulents and how you can place them together in a tin to create a mini garden and turn it into a magnet – you could also use bottle caps, miniature terracotta pots, or more polymer clay, to create your own containers for your succulents or create the succulent by itself and turn them into jewelry, hair pins, etc. Get creative and create your own types of plants & gardens!
What you need:

Inspired by Baby Toes and Jade Gollum succulents!
Create both by starting with the same steps! Follow steps 1-7 to complete Baby Toes and then continue with steps 8-9 to turn them into Jade Gollum!
1. Roll a piece of clay into a snake approx. 1/16″-1/8″ thick.
2. & 3. Cut several pieces from your snake approx. 1/4″ long – these don’t need to be exact!
4. & 5. Roll one end of your cut pieces into a point.
6. & 7. Gather three pieces and gently press your pointed ends together in a bunch, continue to add remaining pieces in a radial fashion until you’ve reached your desired baby toes succulent size!
Turn your Baby Toes into Jade Gollum by using a toothpick to create a divot in the top of the succulent (photos 8). Lastly add pink pastel dust to the tops of your Jade Gollum (photo 9)!

Inspired by Zebra Haworthia, create this spiky succulent!
1. To make a darker green clay, mix a little bit of red with some green clay.
2. & 3. Roll your clay into approx. 1/8″ thick snake and pinch off several small pieces from the snake, approx. 1/2″ long.
4. Roll the ends of each piece you pinched off, to create points.
5. Gently flatten your piece between your fingers.
6 & 7. Gather three pieces and gently press your pointed ends together in a bunch at the bottom and allowing the tops to slightly fan out. Continue to add remaining pieces in a radial fashion until you’ve reached your desired Haworthia succulent size!

Inspired by Little Jewel succulents!
1. Roll 12 balls of clay in various sizes, with the largest not much bigger than a pea. 2. Roll your balls into a small snake, rolling on the ends to form points. 3. Pinch 3 of your smallest pieces together to form the center of your little jewel. 4. Gently flatten your remaining piece between your fingers. 5. & 6. Continue to add your pieces, smallest to largest, around your center, begin by adding three between each of your center pieces (photo 5), then adding three more between each of those pieces!
Inspired by Purpusorum!
1. & 2. Form several small flattened diamond shapes from the desired color in various sizes – no larger than your pinky nail. 3. Pinch 3 of your smallest diamond’s points together to form the center of your Purpusorum. 4. & 5. Continue to add your pieces, smallest to largest, around your center, begin by adding three between each of your center pieces (photo 4), then adding three more between each of those pieces! Continue to add pieces until you’ve reached your desired size!

Seedum comes in many shapes and forms, this little clay succulent was inspired by the Lime Zinger variety!
1. Make 4 sets of small clay balls in various sizes, for a total of 8 balls (two of each size), with the largest set about the size of a pea.
2. & 3. Gently flatten all of your balls into pancakes!
4. Starting to form the center of your Lime Zinger, take your two smallest pancakes, turn them into taco shells and slide them together as shown in picture 4.
5. Take your next size up pancakes and place them around your center piece so they are opposite of your center – don’t line them up the exact same way as your first two but cover the gap that was created.
6. With your next two pancakes, place them opposite of your last two – covering the new gaps created in the last step.
7. Continue to add your last set of pancakes on in this manner – you can also make your seedum larger by adding more pancakes!

1.Add terracotta colored clay to the inside of your tin – this doesn’t need to be all the way to the top, but near the top.
2. Use a toothpick to create texture!
3., 4. & 5. Use liquid sculpey to “glue” your succulents to the terracotta clay – ensure your plants are stuck well by blending some of the plant into the terracotta and visa versa.
6. & 7. Add color to some of your succulents with chalk pastel dust – scribble some pastel on a piece of paper and then use a soft brush to pick up the dust and apply to your succulent.
Bake your piece at 275*F for approx. 15min. – check on your piece several times during baking, if you notice any “scorching” on the tips of smaller succulents you may need to turn down the temp and cook longer (for example: 265* for 20 min.).
Once it’s baked and cooled, you can add a magnet or leave as is! I use E6000 to adhere the magnet to the tin – let sit for 24hrs before using!


Join us at the Art League of Ocean City in June to create your own!

Check out some of our current projects happening in the art room and how they’re made!

Check out some of what we’ve been up to below!
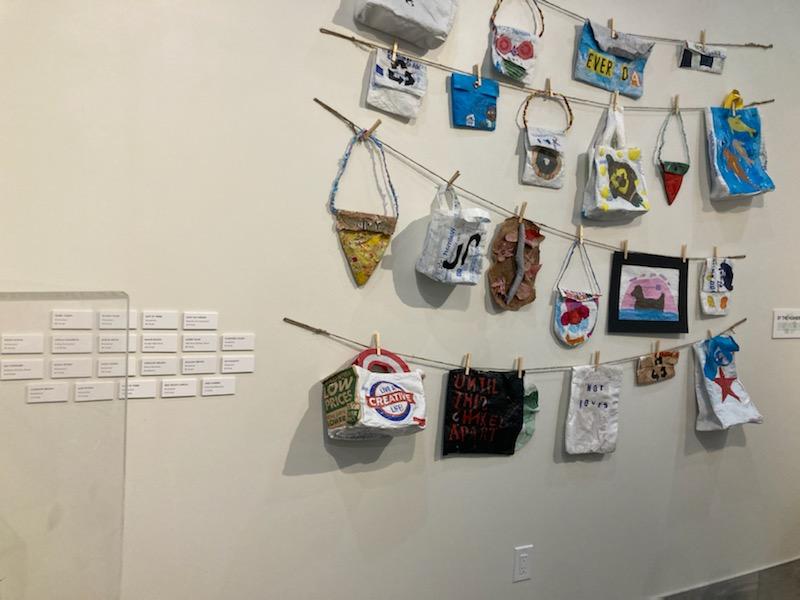
This month students finished creating entries for the Ward Museum’s students art show – “No More Waste, Reduce, Reuse, Recycle”. Everyone brought in plastic bags from retail shops, grocery stores, and plastic bags that breads, potatoes, and other foods are packaged in. Using an iron, we fused layers of plastic together to create a thicker plastic, adding lettering, colors, and cut-outs (from more plastic) to make our works of art colorful and unique! Finally, we cut and assembled our plastic, fusing pieces together to turn it into heavier duty bags, pouches, cases, and artwork! Artwork will be on display through June 12th!


February was full of paint nights in Ocean City at the Princess Royale through the OC Art League. As well as some held at the Seaford & Greenwood Libraries!


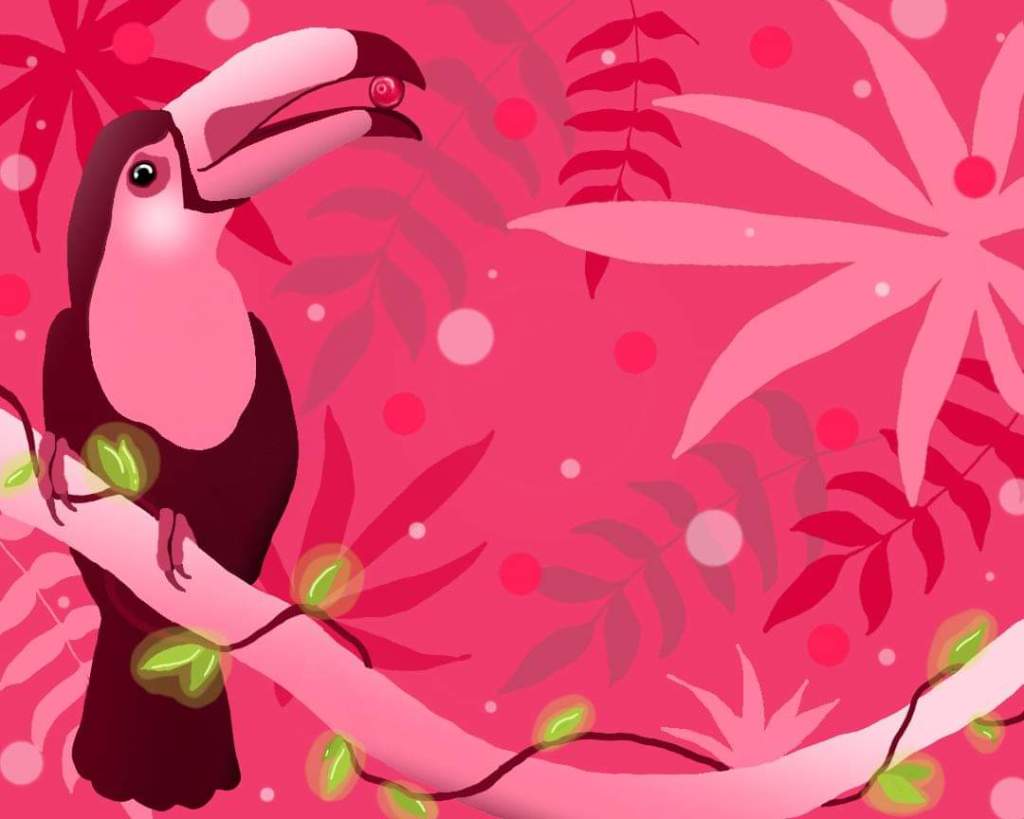
This month I was able to complete my first pastel commission of the year – “Admiral”. As well as work on some new painted glass pieces that will be available at the Ward Museum’s gift shop and upcoming art events! I also created an entry for Tropical Moscato – Follow this link and vote by leaving a comment on your favorite entry!


Students also worked on color wheels and creating artwork using warm & cool colors to help create or evoke certain feelings, moods, or ideas into their art! Many focused on hands and how we can also use them to communicate with too!


Check out these projects you can do at home!


Have fun with warm and cool colors, creating simple & meaningful pieces of art that also make perfect Valentine’s Day cards!
What you need:
What are warm and cool colors? Warm colors are reds, oranges and yellows, while cool colors are, blues, greens, & violets. Warm colors often make us think of warmth – fire, sunshine, heat. Cool colors tend to be more calming and make us think of water, sky, or ice. For this project we have three different elements: Your background paper, your hand, and your heart! We created a pattern by layering warm and cool colors for each element; Background in warm colors, hand in cool colors, heart in warm colors, or the reverse; background cool colors, hand warm colors, heart cool colors. Next to one another, warm and cool colors are very contrasting and make one another stand out! Decide if you would rather have a warm heart and cool hand or cool heart and warm hand!


Prepare your papers: You will need one piece of paper for your background and one piece to share for your hand and heart. Tape one piece of watercolor paper down to a work surface for your background with your masking tape. Cut the other piece of watercolor paper in two, trace an outline of your hand one piece, and draw a heart shape on the other (make sure your heart will fit in your hand outline). Tape your hand and heart pieces of watercolor paper to your work surface as well. Taping helps to keep your paintings flat while you work on them! Keep in mind the tape will resist the watercolor – try to apply the tape evenly around your background paper!
Listed below are three different watercolor techniques to make your warm and cool color hearts and hands! You can use any of the three of the techniques for any portion of your project – background, hand, & heart, or combine techniques or create your own! For each technique we will be using “wet on wet” – where we brush your paper with water, then add our paint. This helps our colors flow and mix around, giving us some really fun effects! Have your watercolors prepared and ready!
Crayons & Watercolor – Use warm or cool color crayons to draw designs or patterns on one of your elements (background, hand or heart). Brush water on your element, going over the crayon designs, then use watercolor paint to fill in your element – the crayons are waxy and will resist the watercolor!


Salt & Watercolor – Wet your element by brushing it with water, then dab splotches of watercolor on top! Watch as the paint flows and mixes on the paper! While the paint is still wet, sprinkle a little bit of salt on your element – notice how the paint pools around the pieces of salt! Let your element dry completely and then gently brush off the salt pieces to reveal the finished technique!


Plastic & Watercolor – This technique is made by using a plastic grocery bag – you may need to cut the bag open so it’s bigger and can cover your whole paper surface! Wet your paper with water and then add color to paper – in the example below we dabbed color on the paper but you can use almost any method for this technique! Once you have your whole piece of paper covered with color, and while it’s still wet, place your piece of plastic over the wet paint, pressing gently, and being sure to “scrunch” or “crinkle” the plastic on your paper. Let this dry completely (this can take some time!) and then remove the plastic to reveal a very cool technique!


Once you have all your elements painted, let them dry completely – it’s best not to use a hair dryer to speed up the process for the salt or plastic techniques as it may not allow the techniques to work well. When they’re dry and ready, remove the tape and cut out your hand and heart! Glue all of your elements together! Turn these into cards or pictures for Valentine’s day!


Check out some of our current projects happening in the art room and how they’re made!

Happy New Year! Check out some of what we’ve been up to below!
Tux was super excited to help us with our first project of the year; creating entries for the Ward Museum’s students art show! Students are creating a piece of upcycled artwork for the upcoming show “No More Waste, Reduce, Reuse, Recycle”. Everyone brought in plastic bags from retail shops, grocery stores, and plastic bags that breads, potatoes, and other foods are packaged in. Using an iron we fused layers of plastic together to create a thicker plastic, adding lettering, colors, and cut-outs (from more plastic) to make our works of art colorful and unique! Finally we cut and assembled our plastic, fusing pieces together to turn it into heavier duty bags, pouches, cases, and artwork!


This month I was able to visit Parkside High and create mini succulent gardens out of polymer clay with students there!


We were also able to hold a painted wine glass class at the Seaford Library!
I’ve had some time this month to work on a fun commission project – painting a wooden Noah’s Ark set! And have also been working on adding some new polymer clay bookmarks to my Etsy shop! Check out this post on how I create my “Put a Fork in it” bookmarks and see them all in my Etsy shop!


Check out these projects you can do at home!