


Create some fun little ornaments with simple supplies! Find the instructions below each of the three pictured!
Snowman ornament!
What you’ll need:
- Mason Jar Lid (not the jar band)
- Small piece of sandpaper
- Piece of 1/4″ wired ribbon – approx. 12″
- Two small pom-poms
- Piece of ribbon/twine for hanging
- Acrylic Craft Paint (White, red or pink, Orange)
- Mod Podge
- Scissors
- Paint brush
- Sharpie pen
- Hot glue or craft glue

Step one: Scuff up the mason jar lid with your sandpaper to help the paint adhere better!

Step two: Paint your mason jar lid with white acrylic craft paint – let dry and apply a second layer if needed.


Step three: Once your white paint is dry, use the orange paint to make your snowman’s nose – I made a dot near the center of my lid and towards the edge, and then connected them to create the nose!

Step four: Use your pink paint or make pink by mixing a little red paint to white paint and give your snowman rosy cheeks!

Step five: Once your orange and pink are dry, apply a layer of mod podge sealer over the entire surface, let dry completely!

Step six: Use a sharpie pen to give your snowman eyes & a mouth – check out the pictures below for face ideas! Also outline your nose. Tip: leave a white spot in your snowman’s eye to give him a spark! Download some additional snowman face ideas and practice your own below!

Step seven: Hot glue a ribbon to the back of your lid for a hanger!

Step eight: Cut and glue a piece of your wired ribbon, from side to side of your lid, glue pom-poms on the ends to look like ear muffs! Use leftover ribbon to make a bow for your snowman if desired!

Tree Scene Ornament!
What you’ll need:
- 3” Embroidery Hoop
- 2 pieces of approx. 3”x3” decorative cardstock
- Small pieces of decorative cardstock
- Mini paper snowflakes
- Piece of 8” burlap like ribbon
- 9 Small foam mounting squares
- Sequins
- Glue gun
- Craft Glue
- Glue Stick
- Scissors
- Colored Pencils
- Additional items to decorate with, such as, stamps, glitter, ribbon, stickers, etc.

Step one: Cut a piece of cardstock large enough to glue to the back of your hoop – this will become the background to your tree scene, use craft glue to adhere it to your embroidery hoop.
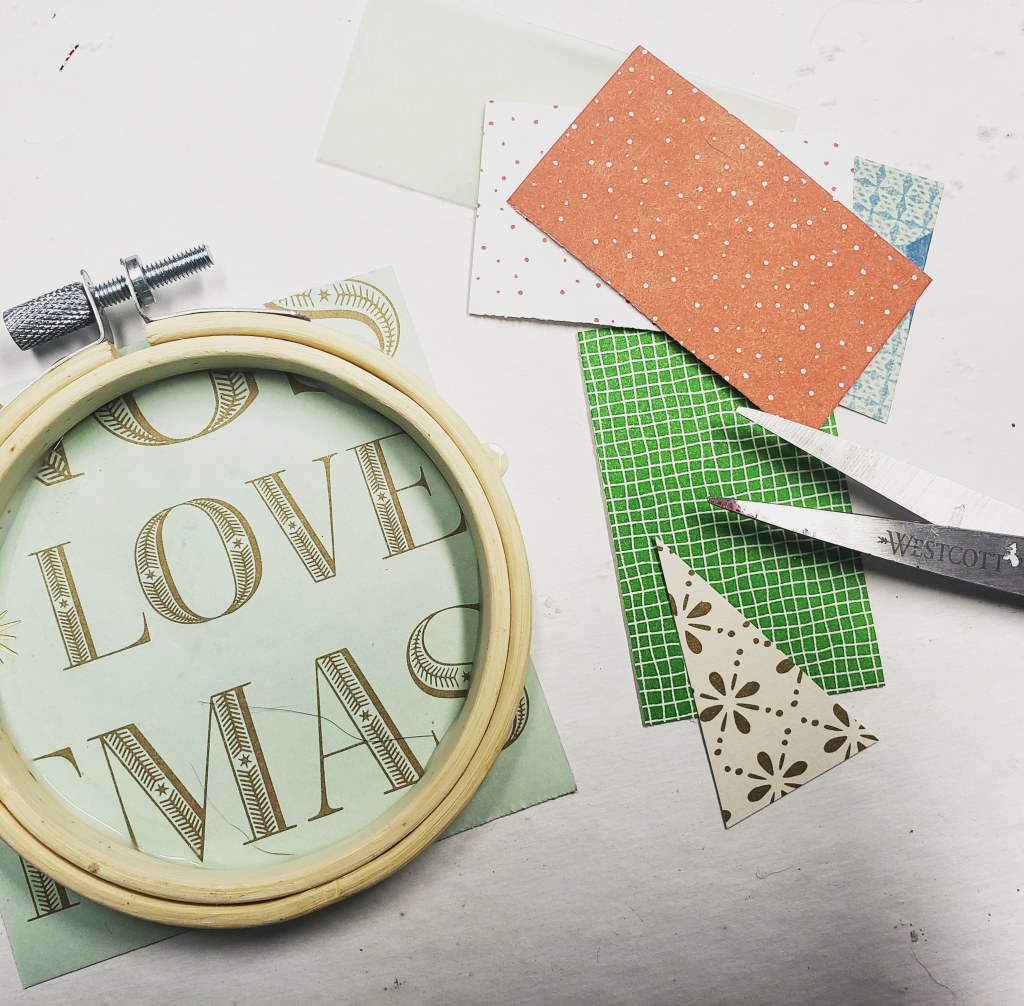
Step two: Work on getting your trees ready while your hoop dries! Using smaller pieces of decorative papers, cut triangles for trees! Make different shapes and sizes for added interest!

Step three: Use colored pencils to shade the side/edges of your trees, giving them a border!

Step four: If your hoop glue is dry, cut the paper off around the edges, you can also use an x-acto knife.


Step five: Add your trees to the hoop! Glue some trees directly to the background paper and use the small mounting squares to adhere some trees, making them “pop” off of the surface – stack mounting squares to add more depth.

Step six: Add sequins as tree toppers and/or ornaments on your trees and add the paper snowflakes (I cut one of my snowflakes in half to use around the edge). Add any other desired decorations and glue the piece of burlap like ribbon to the back for hanging!
Wreath Ornament!
What you’ll need:
- Mason Jar Lid Band
- 6 Pieces of green pipe cleaner
- Piece of 12” ribbon/twine for hanging
- Glue gun or craft glue
- Items to decorate your wreath with – I used pieces of artificial greenery and berries. Some other ideas may include miniature ornaments, pom poms, ribbon, etc.

Step one: Wrap all 6 pieces of green pipe cleaner around your mason jar band!

Step two: Collect items to add to your wreath

Step three: Glue your items to your wreath!

Step four: Add a ribbon to hang your ornament!

Give as gifts, hang on your tree, or use as gift toppers! Have fun making your own!
