Check out some of our current projects happening in the art room and how they’re made!
Painted Panels! Students work on collaboratively painting panels which will be displayed at the Tyaskin Wharf. Finished panels that have been displayed are donated/auctioned off to raise money for the wharf! Over the past few years students have created more than 20 painted panels!
Alcohol Ink & Line Drawing! Students used alcohol inks on polypropylene to create the colorful & beautiful abstract “blooms” and used white chalk markers to create line drawings on top!
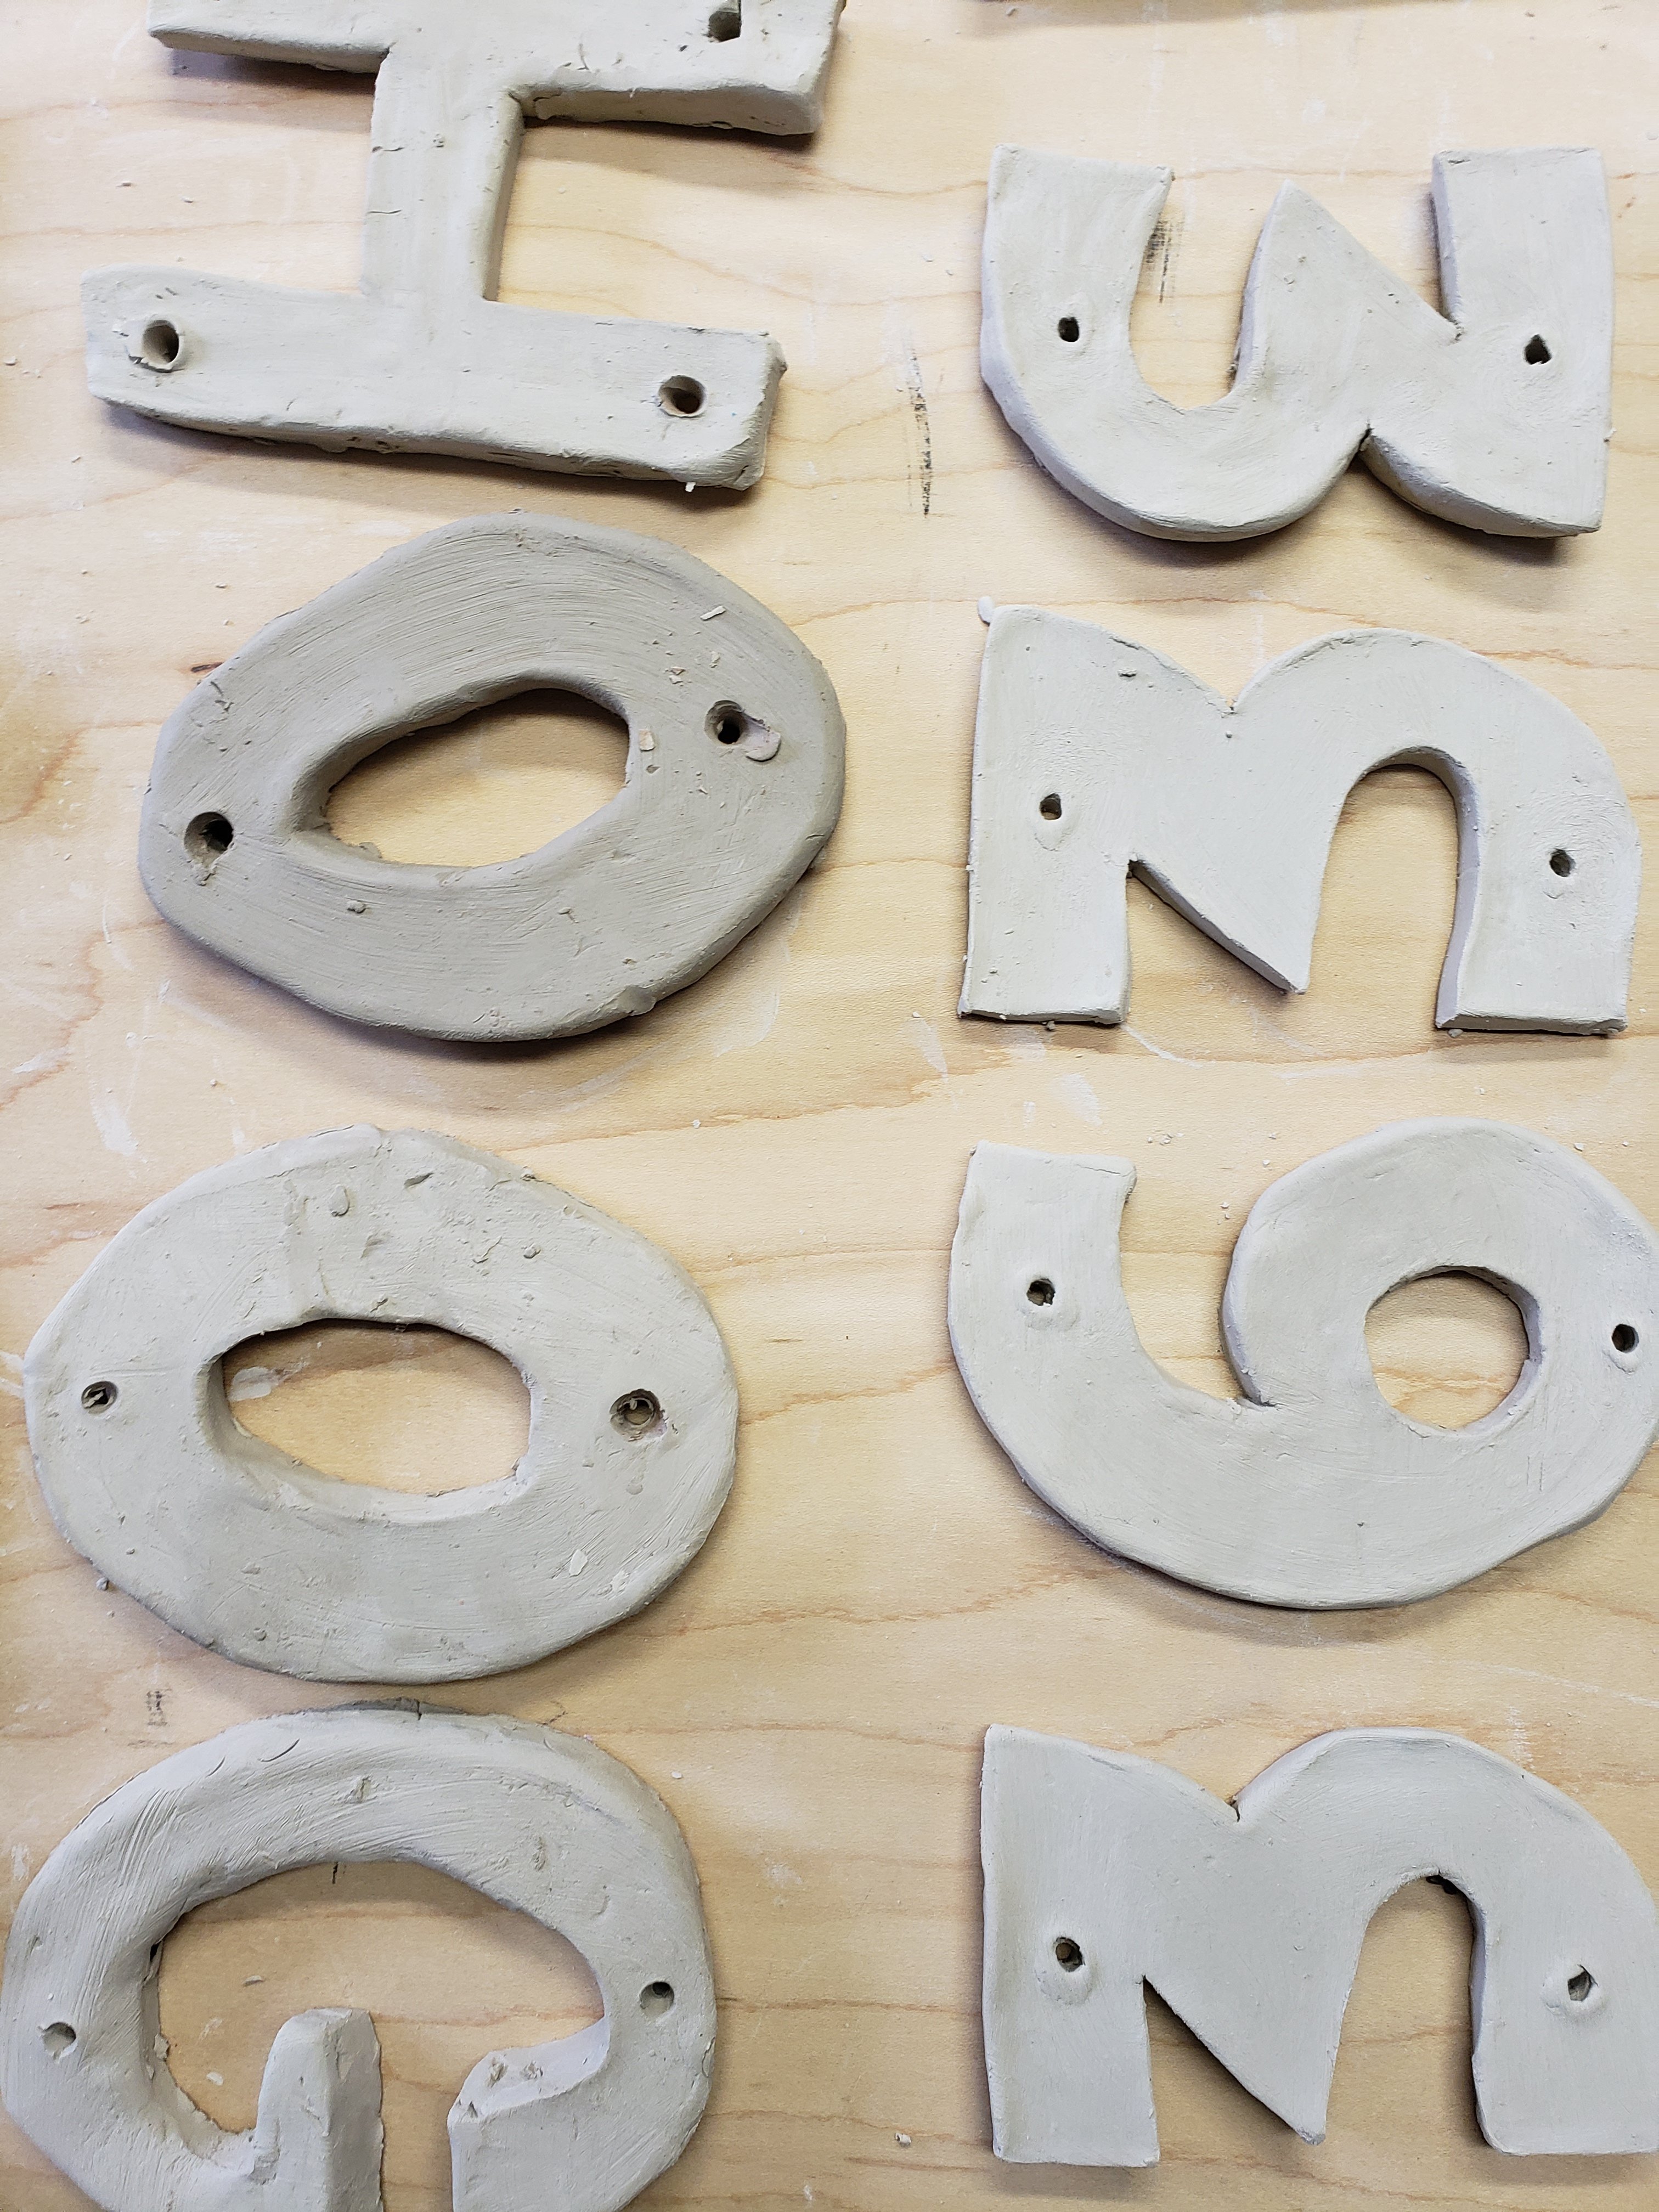
Ceramic Letters & Numbers! Students are in the process of creating a wall hanging with ceramic lettering and numbers! Pieces are in the process of being glazed & fired before being attached to wooden boards for a finished hanging piece!
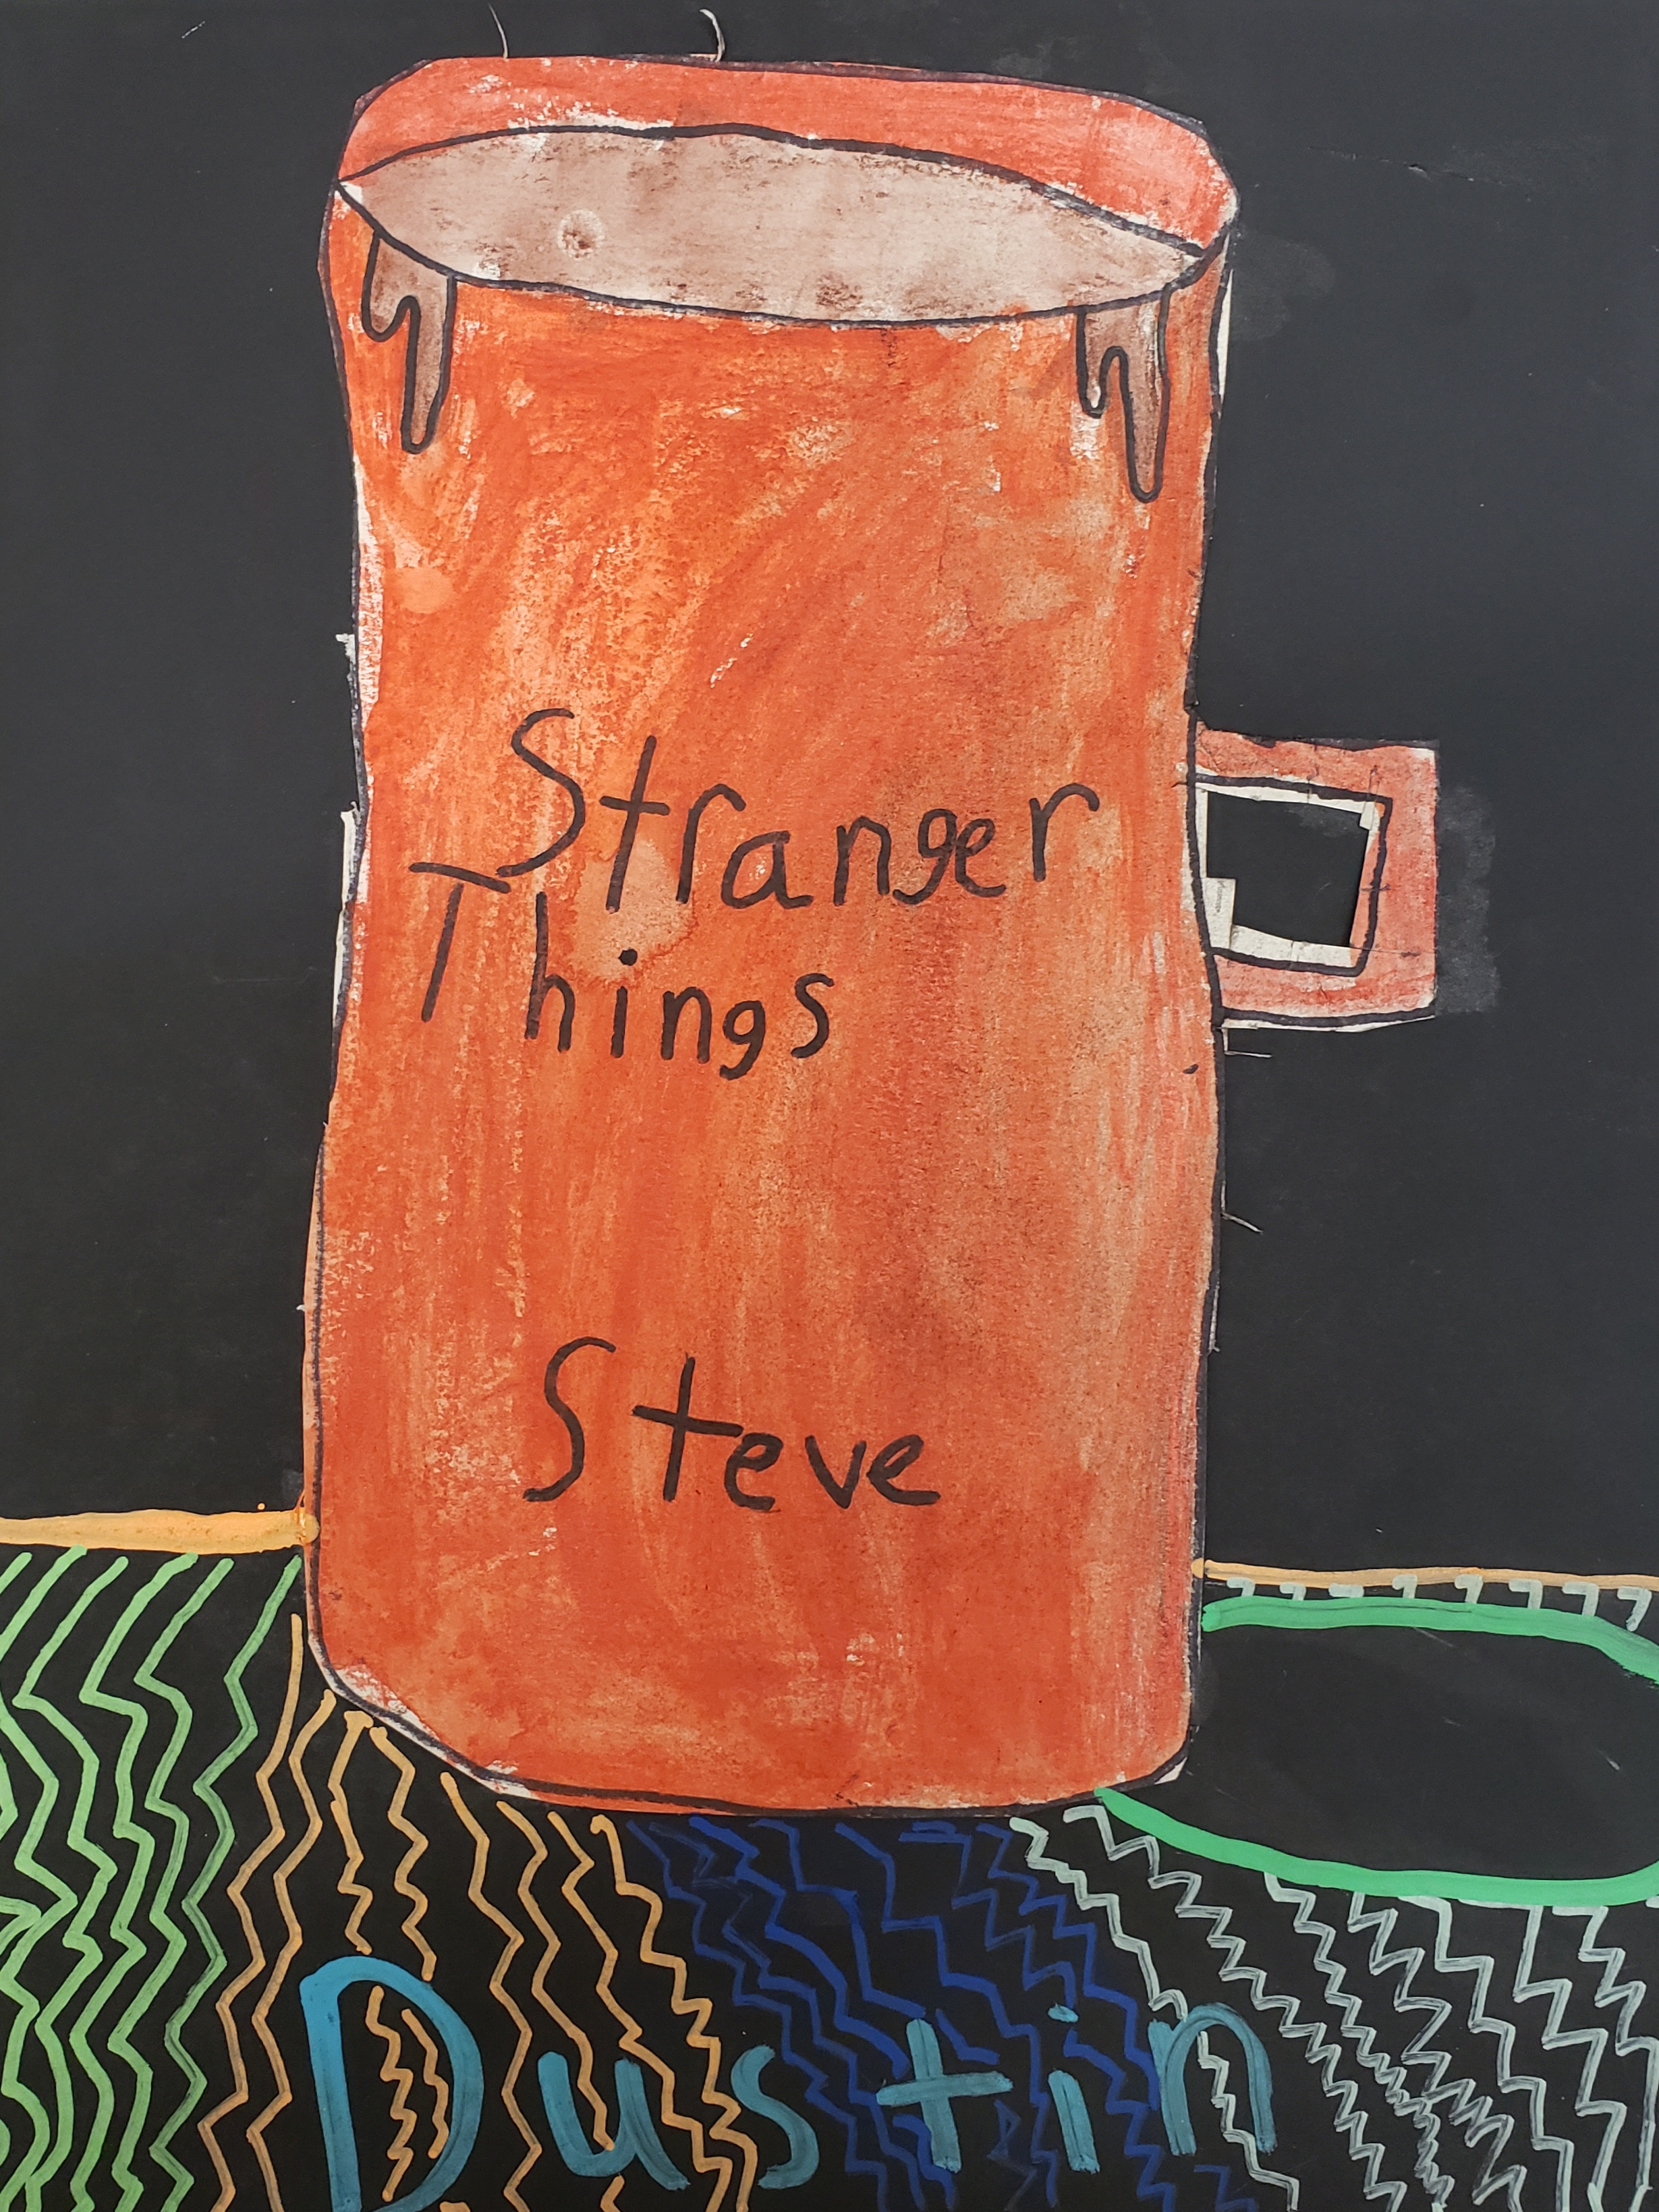
What’s in Your Cup? Students have been working on drawing and shading cylinders, turning them into a custom designed cup of their favorite drink! We used mixed media for these awesome pieces!
As a take home assignment this year, students were asked to create scrapbook/journal pages that reflect on the year so far. They were given packets that contained some supplies and instructions to create 3 different pages, with different themes of; “Staying Home”, “Day Trippin’ Treasures”, & “Serendipitous”. Check out all their awesome pages below and download the instructions to complete your own pages at home!
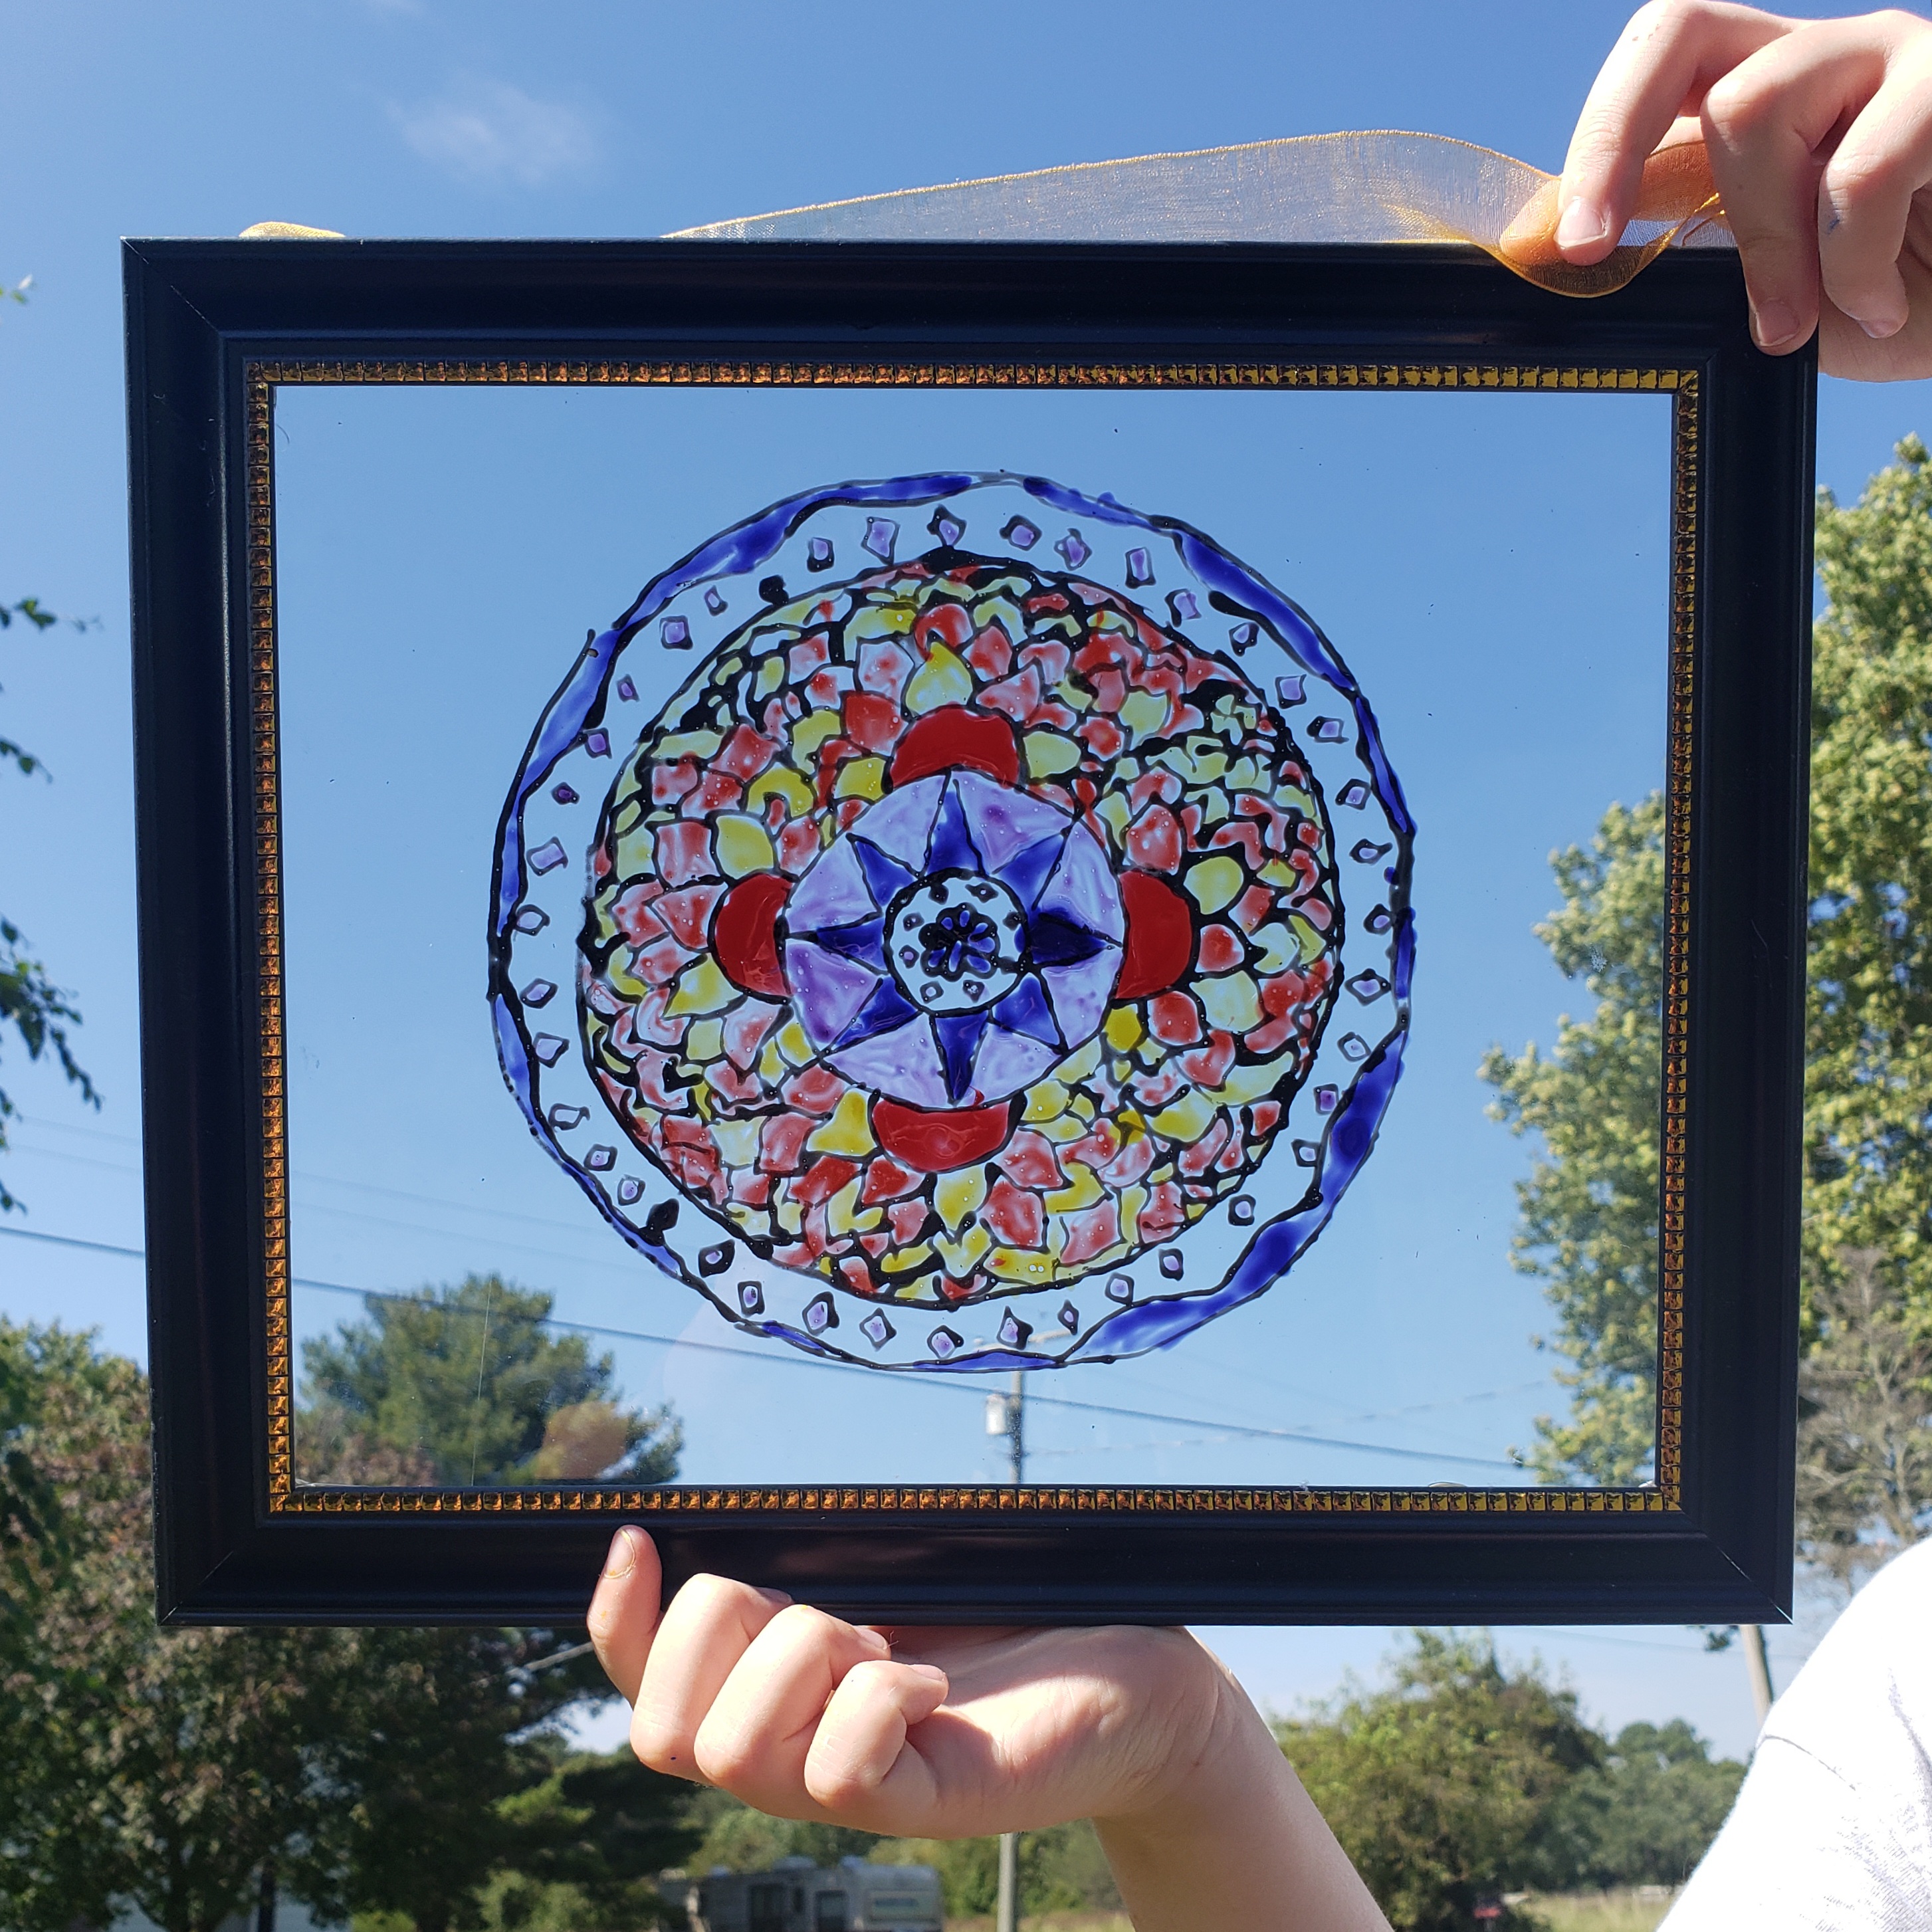
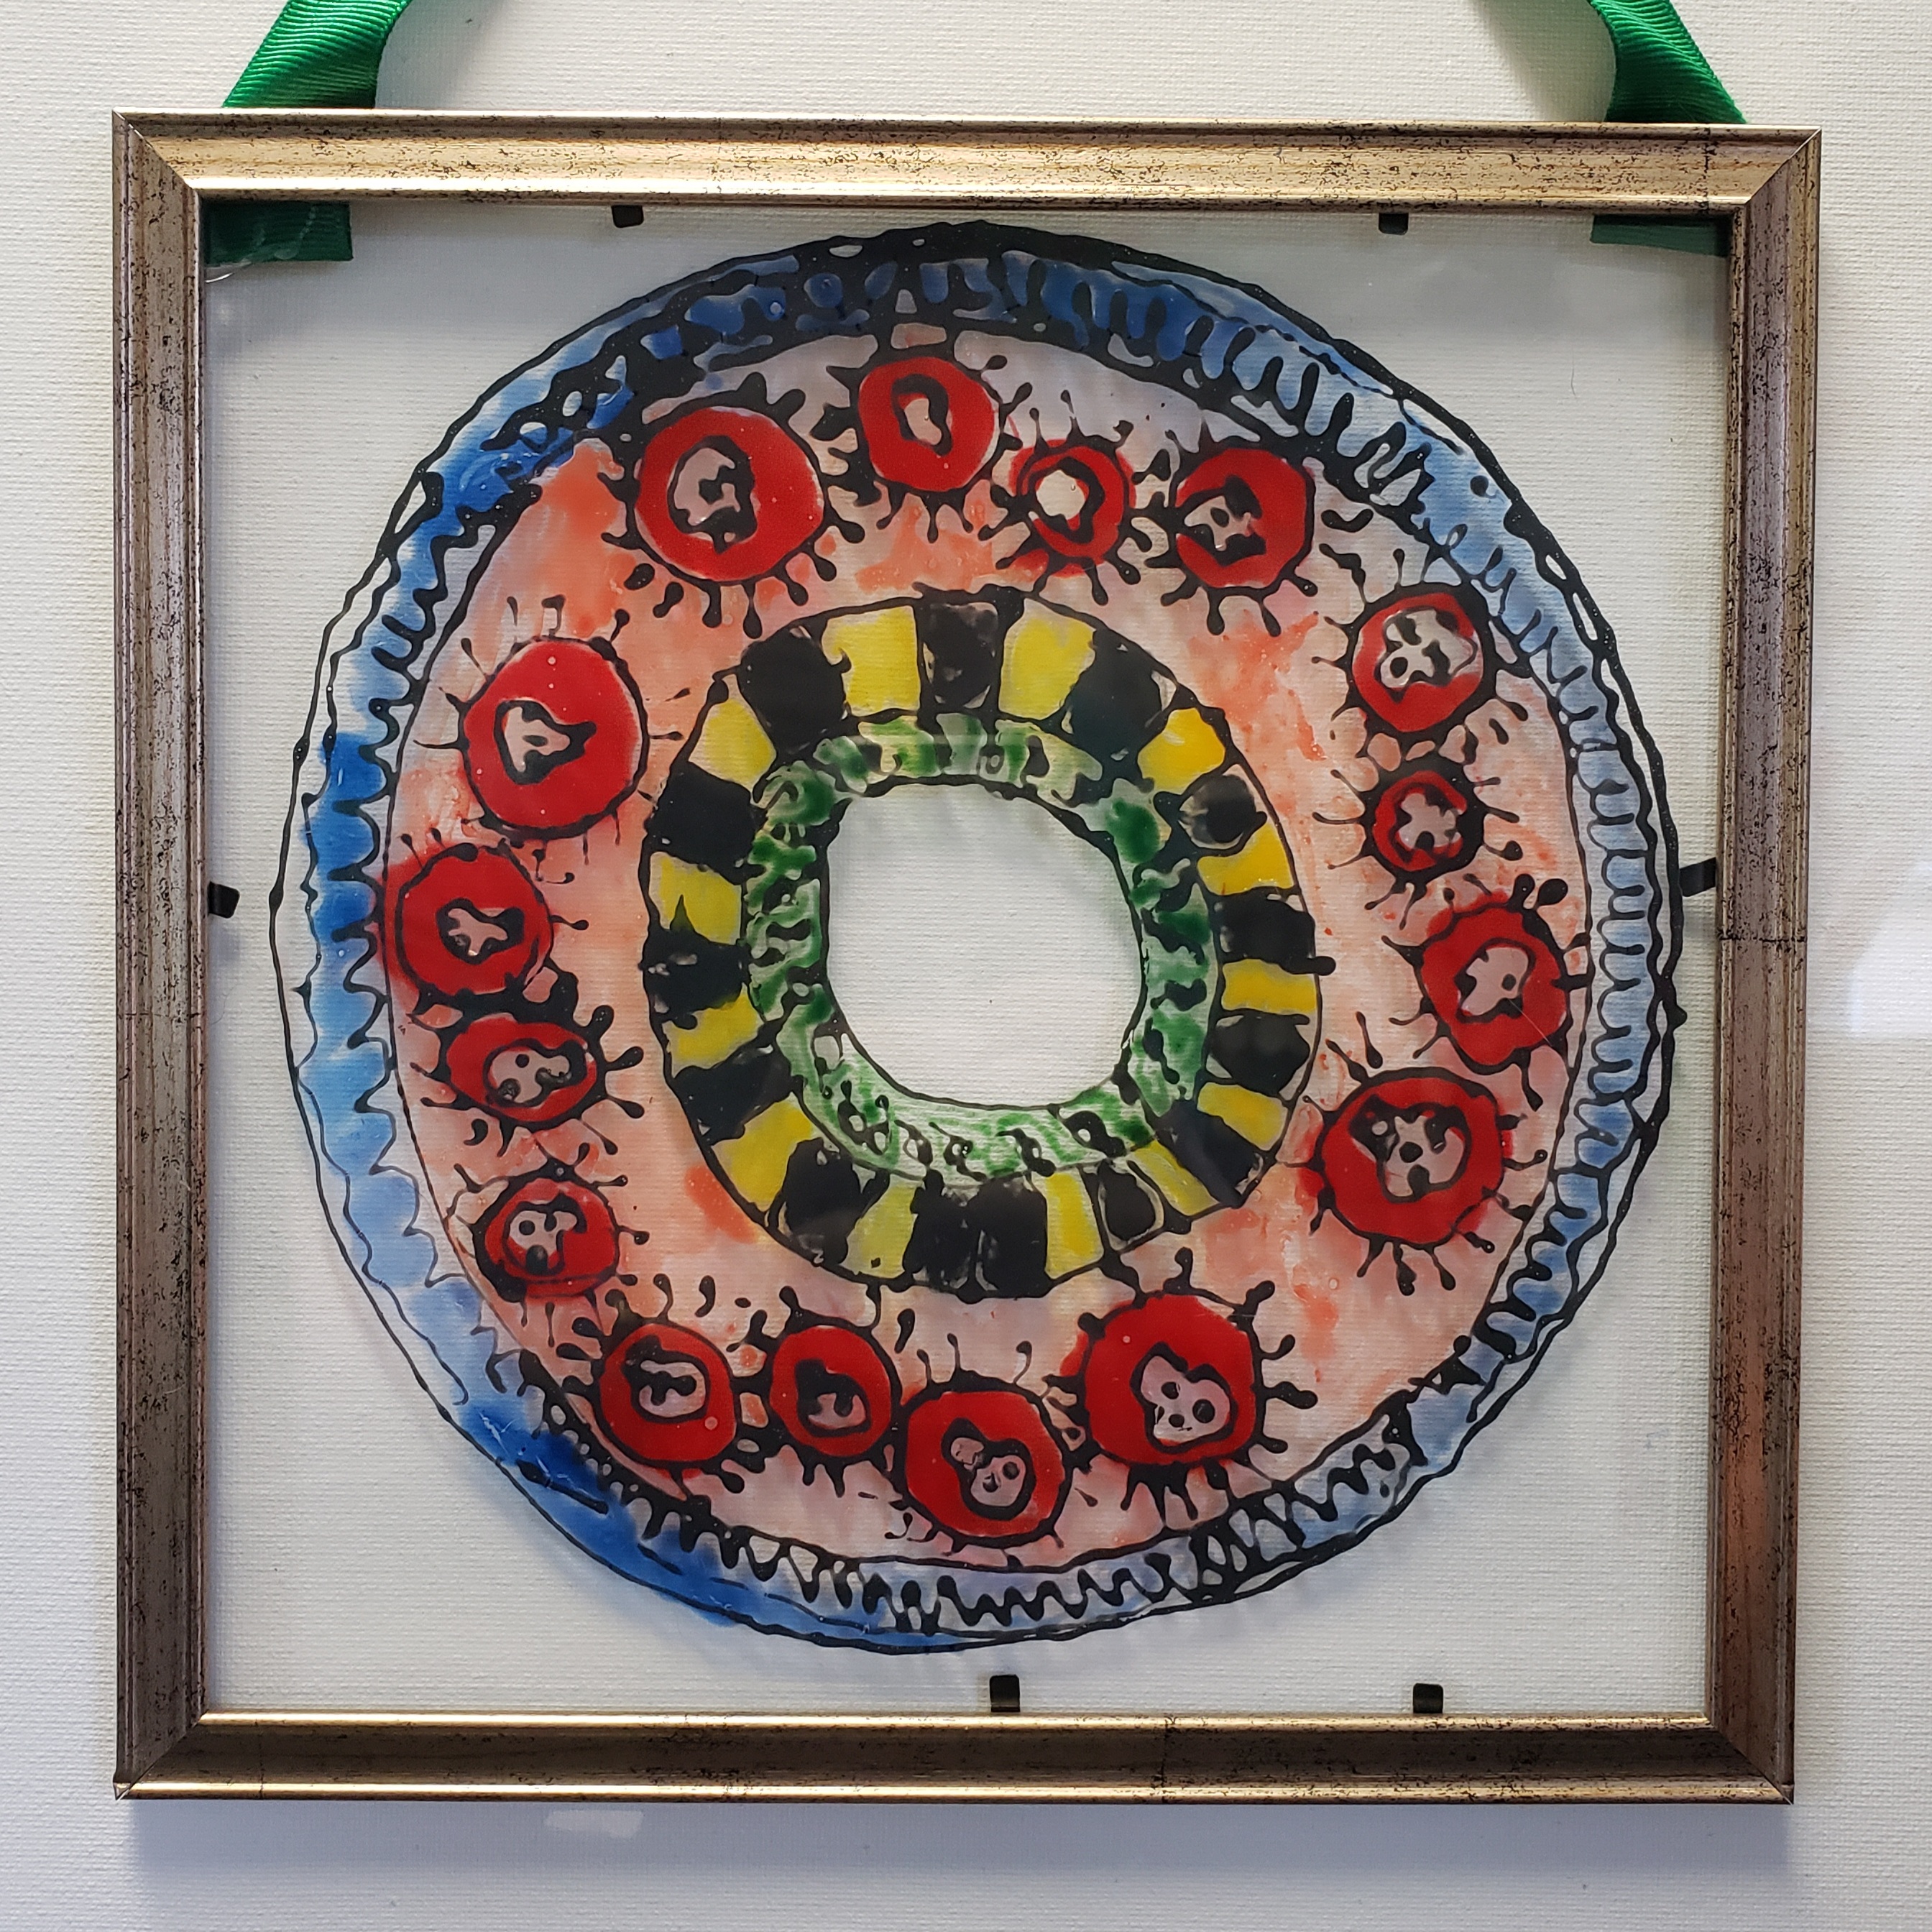
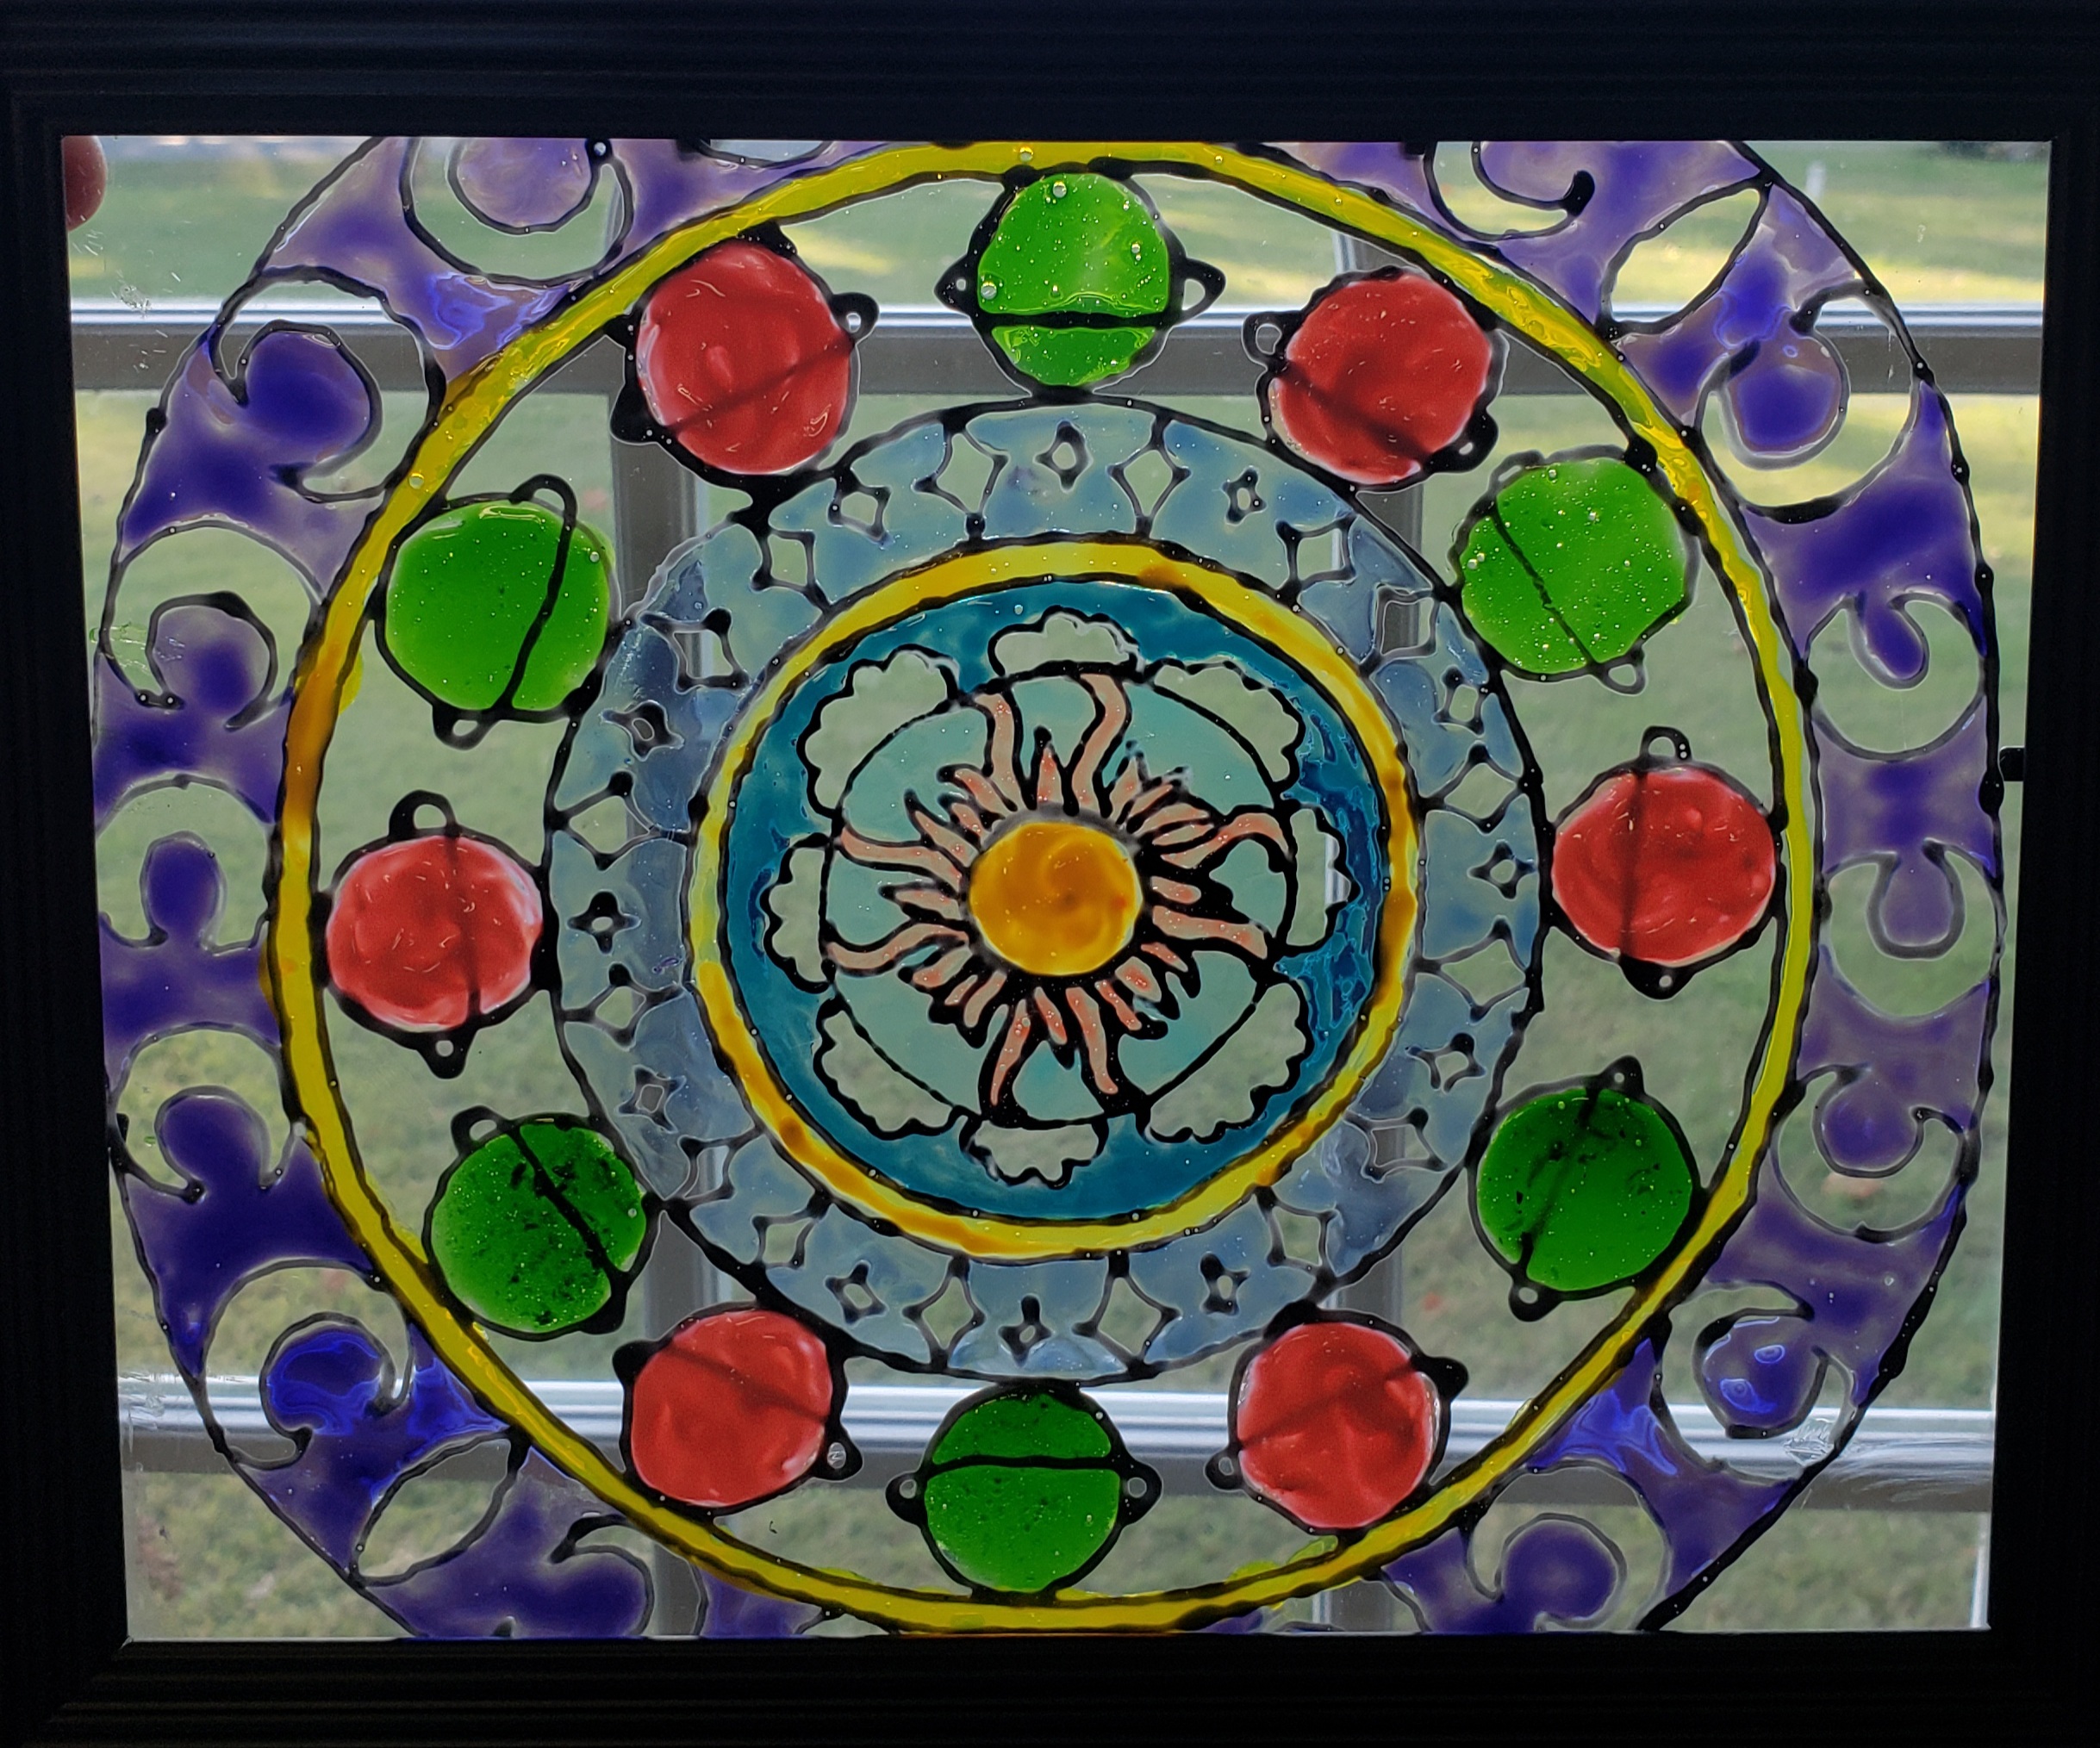
Create a radial design or Mandala, with glass paints, for an awesome piece of window art! Mandalas are a type of radial design – where your design radiates and repeats from a center point. Mandala comes from the Sanskrit word meaning “circle”. Mandalas can be found in many cultures and can have different symbolic meanings and processes. In Buddhist and Hindu traditions, mandalas are a spiritual symbol that represent the universe. More modern mandalas are used for meditation or just to create and enjoy beautiful designs!
What you need:
Picture Frame with Glass – we used 8″x10″ frames from the dollar store but any old frame will do!
Glass Paints – We used Gallery Glass, Martha Stewart and Arti’stick, brands, transparent, glossy, glass paints.
Copy/Printer Paper – that’s at least the same size of your glass/frame.
Pencil
Compass
Sharpie
Light box or sunny window!
Step one: Create your radial design! We did this with a square piece of paper, folded into fourths, from corner to corner. You can do this any size, however, ours were approx. 8.5″x8.5″ to fit our frames.
Cut out one fourth of your paper on your crease lines.
Step two: Draw your design on your cut 1/4 of paper – to make your design have a complete circle pattern, use a compass from the center of your paper out.
Step three: Fold another square piece of paper into fourths, corner to corner. We will be tracing your design onto these four sections. You can use a light box or a sunny window to help your design show through your paper – you can also go over your design with a marker before tracing to help make it more visible. Trace your first 1/4 section and then flip your triangle pattern over and trace your next 1/4 section (this will reverse your design and make the edges of your design line up). Flip it again for your next section and back over for your last section!
Step four: Next line up your radial design under your piece of glass and begin outlining your design – We used Gallery Glass Liquid Lead for this (I’ve also transferred the outliner to a small applicator bottle for easier handling and a smaller line). Let your outline dry!
Step five: While you’re waiting for your outline to dry, you can color your triangle in how you’d like to color your glass!
Step six: Once your outline is dry, use your glass paints to fill in the design with color! We used a mixture of different glass paint brands!
No matter what brand you use, you just want to make sure it’s transparent color as we want these to hang in a window and create a stained glass effect!
Step seven: Once your color has dried, place your glass back in the frame (you can use hot glue, silicone, E6000 or Goop Glue, etc. to help hold your glass in if needed), glue a ribbon to your frame or add eye hooks and a chain/ribbon for hanging! Our frames were very light weight so a hot glued ribbon worked well! Hang up your finished artwork in a sunny window! 🙂
Check out some of our current projects happening in the art room and how they’re made!
Check out lasts months post for more info on some of the projects below!
Radial Mandala designs on glass! Students finished up working on their radial mandala designs – so many cool pieces! Check out last months post for more info on this project and keep an eye out for a DIY on this project to be posted soon!
What’s in your cup? Students worked on how to draw cylinders and shade them in. Next they will create a drawing of their cup, decorating it with patterns and designs, filling it with a favorite drink! This project will be created with mixed media!
Impossible Shapes! Impossible shapes are a type of optical illusion – they can be drawn, however, could never exist in 3D form. Students practiced drawing an impossible Penrose triangle, and impossible square, before choosing which one they would like to paint. They also completed a color wheel and choose a color harmony to utilize in their painting.
Acrylic Pumpkin Paintings! Students worked on drawing spheres and turning them into pumpkins. They included light and shadow, completing value scales and working on shading. They drew their pumpkins and mixed their own colors to create shades of orange for their final pumpkin paintings!
Check out some of our current projects happening in the art room and how they’re made!
We were finally able to start back with some classes in September!! Check out our first month of class projects! We are still in the midst of finishing up a few of the projects but be on the lookout for instructions to create some of the projects at home!
Radial Mandala designs! Students created a four fold radial design of their choosing by designing 1/4 of their design and then repeating it to complete their full radial designs. They outlined their designs on glass with Gallery Glass black out-liner and are working on adding colored glass paints!
Abstract Wall Hangings! Students created non objective abstract art on 3 fabric panels with Pantel fabric crayons, Tee Juice fabric markers, and Sharpies. They then sewed their fabric together to create one large panel. Our next step is to add a dowel to hang their panel from and adorn them with a few finishing details!
Ceramic Letters & Numbers! Students are in the process of creating a wall hanging with ceramic lettering and numbers! We’ll be glazing and attaching them to wooden boards to hang and display their works!
Embossed Metal Zentangles! Students learned about Zentangles and how to create their own inspired versions. They then created a Zentangle on foil by embossing their design into the surface! They used Sharpies to color their metal and then glued them to a piece of poster board! Check out instructions for creating your own inspired Zentangle here!