Art, Art activities, Craft, decorating, DIY, Make, Create, & Share!, Painting

DIY Painted Signs!

Create a custom distressed wooden sign to add to your décor or to give as a gift!

What you need:

  • Wooden board – My example is approx. 8″x9″ and 1/4″ thick, but you can use any board or wooden plaque you have on hand!
  • Acrylic paints – I suggest acrylic craft paints in black or dark brown, white or cream, and a color of your choice (you could also incorporate multiple colors if desired). I used teal as my color.
  • Sandpaper
  • Rope or twine for hanging – I’ve drilled holes in my board but you could also staple the rope or twine to the back, or use a picture hanger instead!
  • Stencil or pattern – You can download & print the ones I used, or create your own!
  • Pencil
  • Masking Tape
  • Ruler
  • Paper Towels
  • Hairdryer
  • Optional: Minwax finishing paste in special dark or other sealer

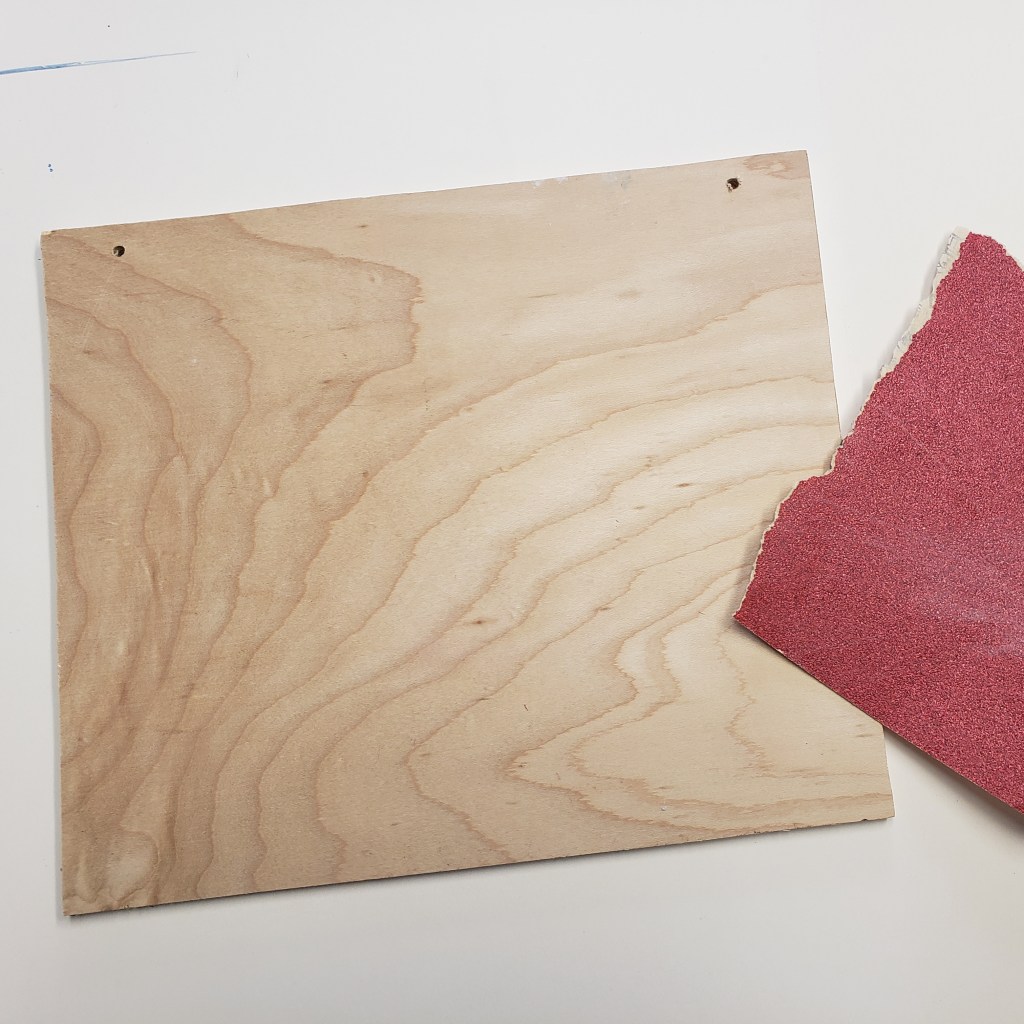
Step one: Sand down any rough edges or spots on your board.

Step two: Paint your board with your black or dark brown color – paint the edges too!

Step three: Once your black paint is dry (you can speed this up with a hairdryer), cover your board with a layer of white or cream paint. Let the white dry – you may need to add a second coat of white/cream if you can still see a lot of your darker color show through. Let it dry!

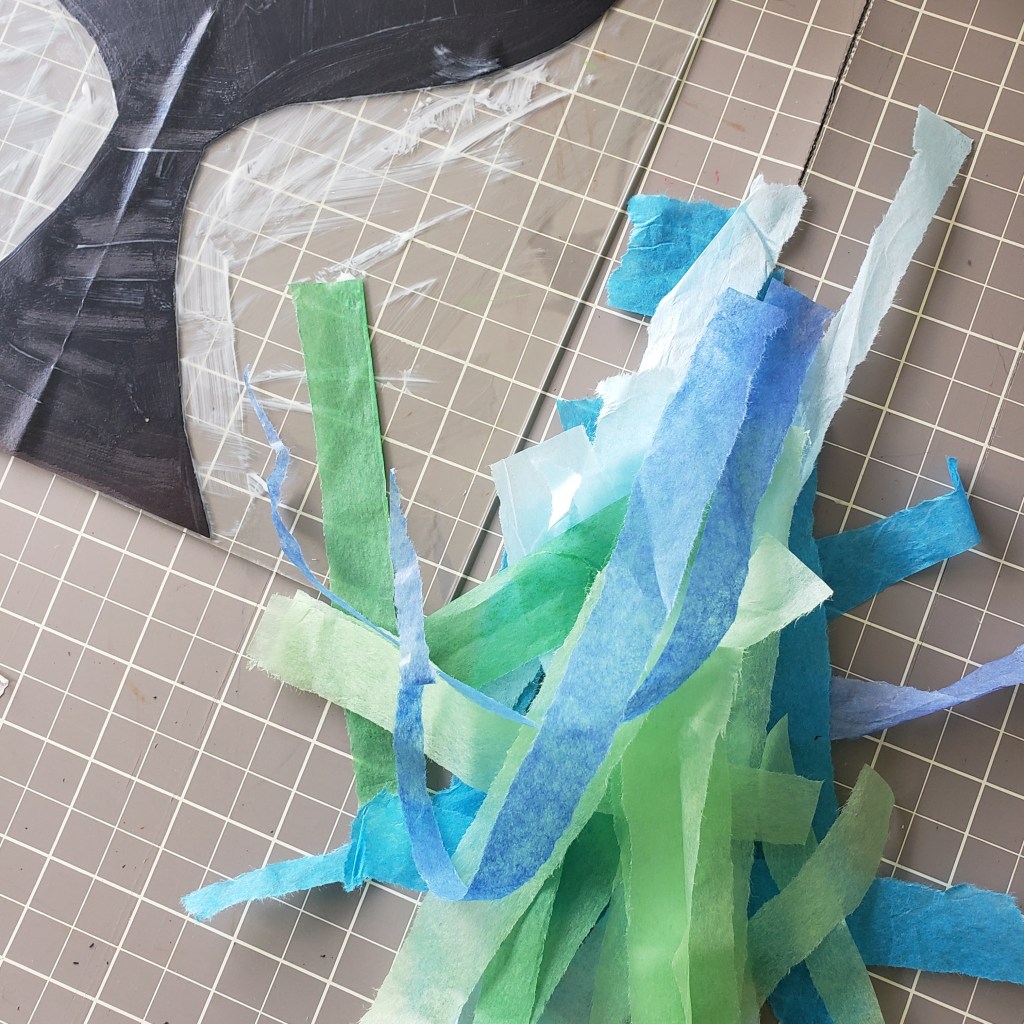
Step four: Download and print out the desired lettering and designs for your board here or create your own! Follow these steps to transfer a printed design to your board!

Step five: Fill in your design outline with the color paint of your choice!

Step six: Make sure your board is very dry before moving on to this step! Sand your board to add age and a distressed look – I sanded more heavily around the edges of my board and lightly near my lettering. If you sand too much off you can always touch it back up with your paint!

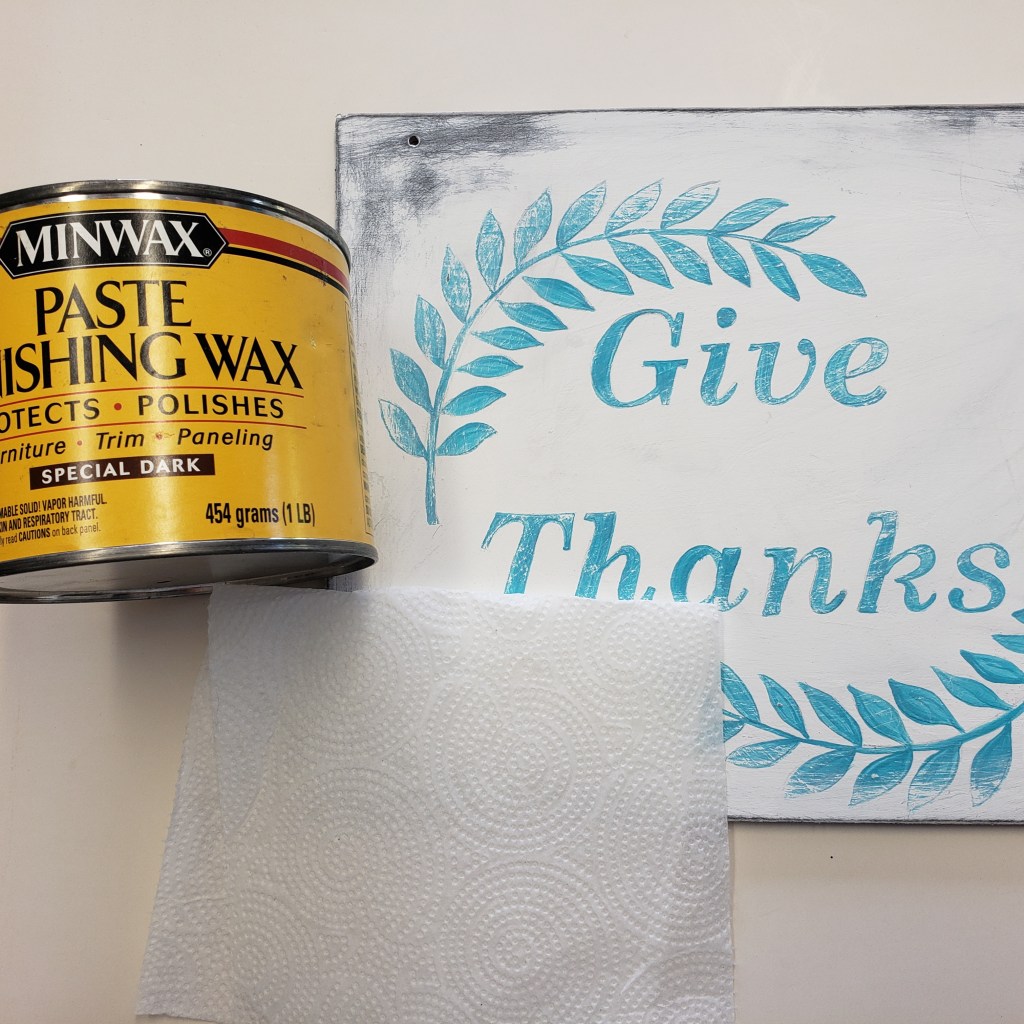
Step seven: This is an optional step, you can leave your board as it is or add a sealer. I prefer to Minwax finishing paste in special dark!

Step eight: Add a rope for hanging (I drilled holes in my board and tied my knots in the front, but you could also staple a rope to the back). Hang your sign as is or hot glue some silk flowers for some pizzazz!

Art, Art activities, Craft, DIY, Make, Create, & Share!

Scoops of the Sea!

Take a scoop of the sea with you! Use a large shell to “scoop” up a piece of the sea – with ultra thick embossing enamel to encase your beach treasures and act as the water! You could also do the same method with resin! Finished scoops of the sea can be made into decorations, ornaments, jewelry, etc.!

What you need:

  • Sea shells – At least one shell that’s large and deep enough to hold sand and smaller shells!
  • Beach glass, pebbles, or other small beach treasures! (Make sure they’re clean and dry)
  • Sand – it must be very dry before using, if collecting your own sand you can dry it out by placing it on a cookie sheet and baking at 325*F until it’s dried out!
  • Melt Art – Ultra Thick Embossing Enamel
  • Tin Foil
  • Optional: You can add bits of paper (like if you wanted to include writing or doodles). Wire or ribbon if you wanted to add a hanger to your shell – You can wire wrap, drill a hole, or glue, to your shell if you’d like to make it into a ornament or hanger!

Step one: Clean and dry your large shell (you want to make sure it has a dish or spoon like shape to it – flat shells won’t hold our enamel!)

Step two: Make sure your large shell is sitting level – you can use a piece of shaped tin foil to hold your shell. *Note: the embossing enamel has to be heated in an oven……it’s easiest to make your scoop of the sea on the surface it will be heated on).

Step three: Add some sand to your shell – just enough to cover the surface! If you’re collecting your own sand make sure it’s super dried out first!

Step four: Add in other little shells, sea glass, or other beach treasures! You could also add in bits of papers with lettering or doodles on them too!

Step five: Cover the sand and items carefully with the ultra think embossing enamel.

Step six: Let the embossing enamel mound up in the center but don’t fill it all the way to the edges of your shell. *Note: You can gently blow or brush off any embossing enamel that got on your tray before baking – It will stick to surfaces somewhat once melted! (You can protect your baking surface with a layer of tin foil).

Step seven: Carefully transfer your shell to an oven or toaster oven. Bake at 350*F (watching closely) until the enamel just turns clear.

Step eight: Remove from the oven and let cool! If you have a lot of air bubbles form on the surface, you can use a heat gun to heat the enamel back up – this will remove the bubbles! Or leave the bubbles to create a fun foamy effect! If your sand and inside shells are not covered with enough enamel after it melts, you can add more powder on top and heat again to melt it! It’s also okay if your inside shells aren’t completely covered….you just don’t want your sand able to leak out!

Have fun creating your own scoops of the sea! What treasures will you include? 🙂

Art, Art activities, Craft, DIY, Drawing

Watercolor Resist Painting!

A fun little technique to create some colorful pieces of art! These also make great pieces to add to collage techniques or are fun for art journaling too!

What you need:

  • Watercolor paper (I use Canson XL cold press 140lb)
  • Masking tape
  • watercolor paints
  • Oil pastels or Crayons
  • Large flat brush

Step one: Tape down your watercolor paper – the tape also creates a nice border to your artwork you can decorate later! I cut my paper to be a bookmark!

Step two: Create a design or picture on your paper with your crayons or oil pastels – press firmly!

Step three: You don’t need to fill in all of your paper – leave some areas white, this will be filled in with your paint color!

Step four: Prepare your watercolor paints and gently brush overtop of your crayon or oil pastel design!

Step five: The oil pastels or crayons will resist the watercolor paint and only stick to the white areas of your paper! I used warm color crayons and cool color paint for more contrast!

Step six: Let your paint dry and remove your tape!

This piece was created with oil pastels instead of crayons!

Art, Art activities, Craft, DIY, Make, Create, & Share!

DIY Shell Trinket Dishes

Turn some of those beach treasures into a lovely trinket dish! These make great personalized gifts too!

What you need:

  • Clean shells – larger, smoother shells are easiest to start with!
  • Mod Podge – I used gloss
  • Paint brushes
  • Decorative tissue papers, or thin papers (like origami paper).
  • Scissors
  • Acrylic paints in desired colors
  • Metallic paints – I used Lumiere by Jacquard

Step one: Gather and clean your shells – ones that have larger, flat/smooth insides will be easiest to start with!

Step two: Find printed tissue papers, pieces of maps, origami papers, or any other thin paper to decoupage your shells with

Step three: If using tissue papers to decoupage your shell with, first paint the inside surface of your shell with acrylic paint. I used white, as my tissue paper was white with printed blue designs – this way the white parts of the tissue looks like it disappears in the back ground of my shell. You may need to apply more than one layer of paint to cover your shell with – if this is the case, let your paint dry between layers.

Step four: Cut your papers for your shells – if using tissue papers that match with the background of your shell, you don’t have to be too careful in cutting out the design precisely. If using papers that will completely cover the inside of your shell, cut it quite a bit larger than your shell!

Step five: If using tissue paper – Add Mod Podge to the inside of your shell and place your tissue paper on top

Step six: If using other papers – brush a layer of mod podge in your shell and on the back of your paper, then place in your shell

Step seven: Gently brush a layer of mod podge on top of your tissue paper or if you’re using paper follow the steps below!

Step eight: If using paper, vs. tissue paper, use your fingers to firmly press your paper into your shell…..start from the center of your shell and work out

Step nine: Use a firm brush to add a layer of mod podge on top of your paper – use the brush to help push and smooth out the paper on the shell surface! Just be careful not to tear your paper as it can become fragile!

Step ten: Let your mod podge dry and trim off any extra paper – you may also need to add in extra mod podge around the cut edges if you have some areas that are not quite stuck! Don’t worry if your cut edge is not perfect – as long as it’s glued down well, the cut edge will get covered with the metallic paints!

Step eleven: Use your metallic paints to create a painted outline on your shells!

Have fun creating these simple trinket dishes! You could also drill a hole and make them an ornament or add other elements in them like other shells, personal photos, sea glass, etc.!

Art, Art activities, Craft, decorating, DIY, Happenings, Make, Create, & Share!, Painting

Painted Stepping Stones

Brighten your garden with a colorful hand painted paver! Paint just one or paint many and create a fun path through your garden!

What you need:

  • Cement Paver – The ones I’m using are 12″x12″
  • Outdoor primer
  • Pencil
  • Acrylic paint – I used Apple Barrel Craft paints in Bright Blue, Bright Yellow, Bright Red, Black, & White. You can also use Patio Paints for longer lasting results!
  • Krylon indoor/outdoor, gloss sealer

Step one: Prime you paver – I used an outdoor primer, brushed it on & let it dry.

Step two: Draw your design onto your paver (you can also use stencils or templates).

Step three: Begin to paint your design! I like to start with my background and work forwards.

You may need to apply more than one layer of paint with certain colors – if this is the case let layers dry between new coats!

If you want to blend colors it’s easiest to do so while the paints are still wet – brush back and forth to help blend colors!

Create effects with your paint – like splatters for stars or texture by “flicking” your paint!

Fill in your foreground with base colors…

Add your details! Leave your stepping stone as is or add in some whimsy with additional lines, colors, & patterns!

Step four: Finish your stepping stone by sealing your paint with krylon indoor/outdoor gloss sealer!

Check out the video below for more ideas or join us for a stepping stone class to create your own!

Be sure to send along a picture of your finished stepping stone! 🙂

Art, Art activities, Craft, decorating, DIY, Make, Create, & Share!, paper art

Faux Stained Glass

This is an easy method to create a stained glass like piece of art! Stained glass artwork can be dated back thousands of years. Most traditional stained glass is created from cut pieces of colored glass brought together to create panels for decorative windows. For this project we will be inspired by stained glass to create a fun piece you can display in your window!

What you need:

  • Picture frame (Mine is 8″x10″ and came from the dollar store)
  • Colored tissue paper
  • Black construction paper or black card stock
  • Mod Podge (I used matte)
  • Paint brush
  • Scissors
  • Pencil
  • Stencil or template for your design

Step one: Cut out your design out of your black paper! You can use stencils, create templates or use cookie cutters to trace!

Step two: Take the backing off of your picture frame and carefully remove the glass. Glue your cut out on the glass with Mod Podge – applying a layer in the glass and then over your cut out.

Step three: Tear your tissue paper into smaller pieces – I tore mine into strips but you can make them any shape and in various sizes!

Step four: Using the Mod Podge, begin to glue down your tissue paper on your glass. It’s okay if your tissue paper covers your cut out and goes off the edge of your glass. You can also overlap your tissue paper – just keep in mind by overlapping new colors will be seen when held up to the light! Also be sure to add layers of Mod Podge between any overlapping tissue paper.

Step five: Once you have all the tissue paper you’d like on your glass, apply a layer of Mod Podge over the whole thing and let it dry!

Step six: Flip your glass over and trim off any pieces of tissue paper that went over the edge.

Step seven: Place your glass back in the frame – don’t add any of the backing, we want it to be just the glass so the light can come through! If needed, you can use some E6000, Goop Glue, or hot glue, to secure your glass in your frame!

Step eight: Set your picture in a sunny window! You can also glue a ribbon to hang it from, or depending on your frame, add eye hooks to attach a ribbon, chain or string.

Art, Art activities, Craft, DIY, Make, Create, & Share!

Wax Paper Sun Catchers

Create some colorful window art with this simple method! You can hang your creations in a window or make them into a mobile! You can also use your colorful translucent wax papers for scrap booking and collage projects!

What you need:

  • Wax Paper
  • Crayons – with papers peeled.
  • Iron
  • Newspaper
  • String
  • Hole punch
  • Handheld pencil sharpener or Crayon sharpener
  • Scissors
  • Stencils, templates, or cookie cutters to trace for your shapes!
  • Pencil

Step one: Cover your work surface with newspaper and lay a piece of wax paper on top!

Step two: Using your hand held sharpener, sharpen your crayons over your wax paper. We want all the little shavings from the crayons on your wax paper! Keep in mind your crayon colors will get mixed together in our next steps!

Step three: Once you have quite a bit of crayon shavings covering your wax paper, lay another piece of wax paper on top and cover with more newspaper.

Step four: Carefully iron your wax paper to melt all those crayon shavings between your wax papers!

Step five: Let your paper cool off slightly and then remove the newspapers. Check out your awesome piece of translucent wax paper!

Step six: Use a stencil, template, or cookie cutter to trace a shape on your wax paper with a pencil. I made a fish template that I cut out of some card stock.

Step seven: Cut out your shapes, make a hole and add your string!

Step eight: You can hang your cut outs in a window just as they are or you can add them to a dowel or hoop (like an embroidery hoop) and create a mobile!

These colorful wax papers are also fun to use in scrap booking or collage projects too!

Art, Craft, DIY, Make, Create, & Share!

Painted Glassware!

Hand painted wine glasses are a fun break for me from more traditional drawing and painting projects and commissions! These little paintings don’t often take more than an hour or two to complete and make a fun gift!

I use Martha Stewart Multi-surface craft paint for all my painted wine glasses. I find it holds up well and I like the Satin finish on the glass to give some contrast. I first clean the glass surface with rubbing alcohol. And then begin to paint!

Most of the time I apply more than one layer of the paint to the glass – some colors need more layers than others to make them more opaque. I let each layer dry before applying the next….so often times I work on multiple glasses at a time. Any mistakes can be easily cleaned up with a little rubbing alcohol on a paper towel or q-tip 🙂

After layering, I add the final details with a tiny round brush – sometimes I find I need to add a little water to thin out the paint for this step. Then, to cure the paint on the glass, it needs to set out for 21 days, or be baked in an oven at 350*F for 30 min.

Besides wine glasses, I’ve also use glass mugs, beer steins & shot glasses. For me these are something a little different to get creative with and they also make a fun paint night project & class! 🙂

Art, Art activities, Craft, DIY, Make, Create, & Share!

Spray Paint Galaxy

Create these awesome galaxy paintings just with some spray paint!

What you need:

  • Poster board (cut to your desired size)
  • Masking tape
  • Round lids from containers/jars, plastic bowls – These will get spray painted!
  • Plastic bag
  • Disposable gloves
  • Spray paint in various colors – I used yellow, blue, red, purple, black and white.

Step one: Make sure you have a work space set up outside – Spray paint travels, make sure you have a lot of space away from everything! You will need tape your poster board down, Glossy side up! I used a piece of plywood to tape mine to, cardboard would work as well! The tape will hold your paper flat and still as we work and also create a white border on you paintings!

Step two: Add a little color to your poster board with some of your spray paint. I used yellow and blue (we still want to see some of your paper).

Step three: Place some of your lids/bowls on your slightly colored poster board. These will become our planets and moons! Then spray your paper with some of your colors – it doesn’t need to be super dark yet, however, we can cover most of the white! Once you have it colored then remove your lids!

Step four: Spray paint your planets & moons! I like to keep one side of my planets lighter and make one side darker – this makes them look more like a sphere!

Step five: You can also create texture on your planets or moons by layering some colors quickly, then crinkle your plastic bag up and press it into the still wet spray paint. Immediately remove the plastic carefully.

Step six: Once you have your planets complete, cover them back up with your lids and bowls. Now spray your paper with black! Add other colors too to create nebula! I used blues, purple & pink! Overall we want your paper to be fully colored and on the darker side!

Step seven: When you’re happy with your background we’ll add stars! Make sure you have gloves on for this part! With your white spray paint, spray some paint onto your gloved finger tips – flick the paint onto your painting! Keep adding more until you have enough stars! Let your painting dry!

Step eight: When your paint has dried, remove the lids/bowls to reveal your planets and carefully remove your tape!

Have fun making these awesome galaxy paintings! 🙂

Art, Art activities, card making, Craft, DIY, Make, Create, & Share!, paper art

Paper Mosaics

This is a great way to use up any paper scraps you might have left over from some other art projects! Paper mosaics are easy and can be made simple or into more detailed pieces of art. A mosaic is simply a piece of art that has been put together using smaller pieces of tiles (usually, stone, ceramic, shell, glass), typically of different colors, placed closely together to create a larger image or design. Instead of the typical tile and grout we may think of for mosaics, this project uses pieces of colored paper arranged closely together!

What you need:

  • Scrap pieces of colored paper – You could also use magazines, junk mail, etc.
  • Glue stick
  • Scissors and/or paper cutter
  • Piece of card stock or thicker paper to complete your mosaic on (my piece is appox. 5″x7″) You could also make it into a greeting card!

Step one: Gather your scrap papers! You can either cut your paper into a lot of geometric shapes in various sizes, or plan out a design – cutting blocks of colors that will get cut smaller later.

Step two: Start to arrange your pieces of cut paper on your card stock. You want your pieces to fit together like a puzzle – leaving small even gaps of the card stock showing between your pieces. Flip, rotate, and trim pieces as needed!

If you’ve cut larger pieces for a pattern, you can start to cut and separate into smaller pieces. You can also draw an outline of a shape or object to fill in like in the video.

Step three: Get your cats to help you.

Step four: Once you have your pattern started you can begin to glue down pieces – remember to leave the gaps between your pieces! The better your pieces fit together the more even gaps you’ll create between them! Sometimes you might have to cut and add little tiny pieces to fill in gaps. This is what give us the mosaic effect!

Step five: Keep going until you have your entire pattern glued down!

Make some awesome artwork just with paper! You can turn your finished paper mosaics into greeting cards, framed art, or incorporate them into collage artworks or even create them on wooden boxes with mod-podge instead of glue sticks! 🙂