Now that Christmas is over I can safely share some of the commissions I’ve been working on the past few months! I enjoy getting to create these pieces that are often made in memory of a special pet or given as a personalized, memorable, gift!
Pastel 9″x12″
Pastel 8″x10″
Pastel 11″x14″
For the most part I start any commission from a clients photo, sometimes more than one photo – especially with multiple subjects or for correct coloration. The better quality photos I have to work from, the more details I am able to add in! However, I do like the occasional challenge of working from an old photo!
Pastel 9″x12″
Pastel 9″x12″
Pastel 9″x12″
While pastels are one of my favorite mediums (you can read more about what pastels I like to use here), I’m always thankful for those commissions that bring a different medium to the table and break up the pastel work!
Watercolor & Pen 10″x16″
Acrylic on canvas 8″x8″
Acrylic on canvas 8″x8″
Once I begin a piece, I send in progress photos to the client for their approval of the work at different stages – I like to work with them to make any needed adjustments so the piece represents their subject and personal taste best! When the final drawing is complete and approved it’s signed and packaged before being delivered, shipped, or picked up!
Charcoal 8″x10″
Watercolor & pen, 14″x16″
Some pieces take longer than others (depending on subject, size, medium, & adjustments needed), accumulatively, the completed pieces this season took between 80 & 120 hours to complete.
Handmade & painted pig crossing sign
Painted Mailbox
Digital Logo Commission
I’m grateful to receive commission requests and be able to do what I love! Thank you for all your support this season (and all year long)!
Each month I will be spotlighting one of my students – past or present, and their artistic ventures! I work with students of all ages and abilities and you’ll get to learn a little bit about these amazing artists and their work! Check out all student spotlights here!
Our January spotlight is on:
Delaney Earp
I am Delaney. I am a freshman in high school and I am 14 years old. I enjoy art, playing the trumpet, and baking.
Medium: watercolor Title: Swimming Turtle Description: This is a watercolor painting of a turtle swimming in the ocean:
How long have you been taking art lessons? “I have been taking art lessons since 2017.”
Why did you begin to take art lessons/how did you become interested in art? “I began taking art lessons because I wanted to become better at what I loved to do. I became interested in art when I was little and I have been drawing for a very long time.”
Medium: Acrylic Title: Blossoming rose Description: This is an acrylic painting of a rose. I painted it on a small cardboard sign. The painting was then rubbed with dirt to make it look older.
What or who inspires you to create your artwork? “I create my artwork based off what I see around me. When I see something outside that I love like a pretty scene, I want to paint it.”
What are your favorite mediums and/or subjects for your artwork? “One of my favorite mediums is watercolor because it is easy to work with. When ever I make mistakes using watercolor, they can be easily hidden. Watercolor is also very beautiful and it blends so well together.”
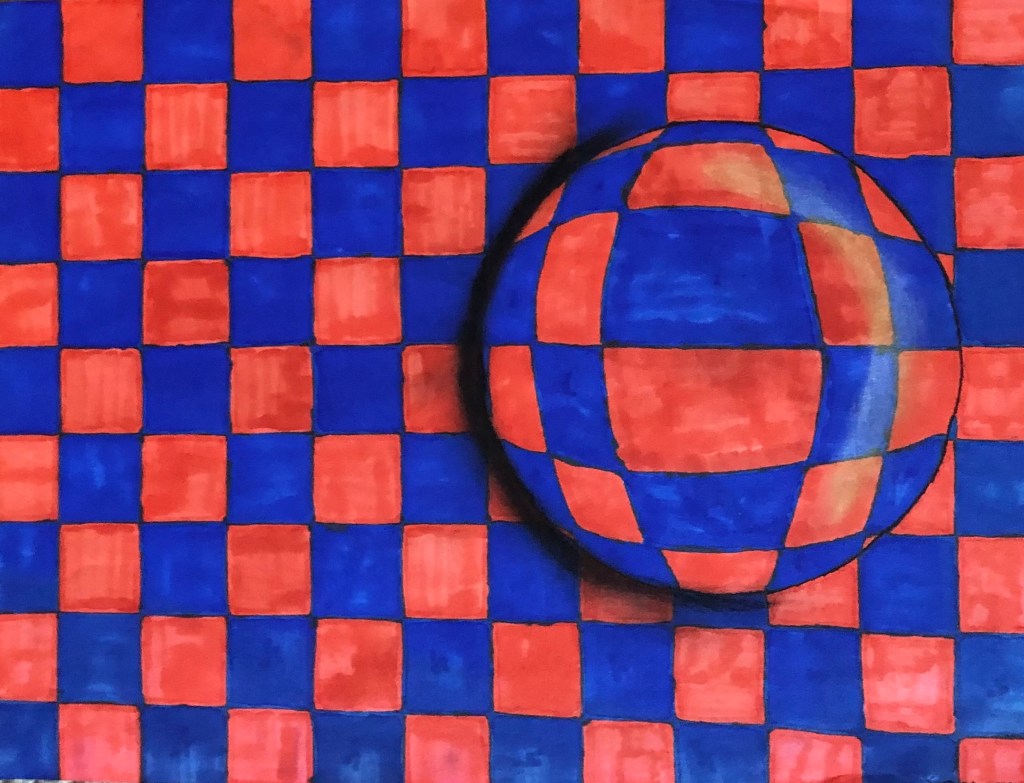
Medium: Marker Title: A closer look Description: This is a drawing of an orb looking shape on a checkerboard surface. The orb is magnifying the checkerboard.
Is there anything else about you that you’d like us to know? “One other thing I’d like you to know is that I don’t plan on stopping art lessons anytime soon.”
What is your favorite thing about art? “My favorite thing about art is when I make it for other people. I love to see people’s reactions when I give them something I made.”
How long does it take you to complete your artwork? “It takes me about 2 days to complete my artwork. It really depends on what I am working on. For example, something like an acrylic piece takes me longer than a watercolor piece.”
Medium: Acrylic Title: Late night bike rides Description: This is an acrylic painting except my canvas was a leaf. There is a man riding is bike with the sunset by his side.
Do you have any advice for someone who wants to become an artist or improve their skills? “One piece of advice I have for someone who wants to become an artist or improve their skills is that you need to have patience. You need to take your time when working on a piece. The longer it takes, the better it will come out in the end. If you rush to finish something, it’s not going to look as nice.”
Do you have a favorite color? “Yes, my favorite color is green.”
How has your artwork improved/what have you done to keep improving as an artist? “My artwork has gotten better overtime because I always look for ways to improve my artwork. I always want to look to see what I can do differently to make sure I create something even better than before.”
Delaney takes her time and puts her best effort into her pieces of art. She’s always working to improve her skills and continues on a piece until she’s happy with it. Her persistence and outlook on learning from her own art are two things, without a doubt, that will help her continue to grow as an artist!
Check out some of our current projects happening in the art room and how they’re made!
Though there’s not been as many in person classes this month, there’s still a lot going on! Check out some of the happenings below!
Virtual Paint Alongs! Although we haven’t been able to do any in person paint nights lately, we have been able to hold some paint alongs virtually! These have been a lot of fun, a great way to stay connected with friends and family and complete activities together! If you have a birthday, holiday party, club or group – or just want to get together with some friends and paint, contact me to set up a virtual paint along! Check out paint along example paintings here or request a personalized painting!
Holiday projects!
A fun alternative to plain canvas – Students painted these burlap wrapped canvas made a fun surface to make a winter inspired acrylic painting on!
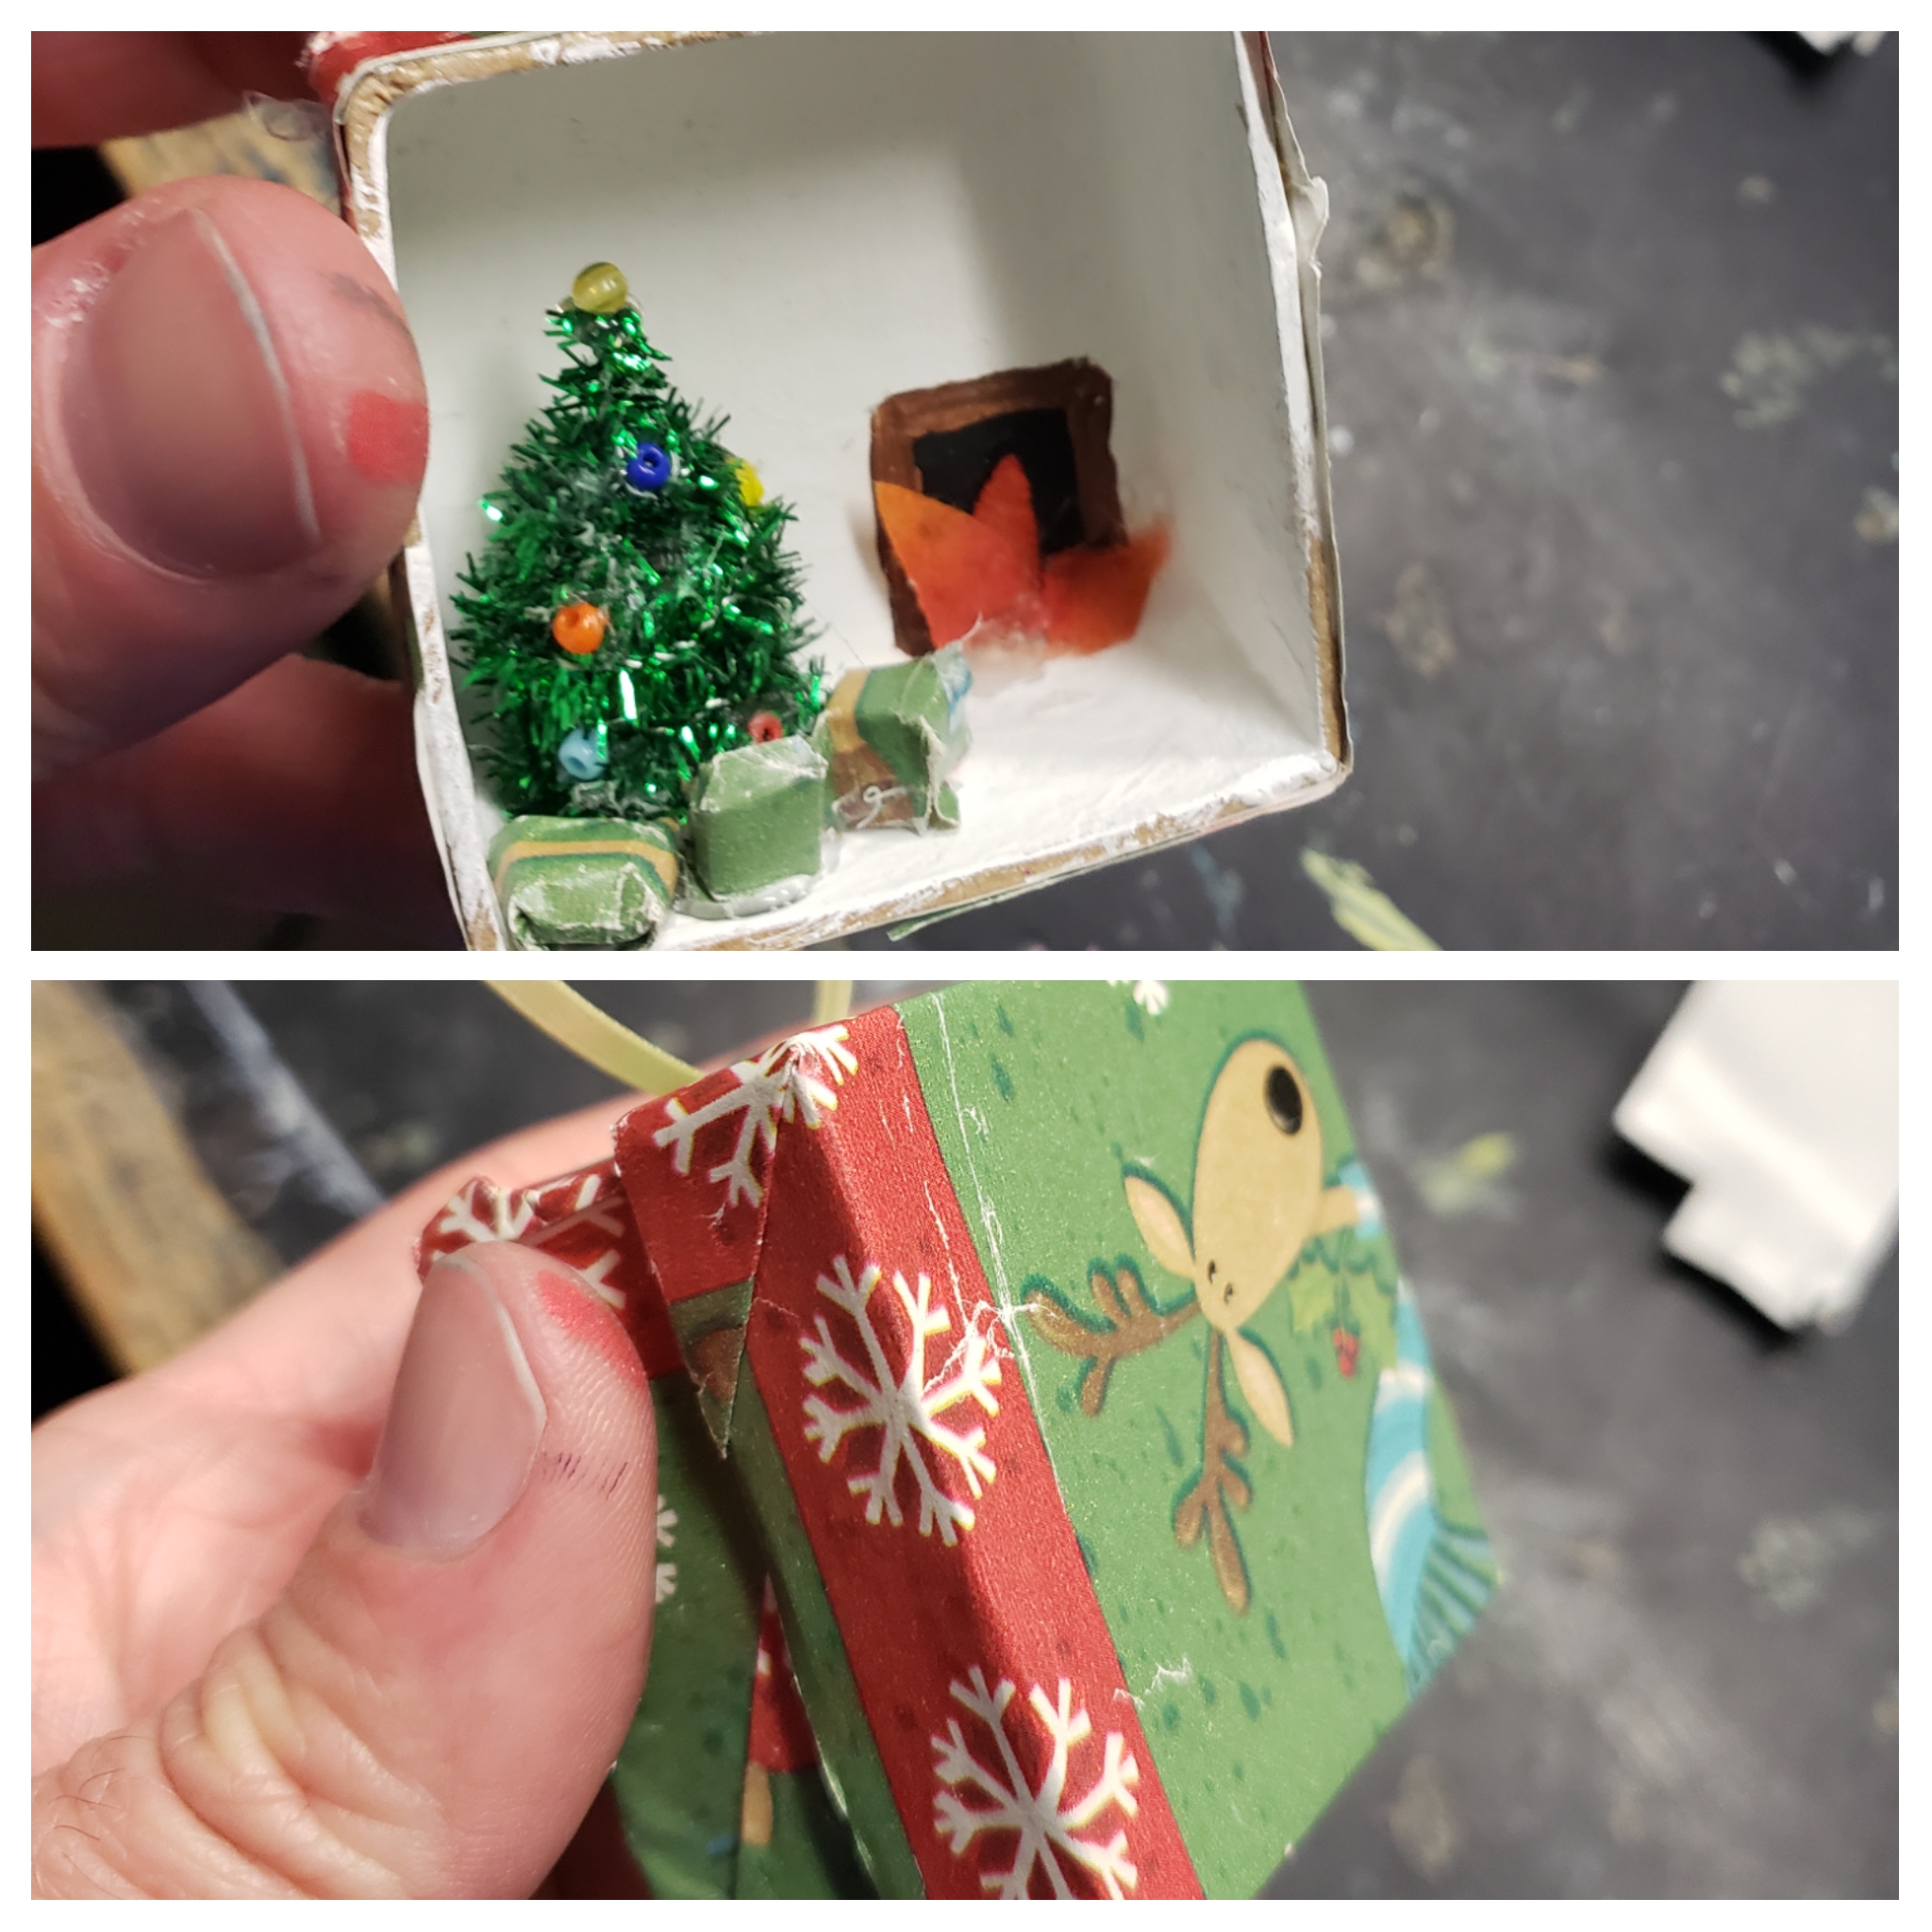
Miniature ornament scenes – students used a small chipboard box and found objects to create these fun miniature scenes in!
Encaustic Snowflake Art – Students made paper snowflakes and layered them, as well as other bits and pieces of papers, with encaustic waxes on a wooden panel to create these awesome mixed media pieces!
Ceramic Letters & Numbers! Students finished up their ceramic letters and numbers, adding them to a painted wooden board!
Prepping Grab & Go Kits! In a typical year I’d be able to hold classes at local libraries and venues – a bit different this year, getting supplies and kits together for local libraries and venues grab & go programs instead! Many of the projects I’ve posted have been created for grab & go programs. It’s been a lot of fun to make kits and being able to still keep in contact with many venues!
Upcoming Virtual classes! Also in the works are some exciting virtual Creative Science lessons – Partnered with UMES to hold a science lesson and an art project related to the topic! Youth can sign up for one, or all topics, which include; “Inking it up”, “Feed the Birds”, “Let’s Upcycle”, Explore the Deep”, & “Fish are Friends”. A supply kit is included in the cost. Check out some examples below of art projects we will complete! Find info on signing up here!
Salt dough is fun and easy! The dough can be baked to harden, painted with acrylics and last for years! I had my nephew create some simple cut-out ornaments but you can also make 3-D sculptures with salt dough too! There’s various recipes for creating salt dough, and other similar dough – I’ve listed one below that we used with good results!
What you’ll need:
Flour
Salt
Warm water
Cookie Cutters
Rolling pin
Straw and/or Toothpick (or something to make holes in your ornaments for hanging)
Cookie tray
Acrylic paints
Paint brushes
Spray Sealer or Mod Podge
Ribbon
OPTIONAL SUPPLIES:
Beads to add to your ribbon
Glitter
Stamps – for making impressions on your dough
Sharpies
Hot glue or craft glue
Step one: Mix together 2 cups of all purpose flour, 1 cup of salt and 1/2 cup of warm water in a large bowl.
Step two: Add up to 1/2 cup more of warm water, one tablespoon at a time, until dough forms. Dough should not be sticky – if it is add a bit more flour!
Step three: Kneed your dough and roll it out on a flat surface – use flour to help prevent sticking if needed. We rolled it to 1/4″ – 1/2″ thick for cut-outs. You can also make sculptures with your salt dough instead!
Step four: Use cookie cutters to cut shapes out of your salt dough. Place cut-outs on a baking sheet (I lined mine with parchment).
Step five: Before baking your salt dough make sure to put a hole in your ornaments to hang from! A plastic straw works well or a toothpick for a smaller shape! Bake your salt dough for approx. 2 hours at 275*F or until firm and dried out. Time will depend on size and thickness. You can also leave your salt dough out to air dry. Be sure to fully bake/dry out pieces before painting and sealing to ensure they’ll last a long time!
Step six: Once your pieces have been baked or dried out, use acrylic paints to paint them with! We used acrylic craft paints!
Step seven: Paint your creations and let them dry completely!
Step eight: Once your paint is dry, seal your salt dough – I brushed on a layer of glossy Mod Podge. You can also use an acrylic spray sealer instead. Let dry.
Step nine: Add ribbon and beads to hang your ornaments from! Alternatively, you could also use pipe-cleaner or wire for hangers!
Step ten: Use a sharpie to add names, dates and details to your salt dough!
Step eleven: Hang those ornaments up!
We had a lot of fun making salt dough ornaments! Create your own ornaments from cut-outs like we did or create some 3D ornaments – you can use a little water to help pieces stick together. You could also make personalized gift tags & toppers, hand/foot print plaques, small sculptures (like snowmen!), key chains, pendents, pins, or magnets! Use Popsicle sticks, wooden skewers, or toothpicks for tools. Adorn finished salt dough pieces with pom-poms, pipe-cleaner, glitter, ribbon, beads, and other craft items! Try decorating pieces with marker instead of paint for easier clean up!
Create some fun little ornaments with simple supplies! Find the instructions below each of the three pictured!
Snowman ornament!
What you’ll need:
Mason Jar Lid (not the jar band)
Small piece of sandpaper
Piece of 1/4″ wired ribbon – approx. 12″
Two small pom-poms
Piece of ribbon/twine for hanging
Acrylic Craft Paint (White, red or pink, Orange)
Mod Podge
Scissors
Paint brush
Sharpie pen
Hot glue or craft glue
Step one: Scuff up the mason jar lid with your sandpaper to help the paint adhere better!
Step two: Paint your mason jar lid with white acrylic craft paint – let dry and apply a second layer if needed.
Step three: Once your white paint is dry, use the orange paint to make your snowman’s nose – I made a dot near the center of my lid and towards the edge, and then connected them to create the nose!
Step four: Use your pink paint or make pink by mixing a little red paint to white paint and give your snowman rosy cheeks!
Step five: Once your orange and pink are dry, apply a layer of mod podge sealer over the entire surface, let dry completely!
Step six: Use a sharpie pen to give your snowman eyes & a mouth – check out the pictures below for face ideas! Also outline your nose. Tip: leave a white spot in your snowman’s eye to give him a spark! Download some additional snowman face ideas and practice your own below!
Step seven: Hot glue a ribbon to the back of your lid for a hanger!
Step eight: Cut and glue a piece of your wired ribbon, from side to side of your lid, glue pom-poms on the ends to look like ear muffs! Use leftover ribbon to make a bow for your snowman if desired!
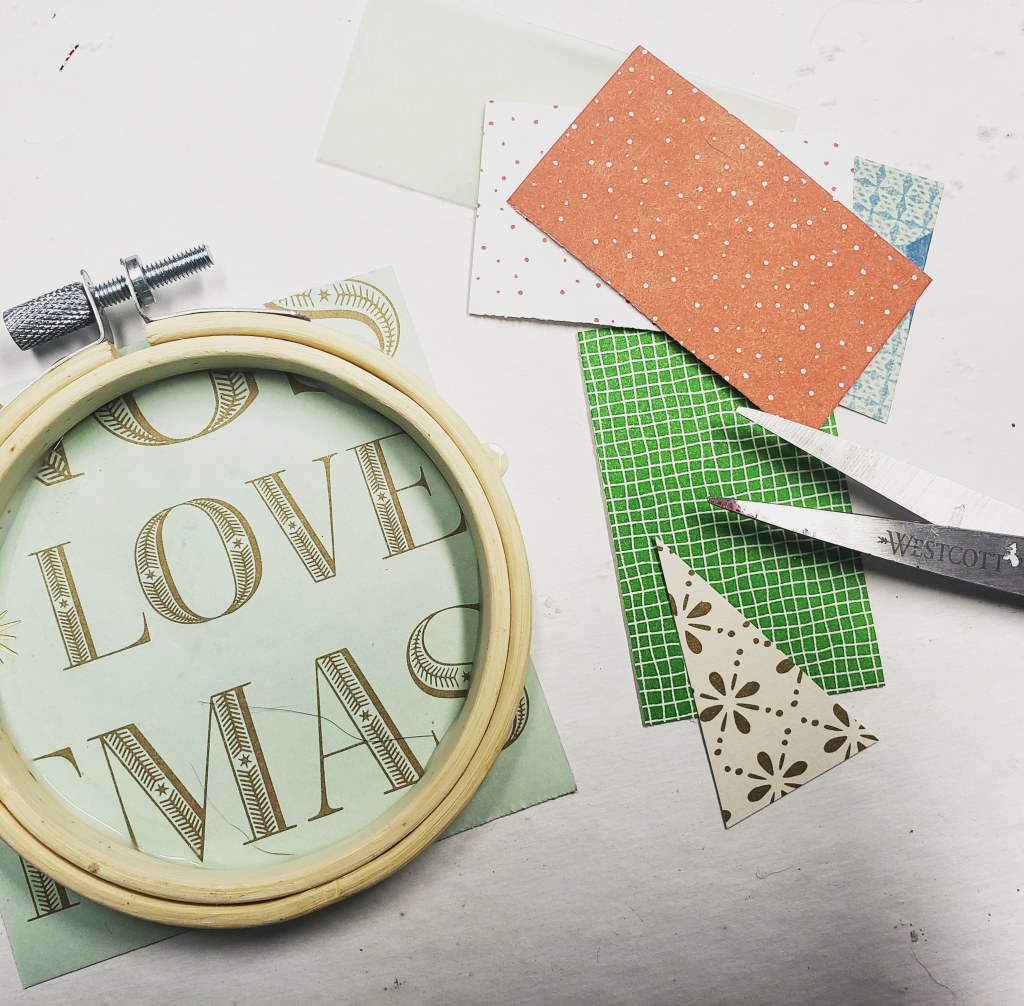
Tree Scene Ornament!
What you’ll need:
3” Embroidery Hoop
2 pieces of approx. 3”x3” decorative cardstock
Small pieces of decorative cardstock
Mini paper snowflakes
Piece of 8” burlap like ribbon
9 Small foam mounting squares
Sequins
Glue gun
Craft Glue
Glue Stick
Scissors
Colored Pencils
Additional items to decorate with, such as, stamps, glitter, ribbon, stickers, etc.
Step one: Cut a piece of cardstock large enough to glue to the back of your hoop – this will become the background to your tree scene, use craft glue to adhere it to your embroidery hoop.
Step two: Work on getting your trees ready while your hoop dries! Using smaller pieces of decorative papers, cut triangles for trees! Make different shapes and sizes for added interest!
Step three: Use colored pencils to shade the side/edges of your trees, giving them a border!
Step four: If your hoop glue is dry, cut the paper off around the edges, you can also use an x-acto knife.
Step five: Add your trees to the hoop! Glue some trees directly to the background paper and use the small mounting squares to adhere some trees, making them “pop” off of the surface – stack mounting squares to add more depth.
Step six: Add sequins as tree toppers and/or ornaments on your trees and add the paper snowflakes (I cut one of my snowflakes in half to use around the edge). Add any other desired decorations and glue the piece of burlap like ribbon to the back for hanging!
Wreath Ornament!
What you’ll need:
Mason Jar Lid Band
6 Pieces of green pipe cleaner
Piece of 12” ribbon/twine for hanging
Glue gun or craft glue
Items to decorate your wreath with – I used pieces of artificial greenery and berries. Some other ideas may include miniature ornaments, pom poms, ribbon, etc.
Step one: Wrap all 6 pieces of green pipe cleaner around your mason jar band!
Step two: Collect items to add to your wreath
Step three: Glue your items to your wreath!
Step four: Add a ribbon to hang your ornament!
Give as gifts, hang on your tree, or use as gift toppers! Have fun making your own!
Each month I will be spotlighting one of my students – past or present, and their artistic ventures! I work with students of all ages and abilities and you’ll get to learn a little bit about these amazing artists and their work!
Our May spotlight is on:
Sonny St.Pierre
My name is Sonny St. Pierre and I am 15. I am going into 11th grade. I have been enthralled with all things paleontology and marine biology since I can remember. I love to write, and I am currently working on my second revision of my first novel. Art has been an outward form of expressing my inner self since I lost my first goldfish at 5 years old. When I’m not exploring Biology or writing, I enjoy bodysurfing, hunting and fossil collecting.
How long have you been taking art lessons and why did you begin taking art lessons or become interested in art? “I have been taking art lessons for 9-10 years. I love art and I’m glad my mom signed me up when I was so little.”
What or who inspires you to create your artwork? “I am inspired by Biology and my imagination. I often use my imagination to tweak what would typically be found in nature into something new.”
What are your favorite mediums and/ or subjects for your artwork? “My favorite medium is pen or pencil. I love to draw dinosaurs and beasts.”
Is there anything else about you that you’d like us to know? “I have a snowflake moray eel named Edgar. I enjoy keeping my saltwater tank and plan to get an octopus someday.”
When you’re making your art do like to listen to music or watch tv for inspiration (if so what)? “I enjoy listening to music when I draw. It helps me focus, but I can’t really say it’s for inspiration.”
What is your favorite color? “Blue- it’s been my favorite my whole life.”
How has your artwork improved/what have you done to keep improving as an artist? “My drawing has improved as I practice it in my downtime. I keep a notebook and draw in it often.”
Do you plan to have a career in the arts? “I do. I am interested in architecture and graphic design.”
Is there a certain style, or type, of art that you’d like to someday try? “I’d like to try 3-D modeling and sculpting.”
“Dunkleosteus”, Charcoal“Crypoclidus”, Charcoal“Prehistoric Monster of the Cretaceous Deep”, Acrylic paint & resin
“This piece is my favorite I have ever made. I made it when I was much younger. It is an aquatic reptilian tetrapod of Phylum Chordata, Class Reptila, Order Squmata, Family Mosasauridea, Tribe Mosasaurini, and Genus Mosasaurus. In short, it was a prehistoric marine reptile. I entered it into an art show and won second. I brought it home and hung it in my room. Three years ago, we had a house fire and I feared this piece was ruined by the smoke. After a lot of care, treatment and fresh air, it hangs, once again in my room.”
Sonny is always creative in his artwork and brings a bit of science to his pieces! He has a lot of passion for the elements & subjects of his work – it’s inspiring! He’s not afraid to try new mediums, techniques, or add his own twist, making his work unique and one of a kind. Keep on creating and bringing those ideas to life!
Check out some of our current projects happening in the art room and how they’re made!
Painted Panels! Students work on collaboratively painting panels which will be displayed at the Tyaskin Wharf. Finished panels that have been displayed are donated/auctioned off to raise money for the wharf! Over the past few years students have created more than 20 painted panels!
Alcohol Ink & Line Drawing! Students used alcohol inks on polypropylene to create the colorful & beautiful abstract “blooms” and used white chalk markers to create line drawings on top!
Ceramic Letters & Numbers! Students are in the process of creating a wall hanging with ceramic lettering and numbers! Pieces are in the process of being glazed & fired before being attached to wooden boards for a finished hanging piece!
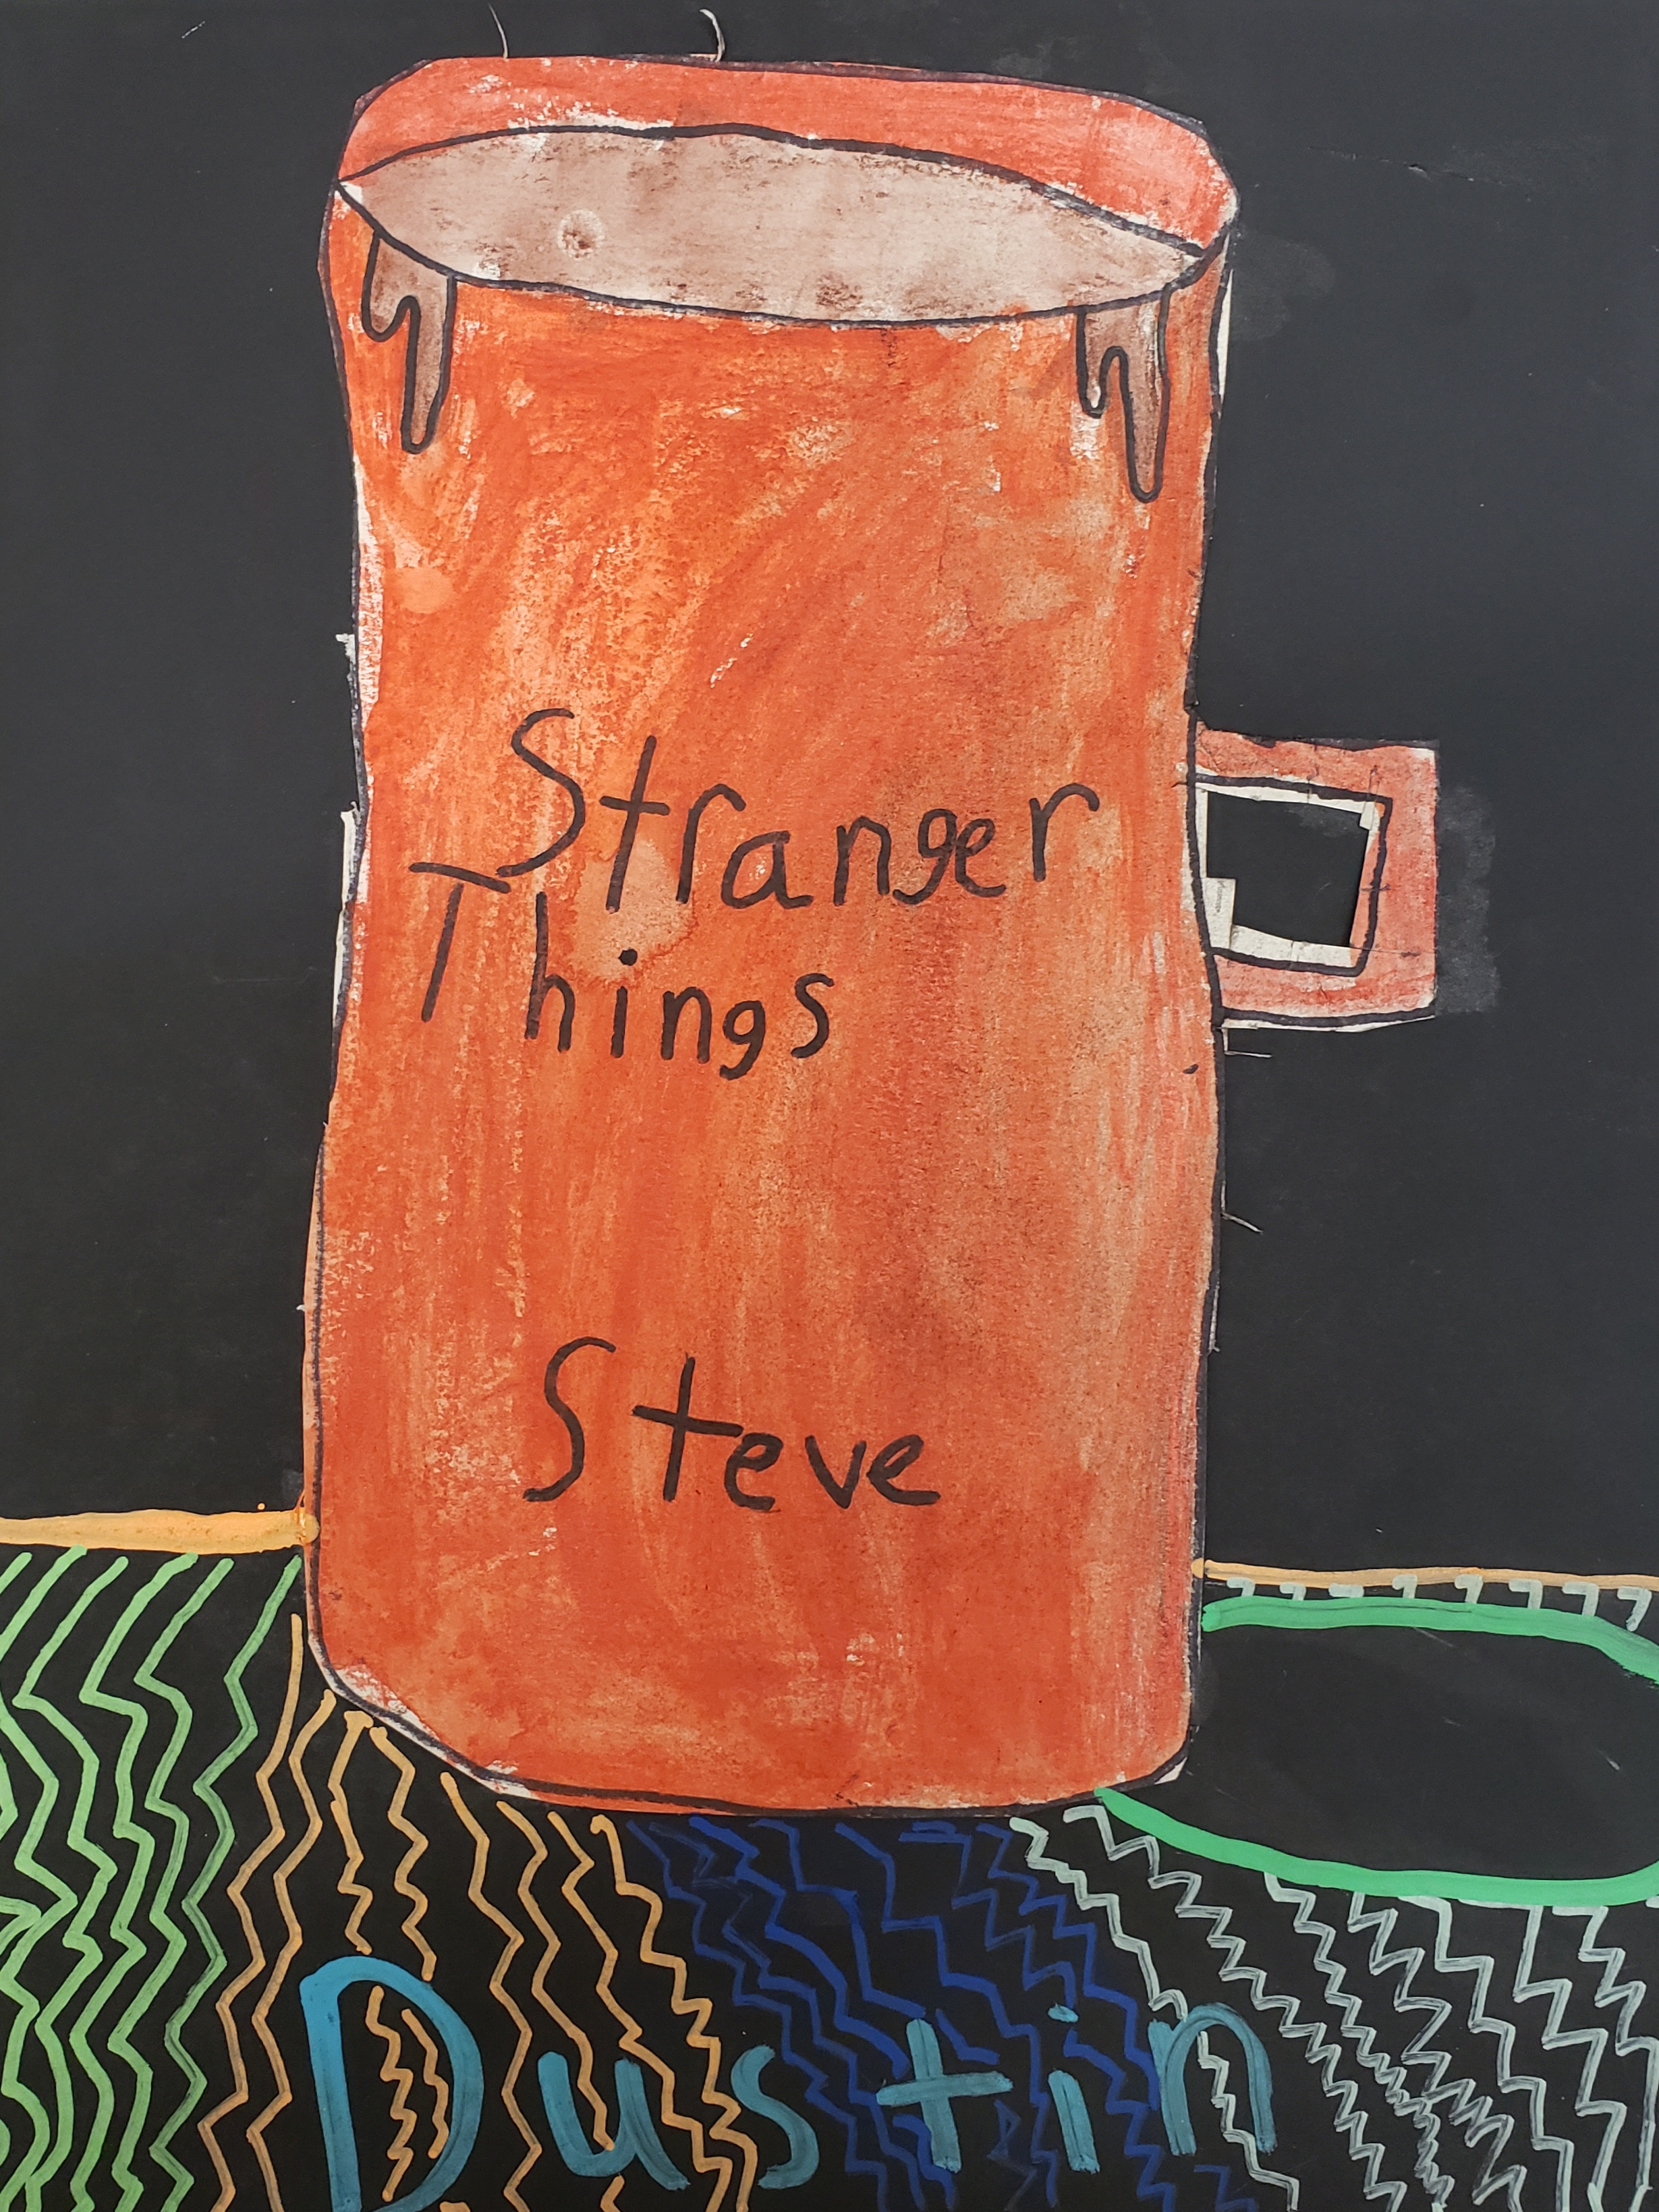
What’s in Your Cup? Students have been working on drawing and shading cylinders, turning them into a custom designed cup of their favorite drink! We used mixed media for these awesome pieces!
As a take home assignment this year, students were asked to create scrapbook/journal pages that reflect on the year so far. They were given packets that contained some supplies and instructions to create 3 different pages, with different themes of; “Staying Home”, “Day Trippin’ Treasures”, & “Serendipitous”. Check out all their awesome pages below and download the instructions to complete your own pages at home!
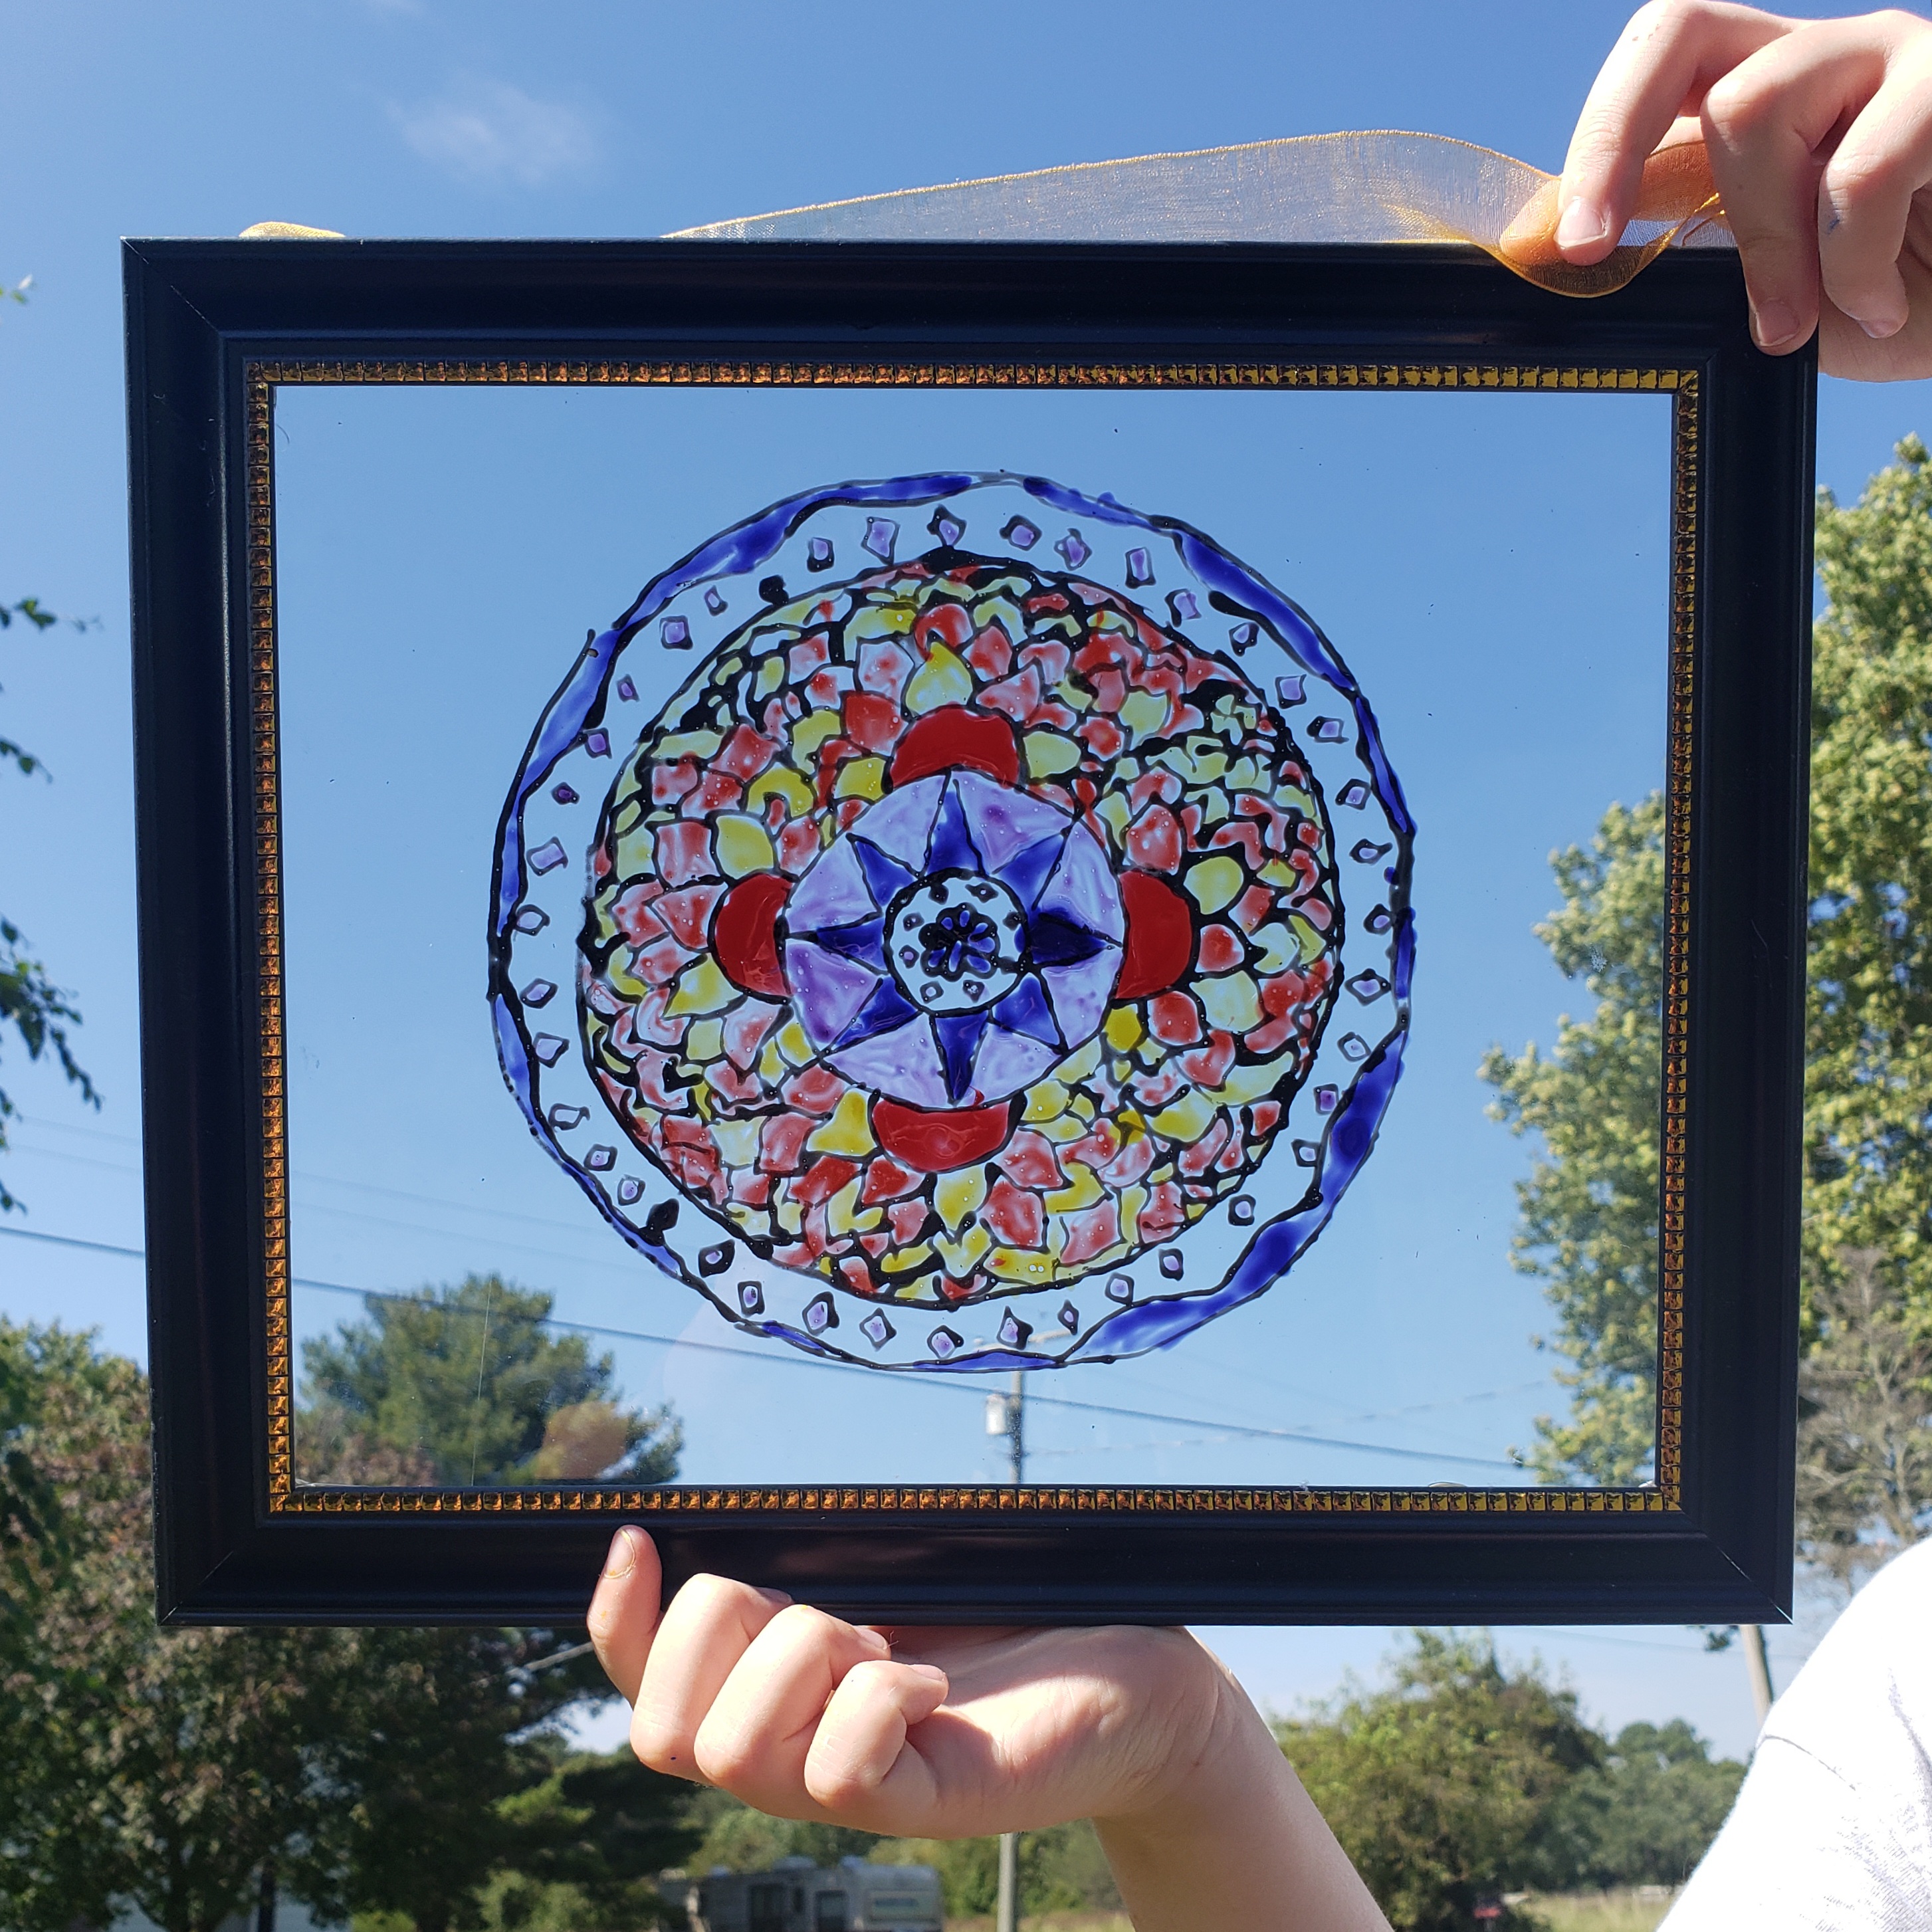
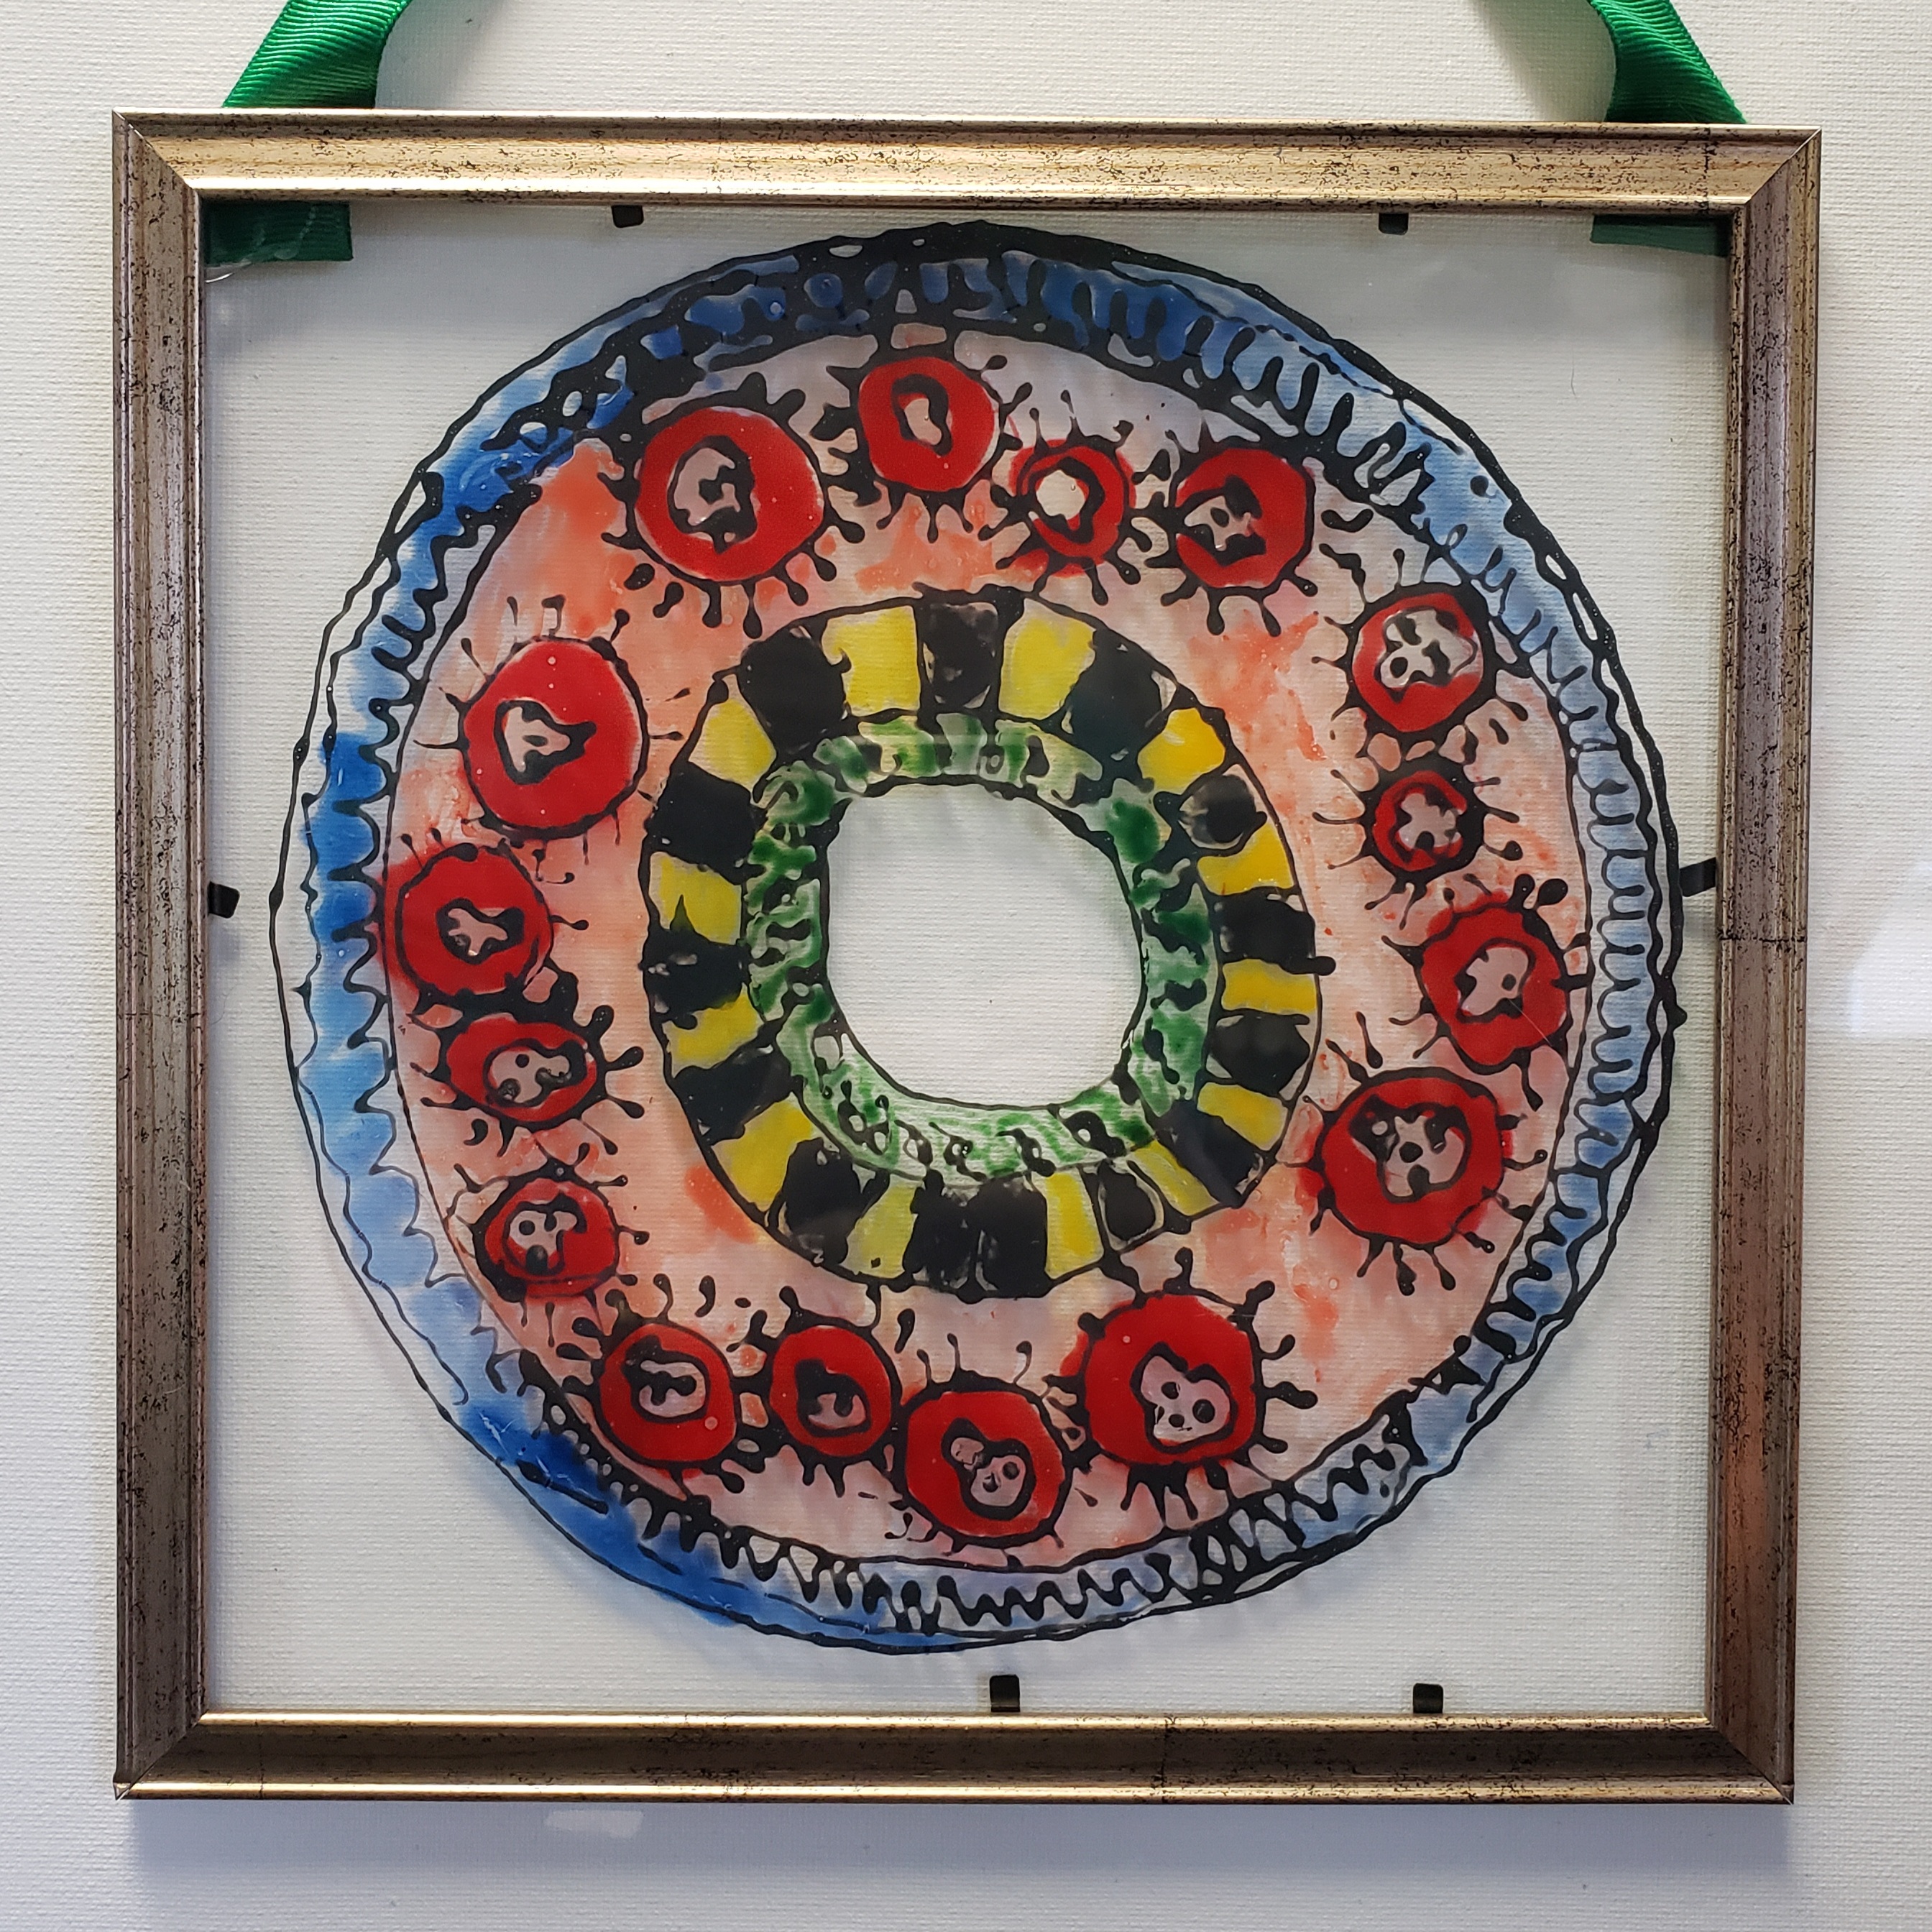
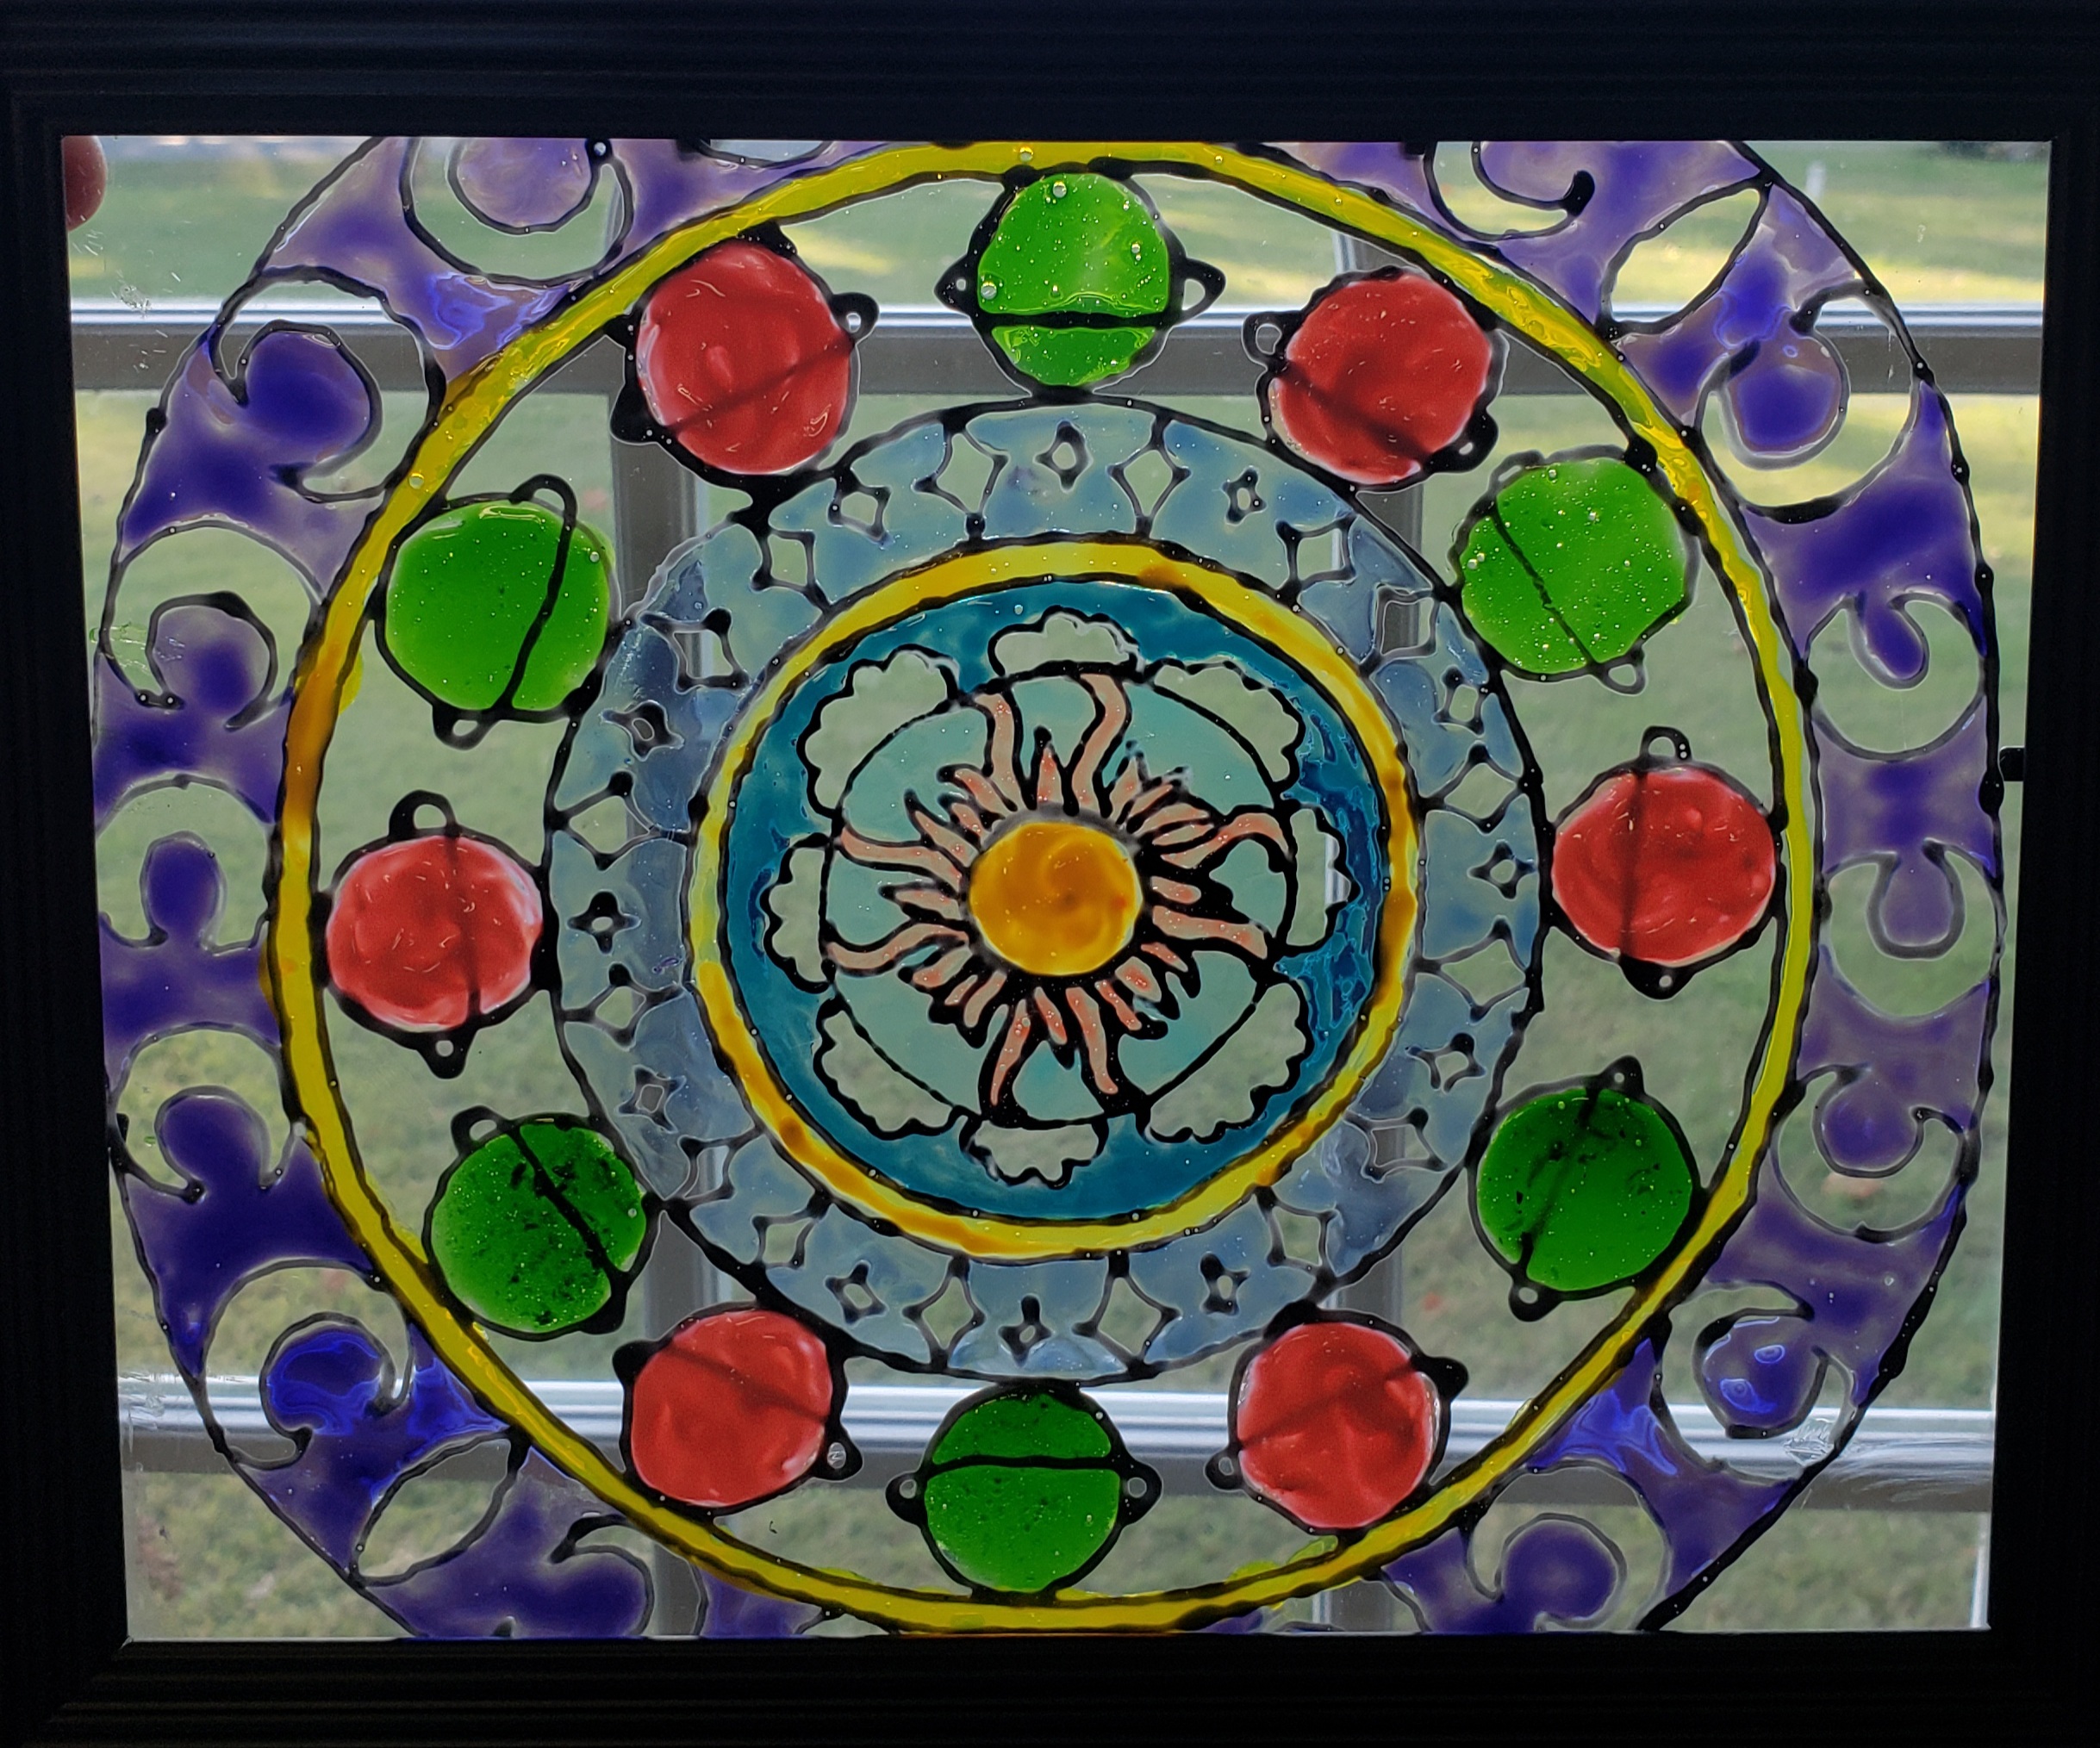
Create a radial design or Mandala, with glass paints, for an awesome piece of window art! Mandalas are a type of radial design – where your design radiates and repeats from a center point. Mandala comes from the Sanskrit word meaning “circle”. Mandalas can be found in many cultures and can have different symbolic meanings and processes. In Buddhist and Hindu traditions, mandalas are a spiritual symbol that represent the universe. More modern mandalas are used for meditation or just to create and enjoy beautiful designs!
What you need:
Picture Frame with Glass – we used 8″x10″ frames from the dollar store but any old frame will do!
Glass Paints – We used Gallery Glass, Martha Stewart and Arti’stick, brands, transparent, glossy, glass paints.
Copy/Printer Paper – that’s at least the same size of your glass/frame.
Pencil
Compass
Sharpie
Light box or sunny window!
Step one: Create your radial design! We did this with a square piece of paper, folded into fourths, from corner to corner. You can do this any size, however, ours were approx. 8.5″x8.5″ to fit our frames.
Cut out one fourth of your paper on your crease lines.
Step two: Draw your design on your cut 1/4 of paper – to make your design have a complete circle pattern, use a compass from the center of your paper out.
Step three: Fold another square piece of paper into fourths, corner to corner. We will be tracing your design onto these four sections. You can use a light box or a sunny window to help your design show through your paper – you can also go over your design with a marker before tracing to help make it more visible. Trace your first 1/4 section and then flip your triangle pattern over and trace your next 1/4 section (this will reverse your design and make the edges of your design line up). Flip it again for your next section and back over for your last section!
Step four: Next line up your radial design under your piece of glass and begin outlining your design – We used Gallery Glass Liquid Lead for this (I’ve also transferred the outliner to a small applicator bottle for easier handling and a smaller line). Let your outline dry!
Step five: While you’re waiting for your outline to dry, you can color your triangle in how you’d like to color your glass!
Step six: Once your outline is dry, use your glass paints to fill in the design with color! We used a mixture of different glass paint brands!
No matter what brand you use, you just want to make sure it’s transparent color as we want these to hang in a window and create a stained glass effect!
Step seven: Once your color has dried, place your glass back in the frame (you can use hot glue, silicone, E6000 or Goop Glue, etc. to help hold your glass in if needed), glue a ribbon to your frame or add eye hooks and a chain/ribbon for hanging! Our frames were very light weight so a hot glued ribbon worked well! Hang up your finished artwork in a sunny window! 🙂
Check out some of our current projects happening in the art room and how they’re made!
Check out lasts months post for more info on some of the projects below!
Radial Mandala designs on glass! Students finished up working on their radial mandala designs – so many cool pieces! Check out last months post for more info on this project and keep an eye out for a DIY on this project to be posted soon!
What’s in your cup? Students worked on how to draw cylinders and shade them in. Next they will create a drawing of their cup, decorating it with patterns and designs, filling it with a favorite drink! This project will be created with mixed media!
Impossible Shapes! Impossible shapes are a type of optical illusion – they can be drawn, however, could never exist in 3D form. Students practiced drawing an impossible Penrose triangle, and impossible square, before choosing which one they would like to paint. They also completed a color wheel and choose a color harmony to utilize in their painting.
Acrylic Pumpkin Paintings! Students worked on drawing spheres and turning them into pumpkins. They included light and shadow, completing value scales and working on shading. They drew their pumpkins and mixed their own colors to create shades of orange for their final pumpkin paintings!